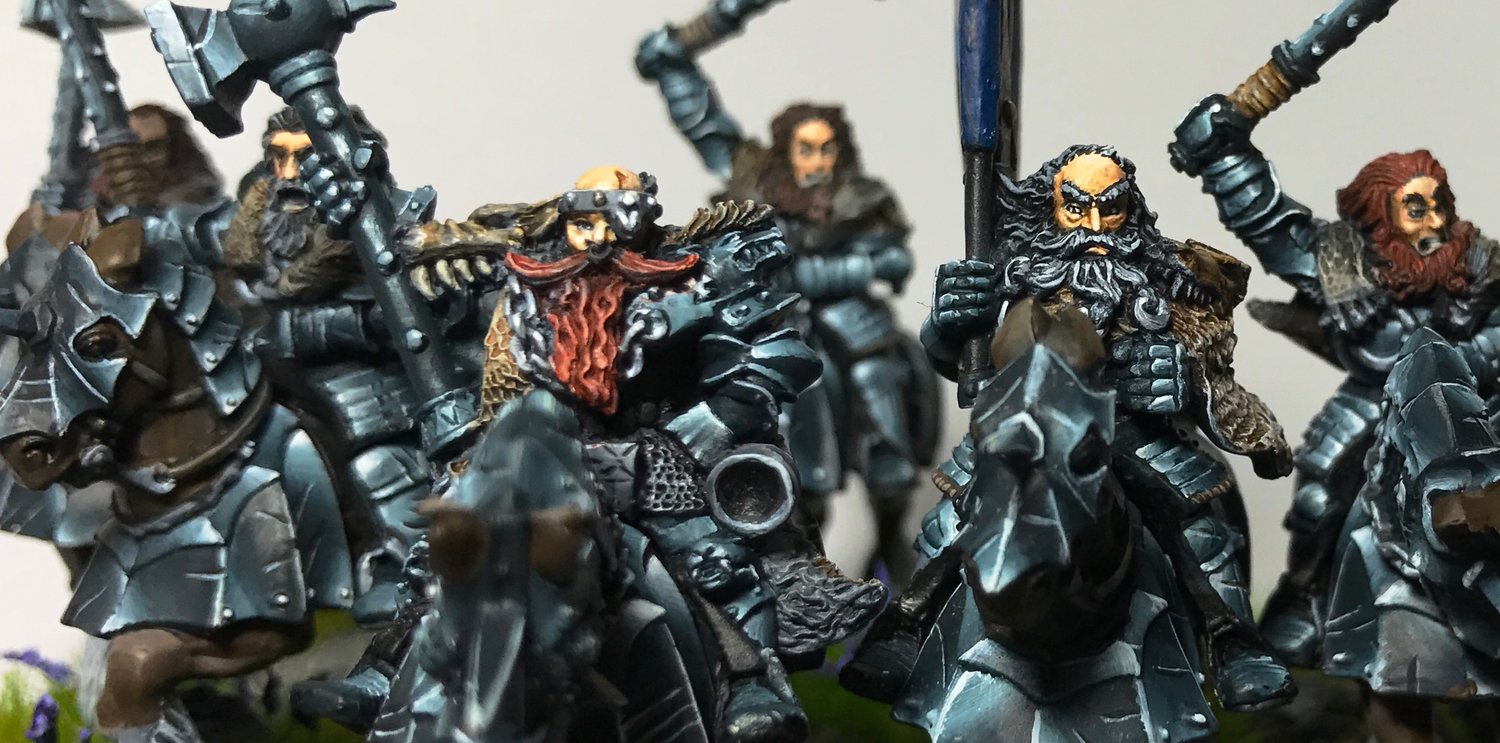
My last post was on the inspiration for the swamp basing scheme for a Kings of War Nightstalker army. Since then I've completed my first base. This is for a troop of cavalry and will be used for Shadow Hounds. Those models aren't painted yet so won't be attached for a little while more, but I'm using Hormagants from the Tyranid range of GW 40K. Water effects are easy and fun, so here's how to give it a go.
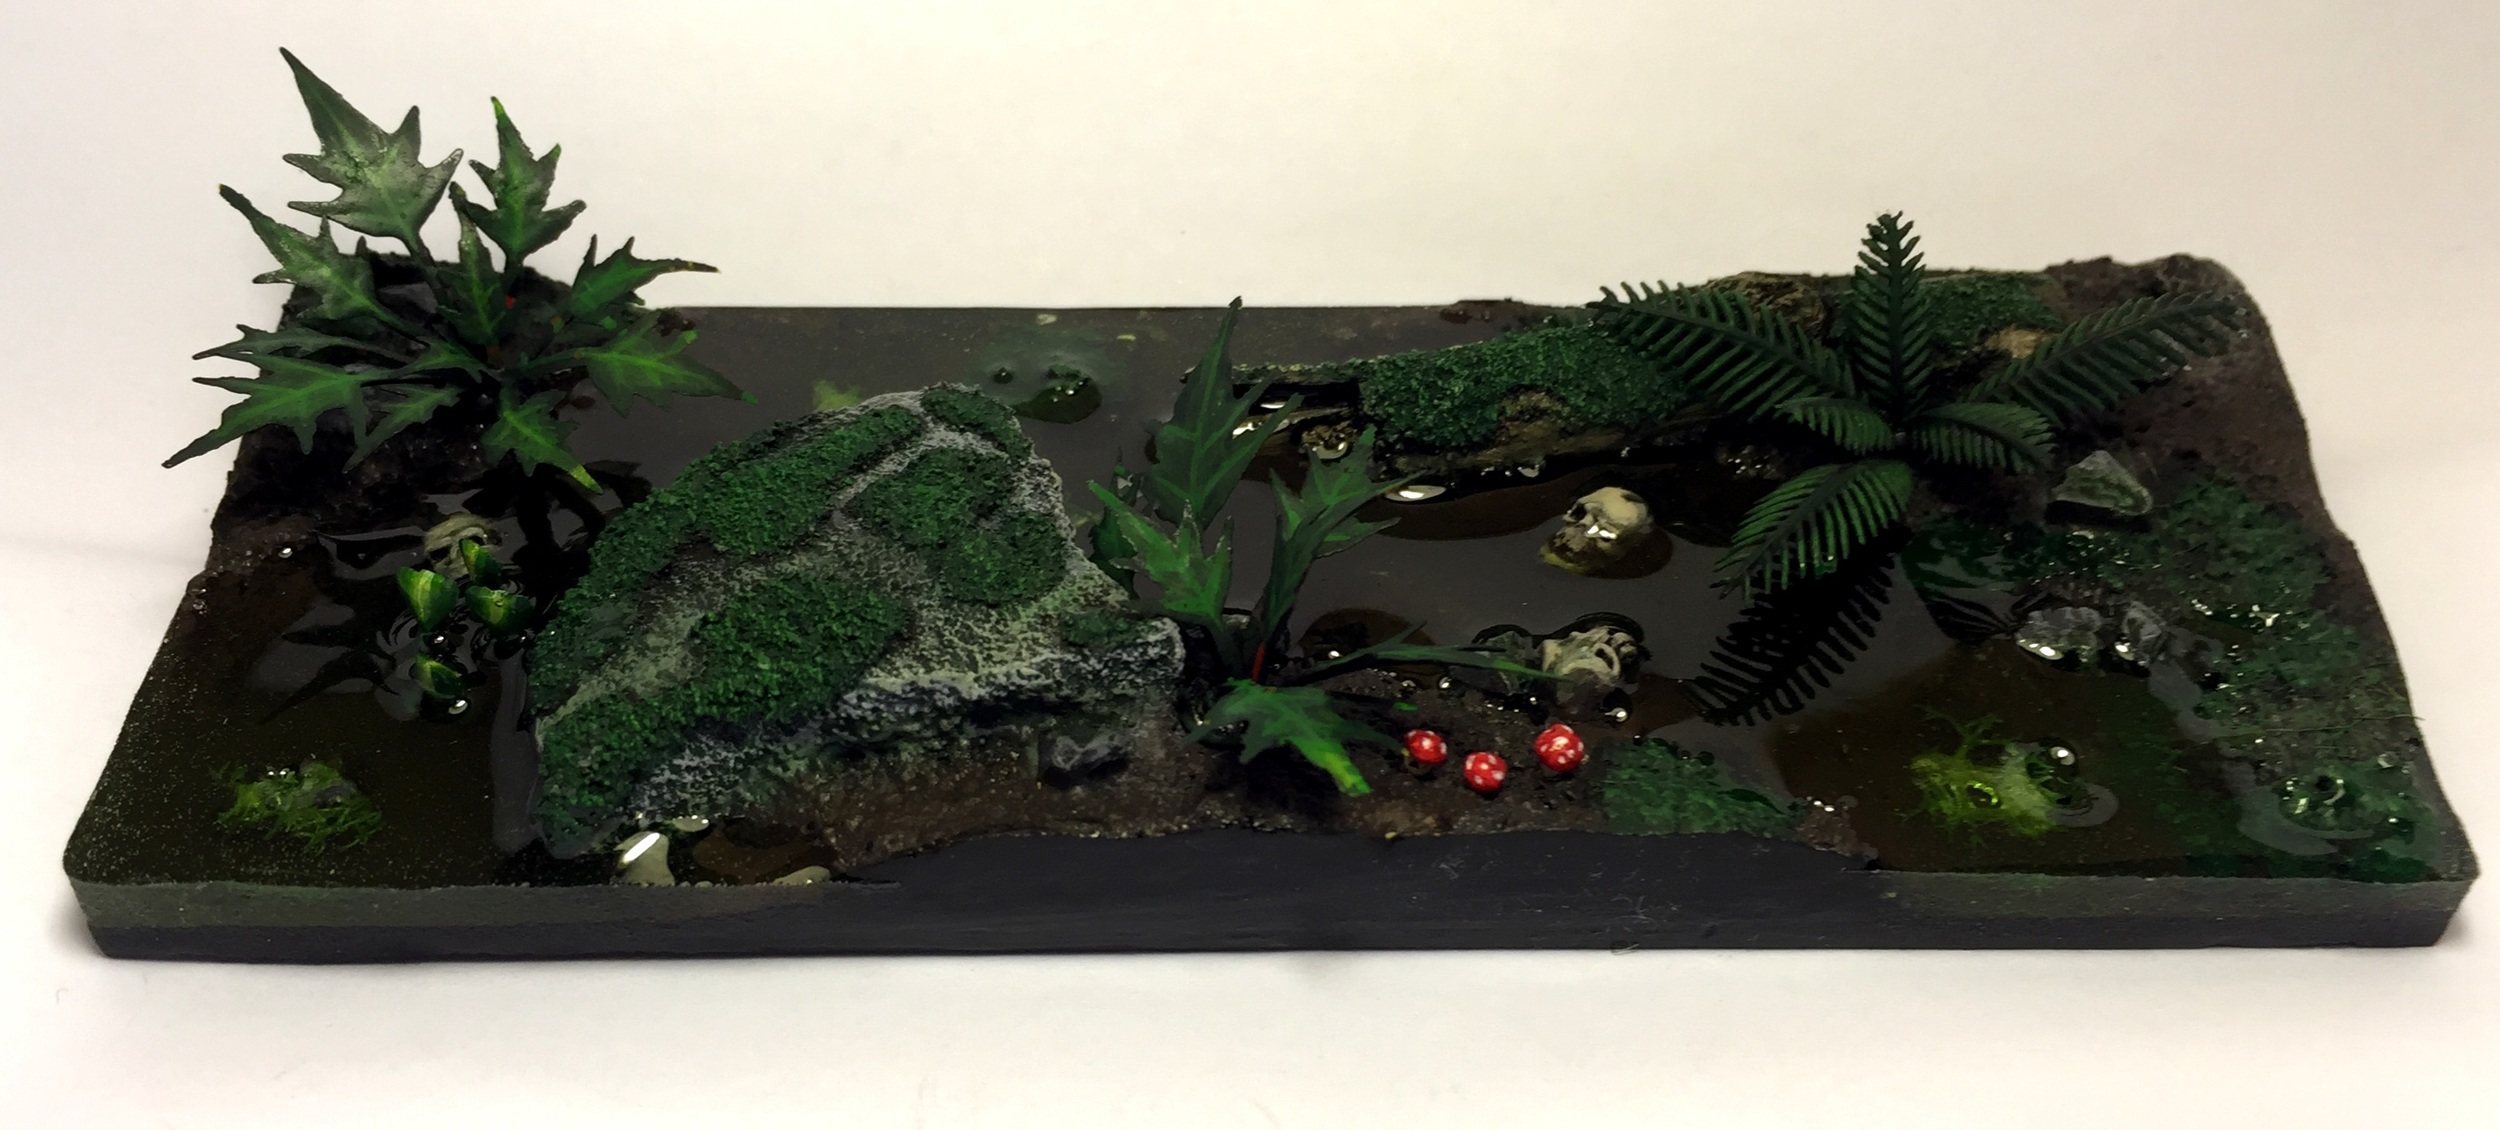
The finished product
Step 1 - Cut your base
There are lots of places that will pre-cut you some MDF to the size you want and that's fine. I have a large sheet of acrylic that I use and I just cut it with a jig saw and sand it down when I'm done. It works fine and makes a good starting base, plus it's a little cheaper.
Step 2 - Mounds and Lakes
I use Fimo Modelling Clay for this step. You can use something else if you like, Milliput for example, but just be sure that it's easy to sand once you're done. I like clay because it's super cheap and you use quite a bit. Mold it into place on base just as in the picture. The low parts will fill with water. If you have a log or a stone, make impressions in the clay before it dries.
Once the clay is all dry, snap it off and glue it down. If you used Milliput it will bond to the base, but clay won't so use a little super glue will bond it. Once bonded, mix some white glue with water and paint over it. This creates a tougher surface and ensures it won't chip later. Once again if you used Milliput this isn't necessary.

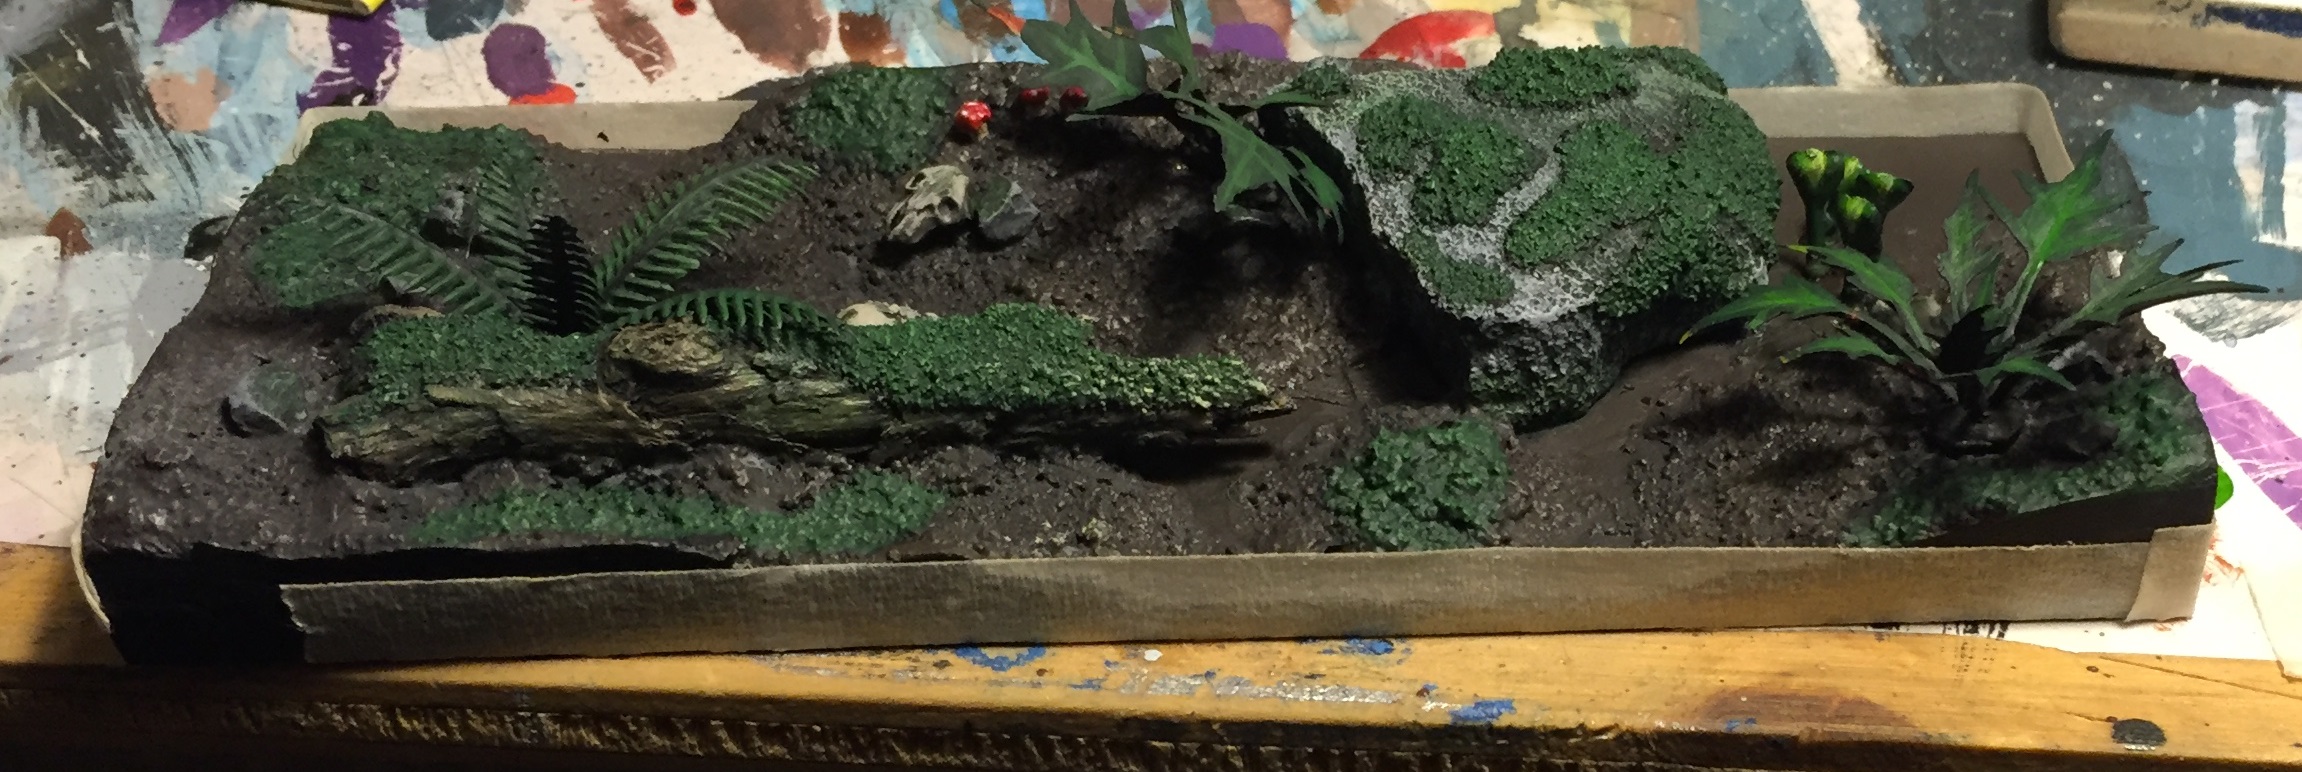
Step 3 - Sand, Rocks and Logs
Glue your rocks and logs down into the previously molded shapes you made in your clay. I just used superglue for this part, white glue would work too just take longer to dry.
Clay and putty have too smooth a surface to look like mud or sand when painted so you'll need to add some texture. You can use Modelling Sand (whatever brand you like) but I'm stingy so I just use cheap sand from the hardware store. I got 10 Kg for about the same price as a small baggy of sand from a craft store. It's fine, it's clean and it works really well. If you want it finer (mud looks better with REALLY fine sand) like I did, just crush it in a mortar and pestle first.
Mix your sand with watered down white glue and paint it on over the mounds. Clump it where you want to make it look wetter, messed up or mossy.
Step 4 - Who wants Moss?
Spread undiluted white glue across any surface you want to be mossy. Don't add water because you won't get enough depth from your moss. While the glue is still wet, you have a while white glue dries slow, pour on as much sand as you can or dip your base into the glue. Press the sand down to spread the glue through the sand and then wait a few minutes. The glue is pretty tacky when wet so you don't need to leave it to dry, so tap the excess sand off your base.
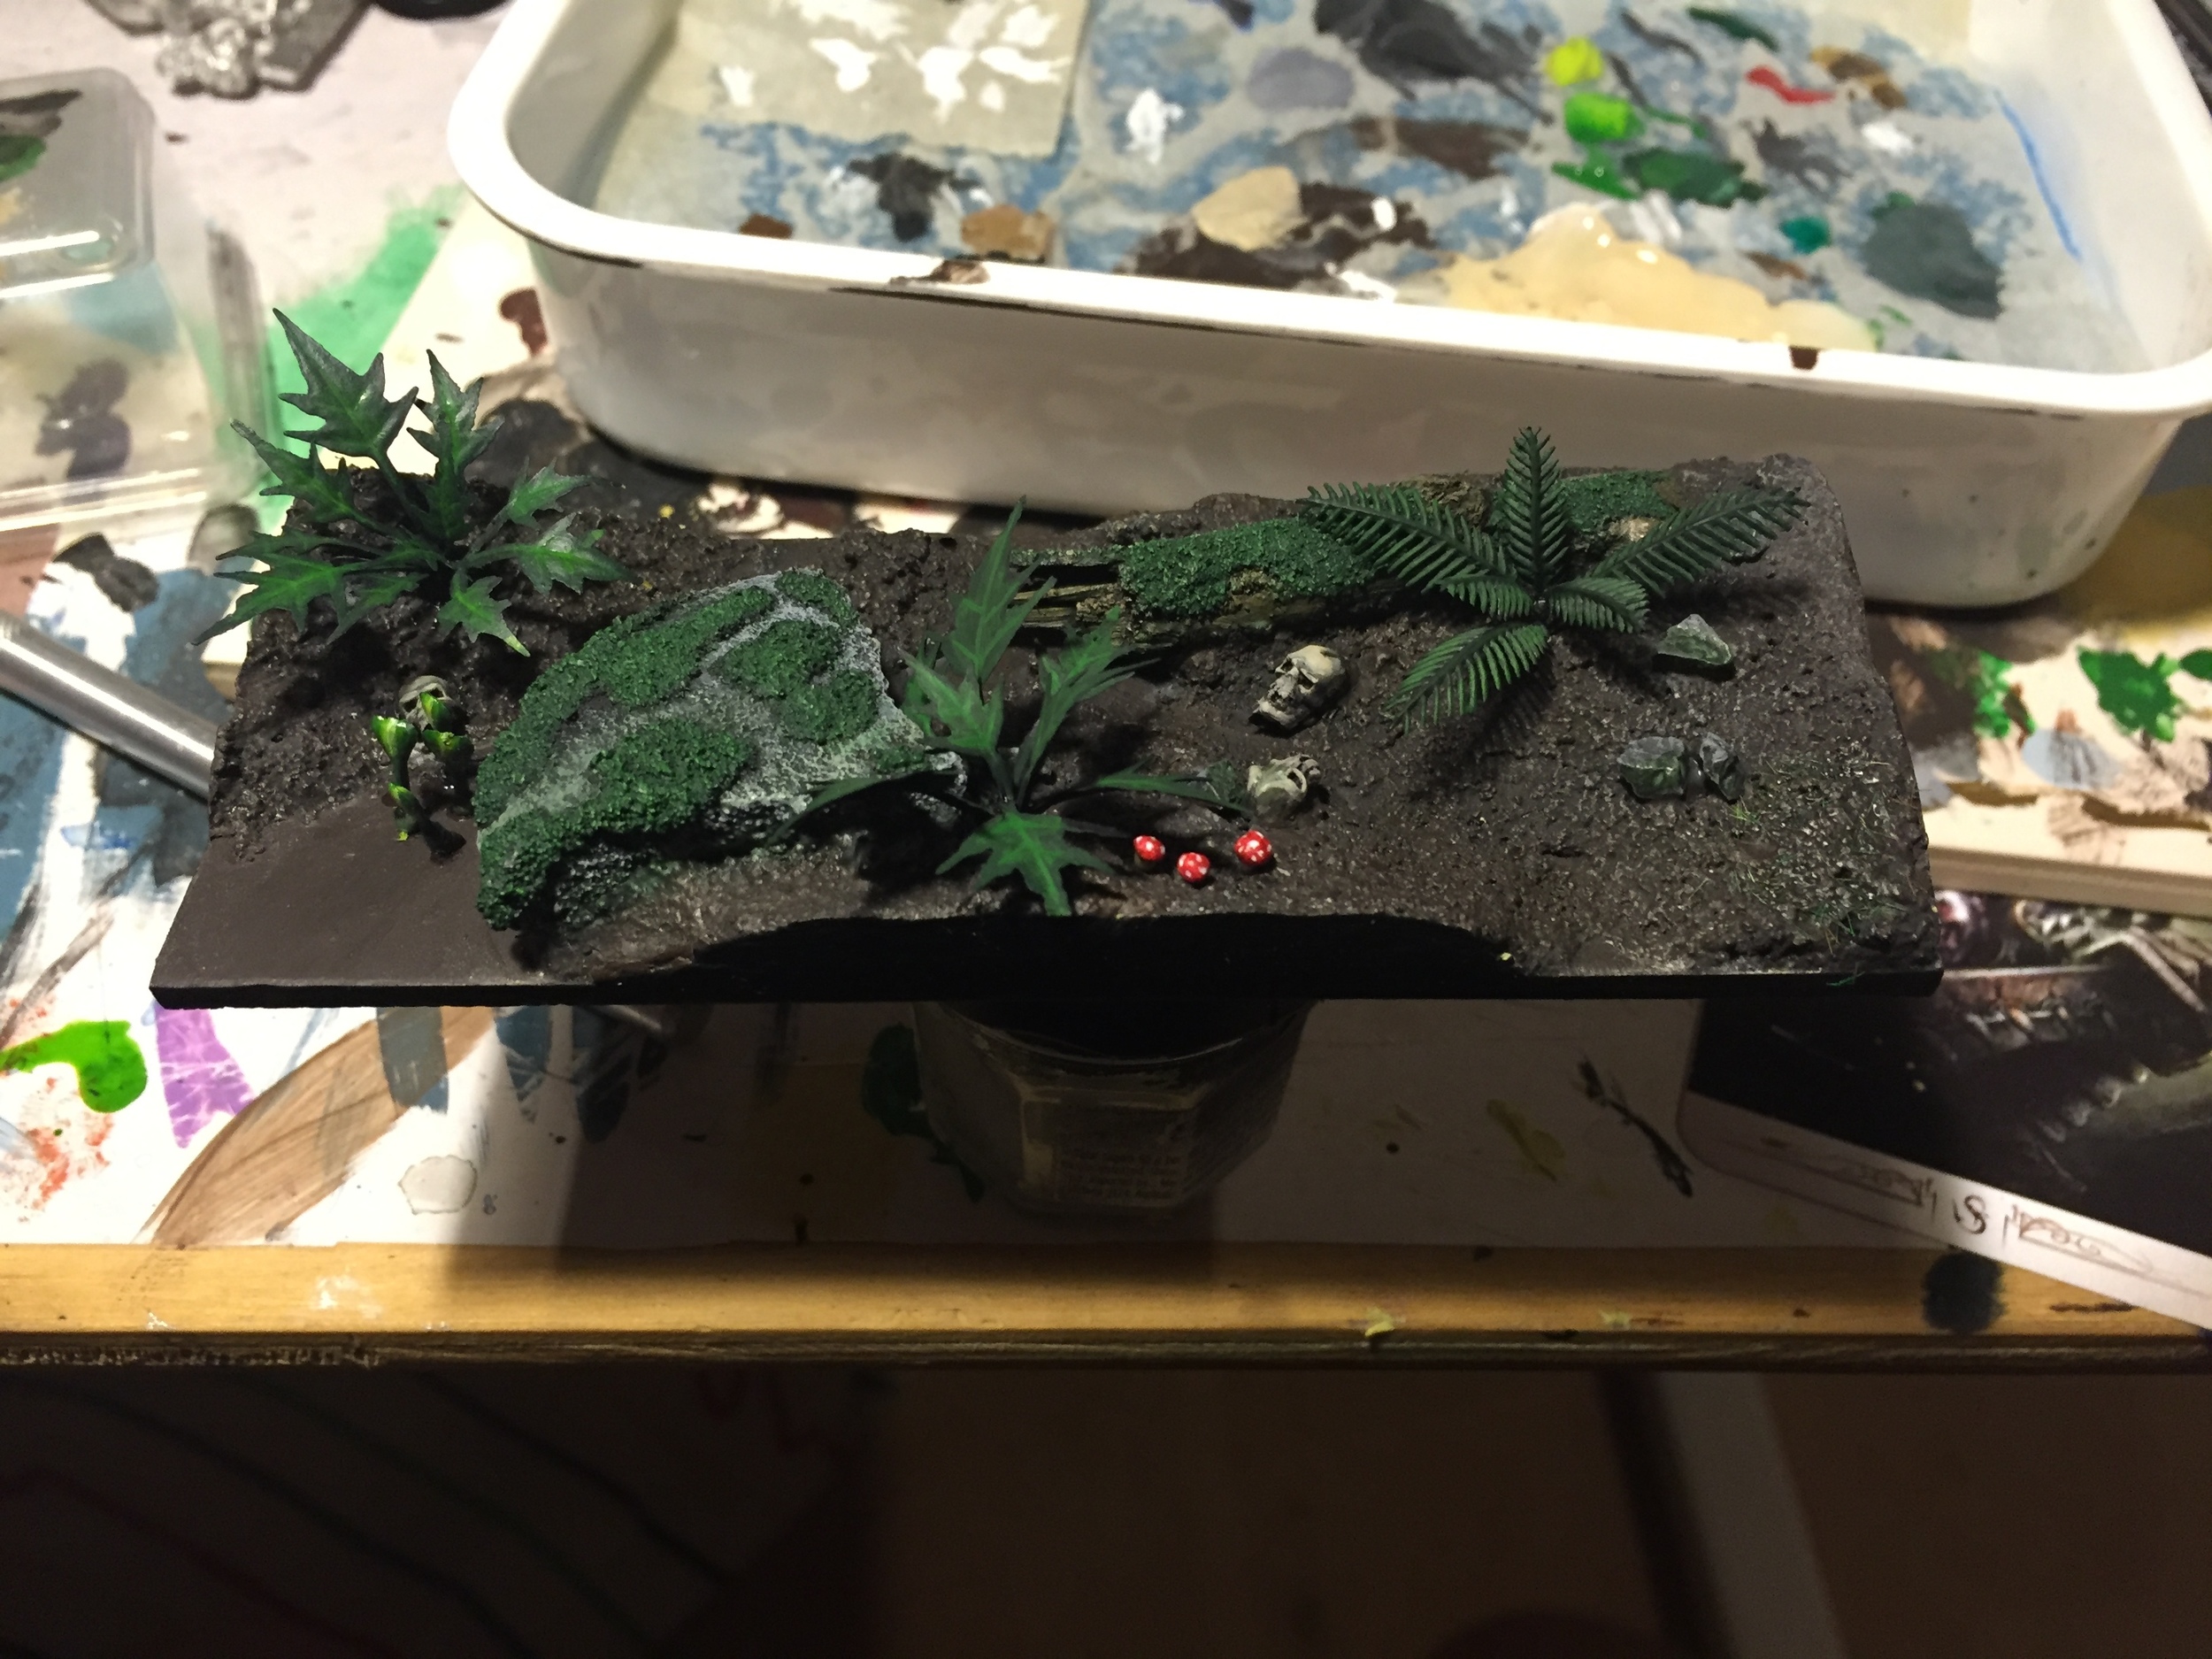
Stick down some extra skulls or rocks or whatever you like and you're ready to paint once it's dry. You could add some things like mushrooms now but I find it easier to pick placement a bit later.

Step 5 - Paint.
Pick your colours, undercoat black, paint, ink, drybrush, airbrush, whatever you like. This isn't a painting tutorial but if you're reading this and you want to know my formula just leave a comment below and I'll post it.

Step 6 - Plants
To make my plants I went to my local hobby store and bought everything that looked leafy that I could use. I cut the leaves off and arranged them into plants. To make the ferns I bought a few plastic palm trees from Eckersleys, cut the fronds off and stuck them together with a greenstuff base. It's easier than you think.
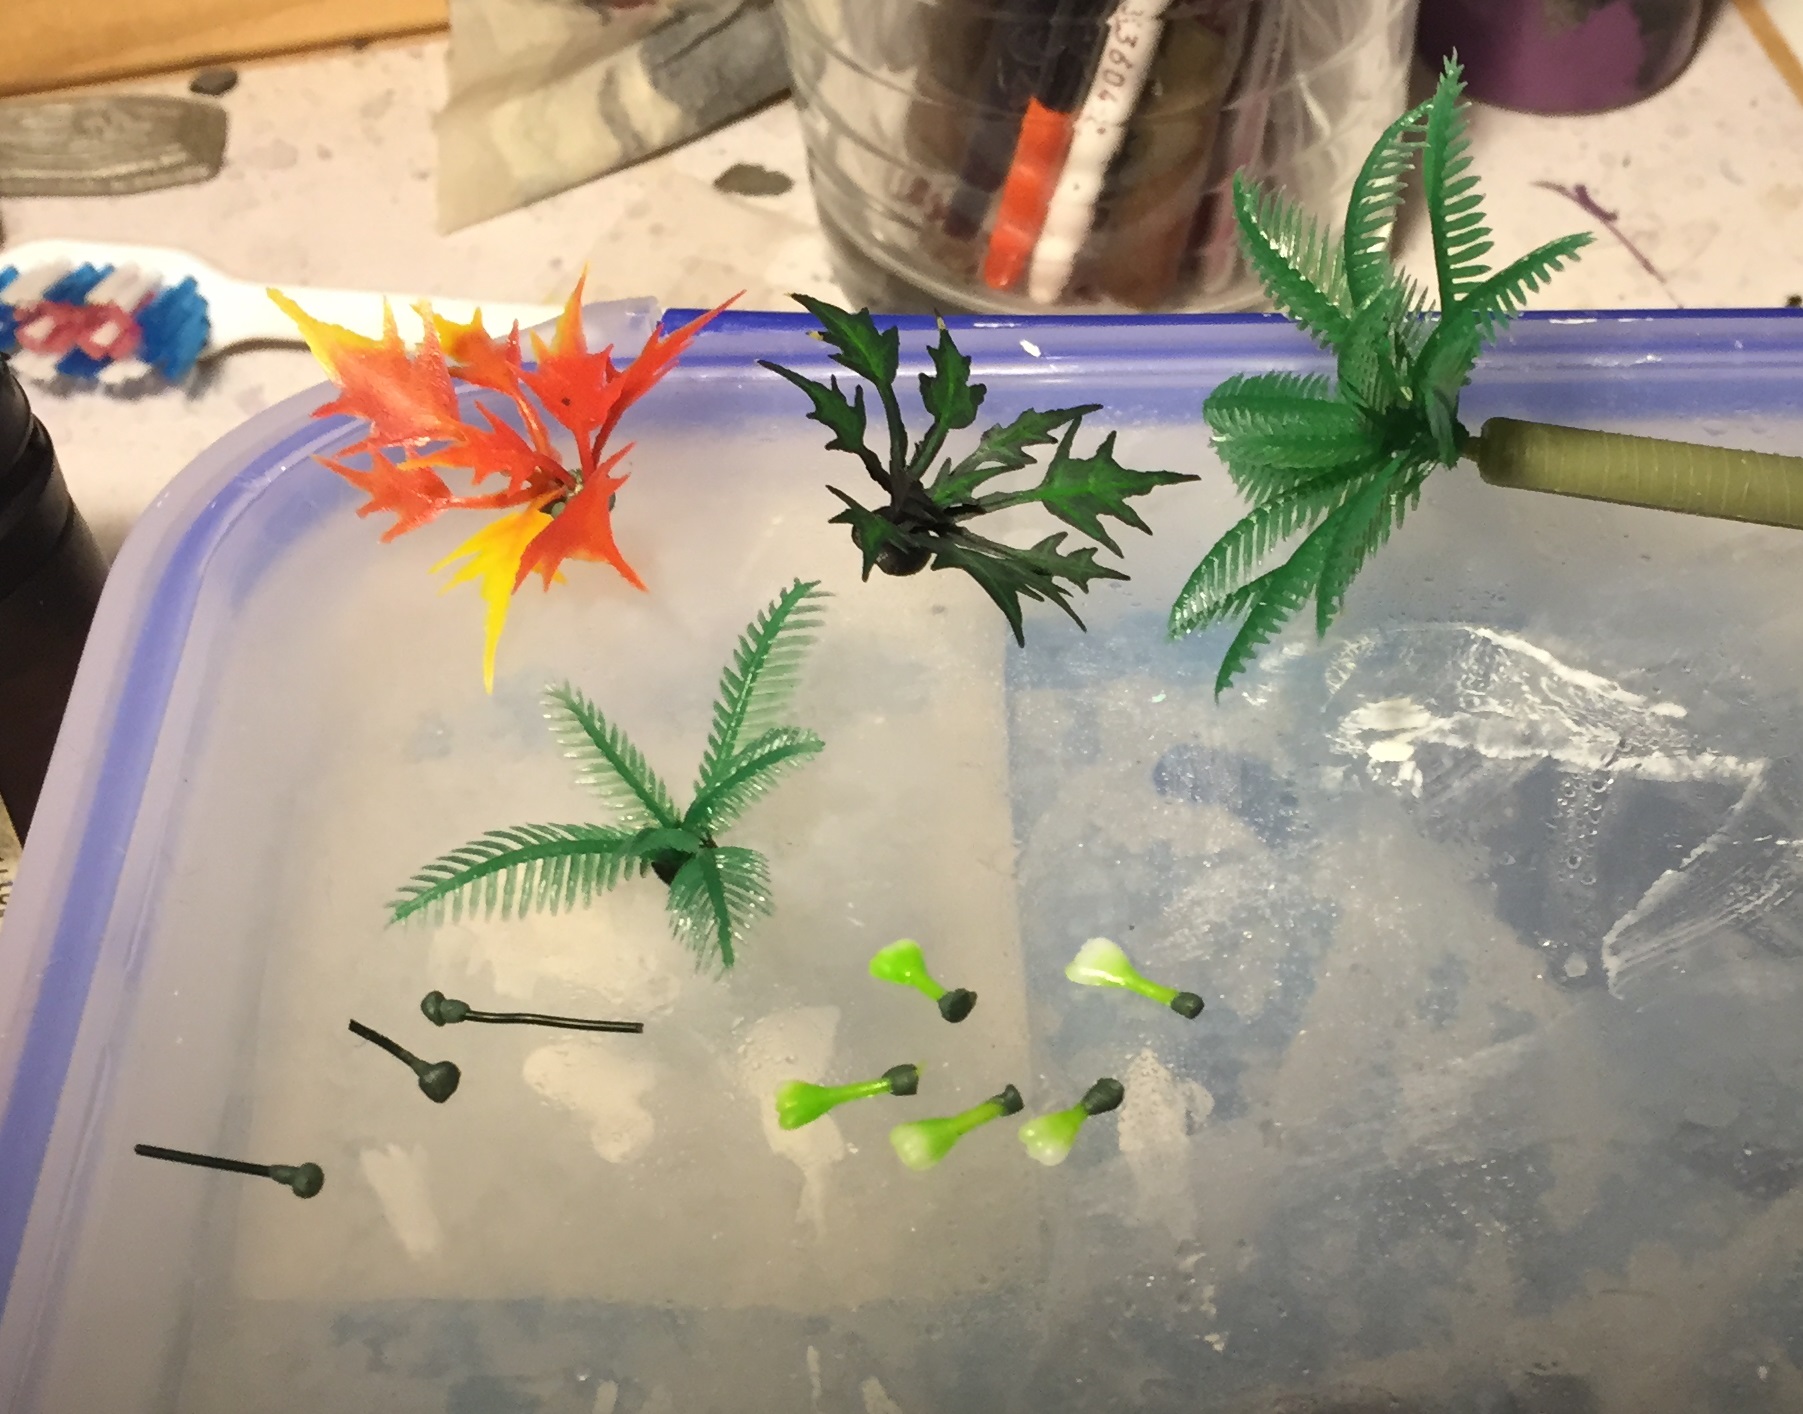
Once you've put them together, undercoat black and paint them. They're plastic so they are fragile and the paint might crack so cover them in mat varnish of your choice.
Mushrooms are easy. Get a small peice of wire, put a small ball of greenstuff on the end and wrap it around into the stalk. Then get a larger ball and just push it onto the end. They look great and add some real contrast to your base.
Step 7 - Water
This is the hardest step and you can't just paint over it if you stuff it up, so take care and run a few tests first. I did 4 test runs with different levels of ink and base paint colour to determine the colour scheme I wanted and settled on a fairly transparent green with a hint of brown. The mix is roughly two table spoons of resin to 5 drops of ink (Vallejo) in a ratio of 4 green (Black Green specifically) to 1 brown ink.
The resin I've been using is Envirotex Lite. It's readily available and pretty cheap. Some forums will suggest other options, another is ICE Resin, but I've never tried them. Envirotex Lite does a good job and is very simple to use. Use gloves when you use it, not because it's overly harmful to your skin but because the risk of getting some on your fingers and then putting them in your eyes is high if you don't. There are heaps of tutorials on you tube on how to use Envirotex Lite so I won't go into it here. Google is your friend.
Once I was happy with the test results I used masking tape to mark around my diorama the height I wanted the resin to go to. I had previously picked 6mm because masking tape comes in that height from the hobby store but you can pick any height.
Then it's just a case of pouring your resin in. Pour it in VERY slowly. The best way to do this is to drill a small hole in the side of the cup holding your resin and drop it through that in a continuous stream. It won't push into all the gaps on it's own, I used a toothpick to push it into any gaps that it's viscosity prevented it from going on to.
Step 8 - Cover and Let Cure
Cover it up so dust doesn't get in, trust me you'll regret it if it does or even worse if a bug crawls into it and get's stuck in the resin! Once done, roughly 24 hours to be sure, pull the tape off and sand the edges flat with the finest sandpaper you can. Use a gloss varnish to clear up the edge and here's the result.

Thanks for reading, I hope you get something out of this post, please leave a comment below or share this post.