Night Stalkers

Project Complete - Swamp Monsters - Night Stalker Doppelgangers

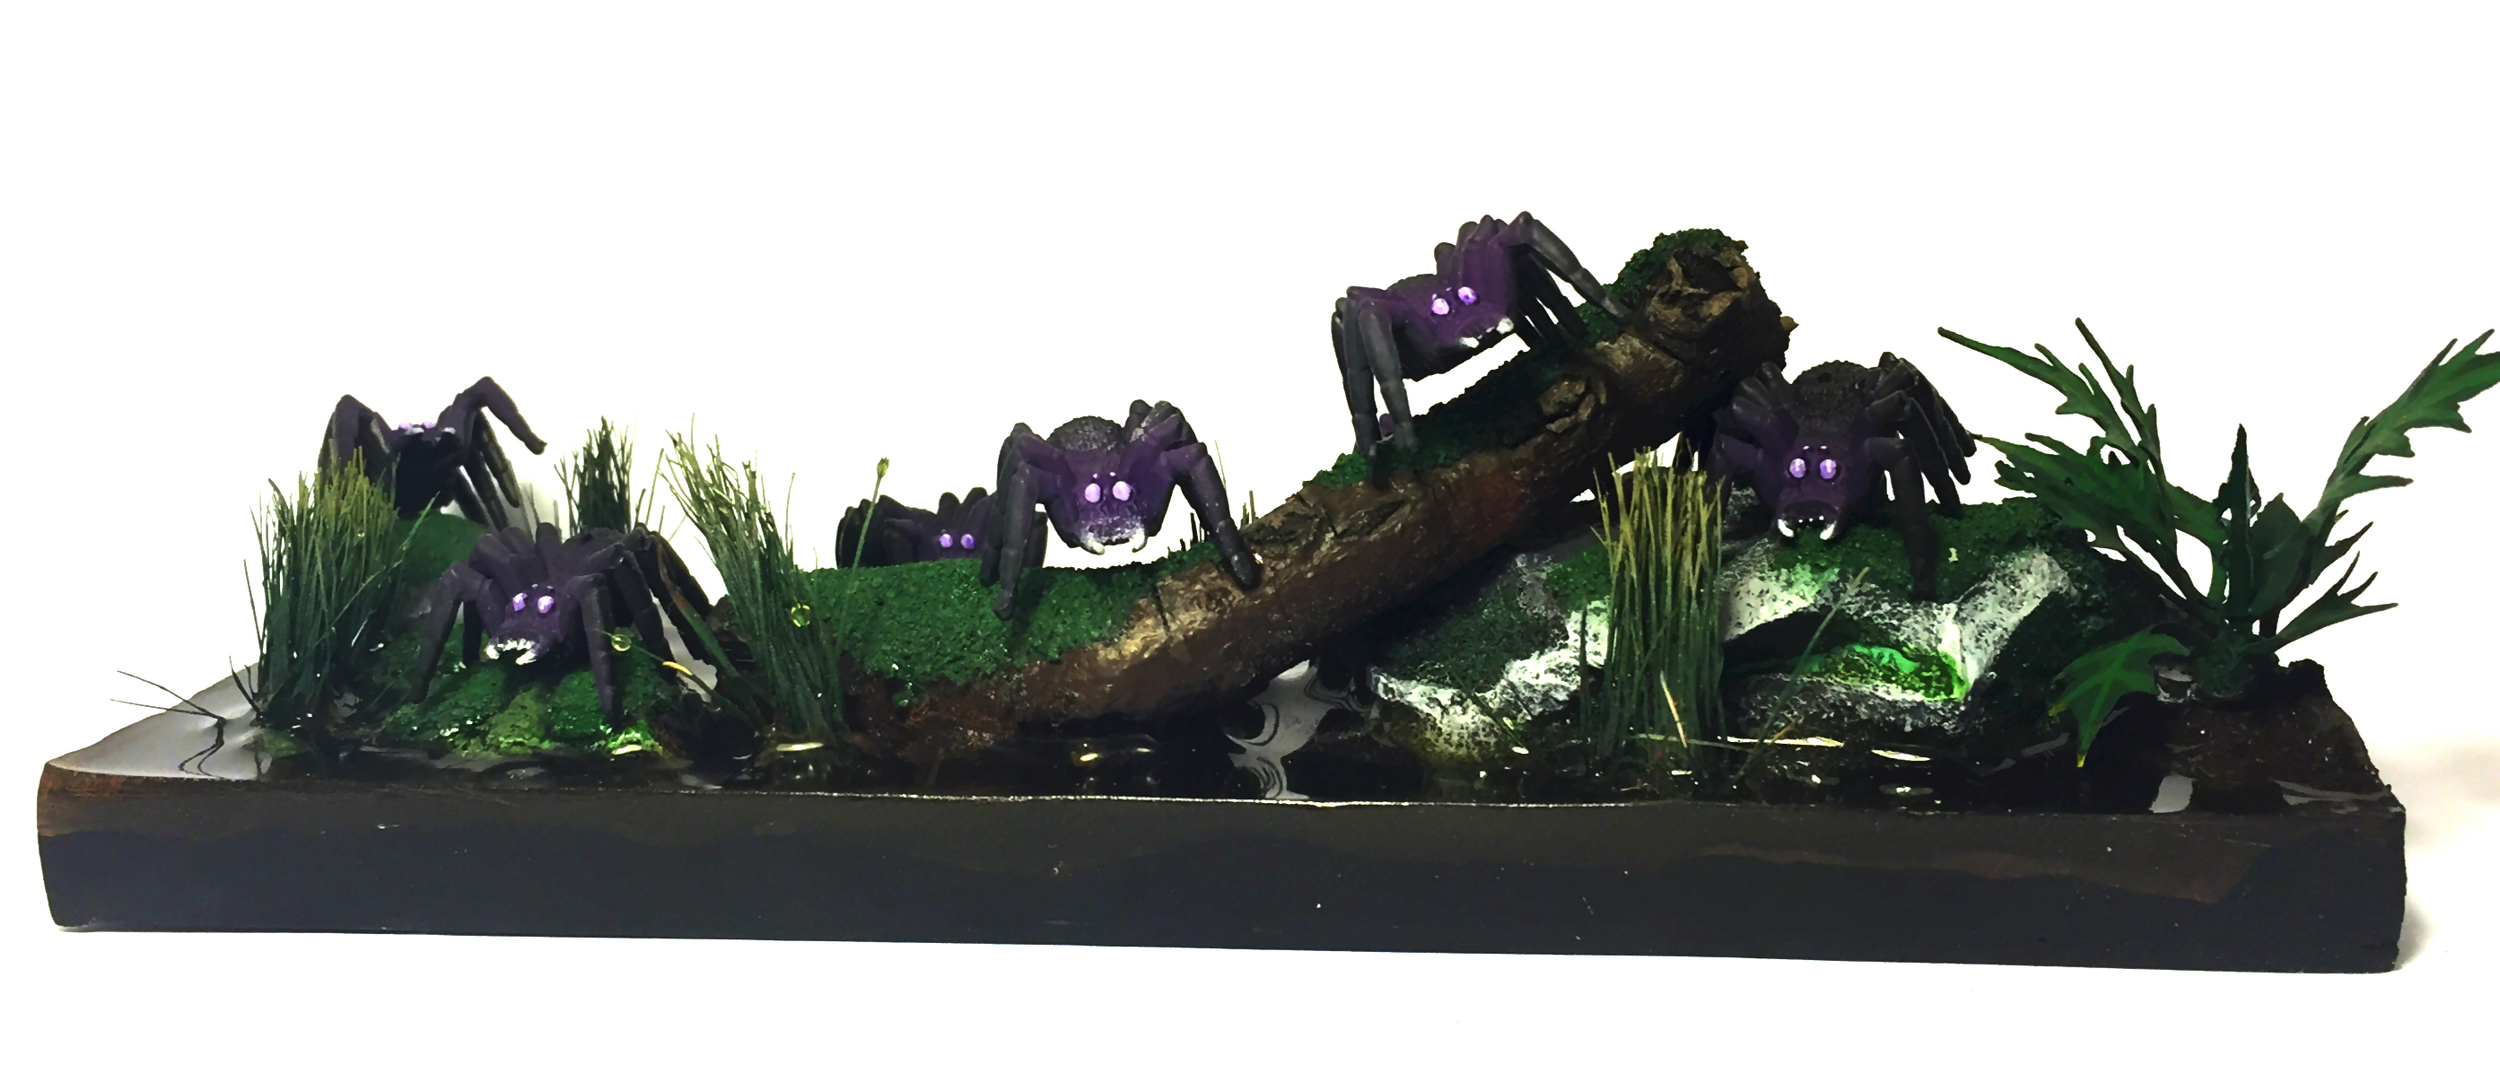
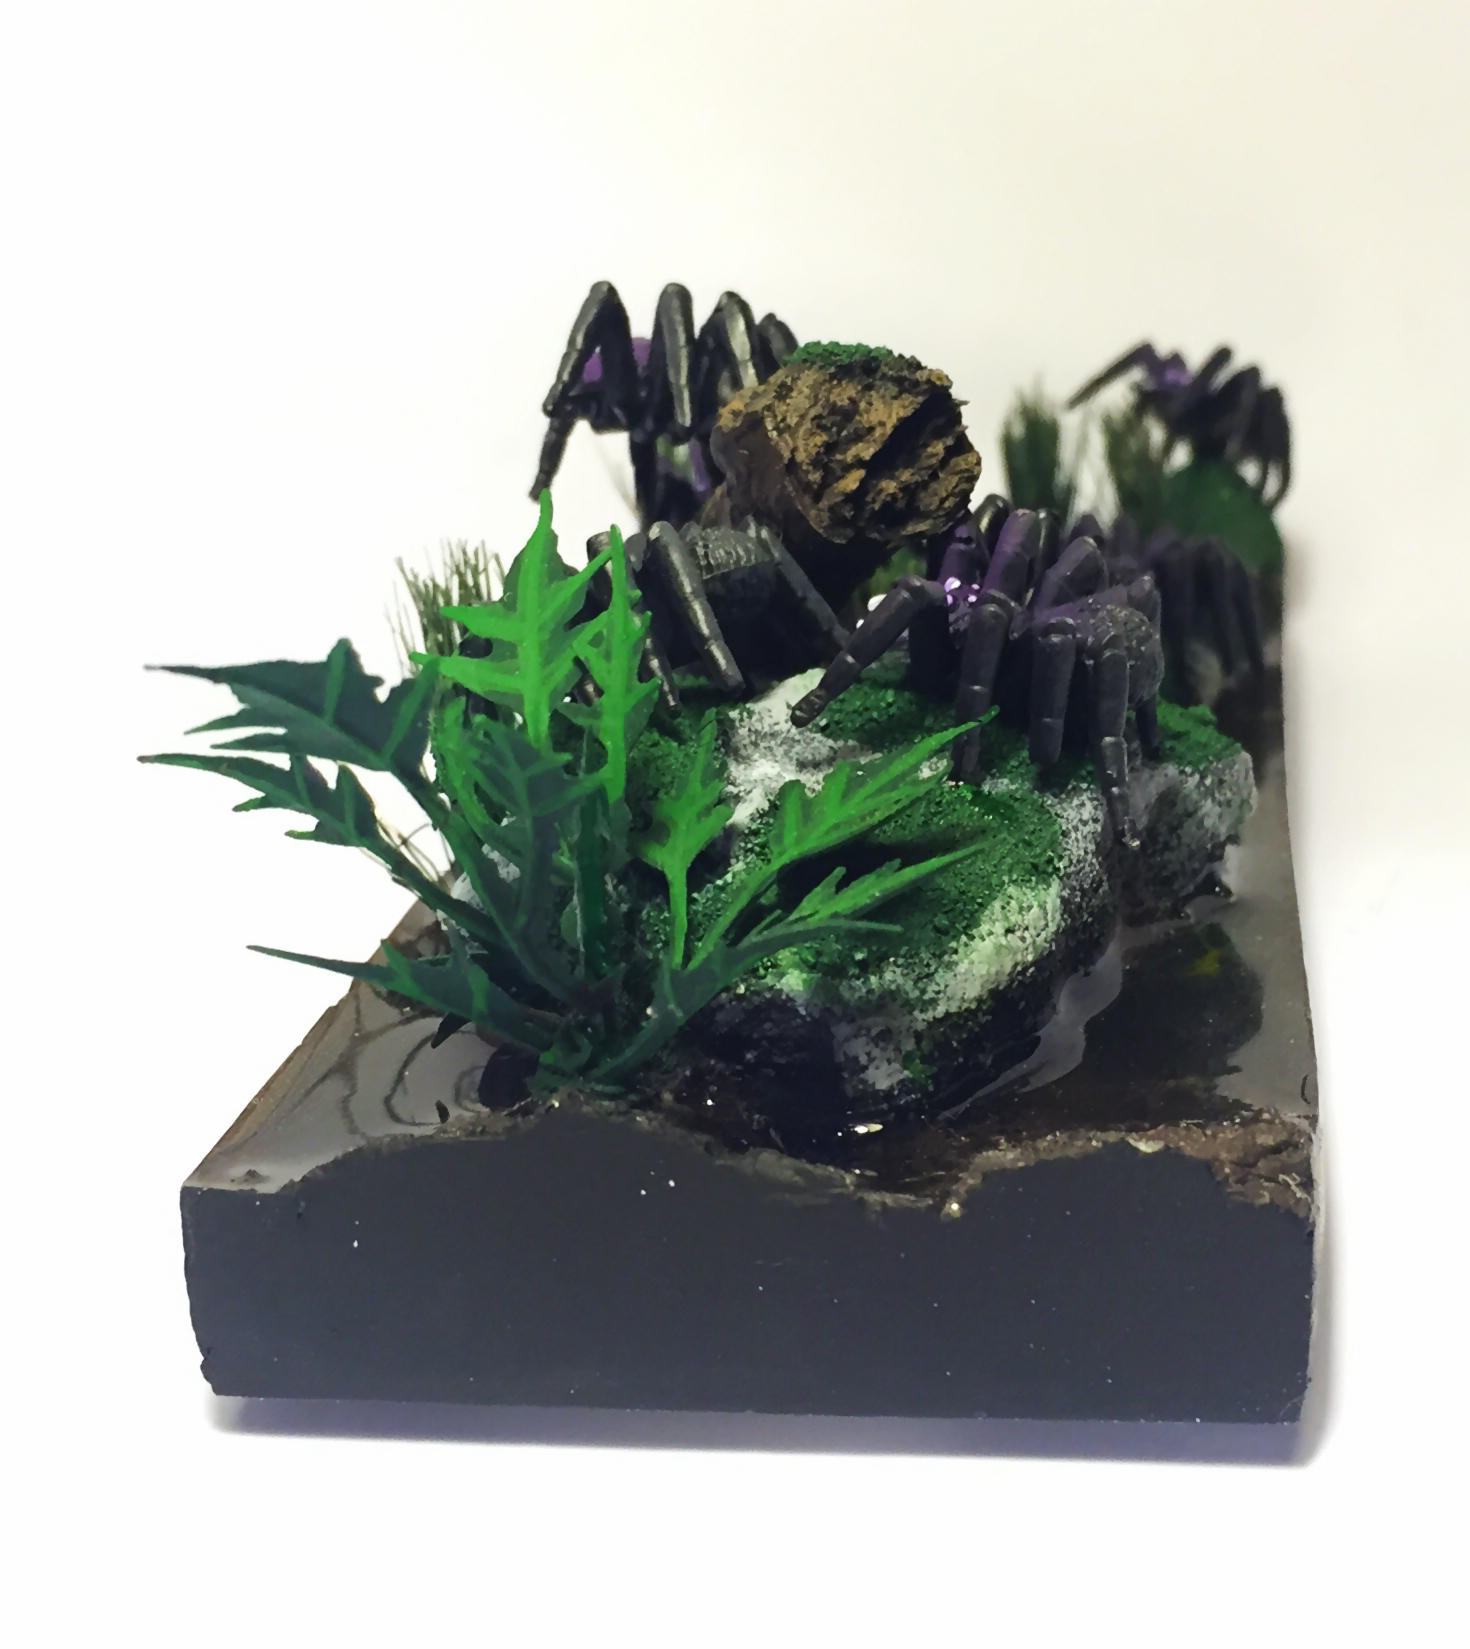
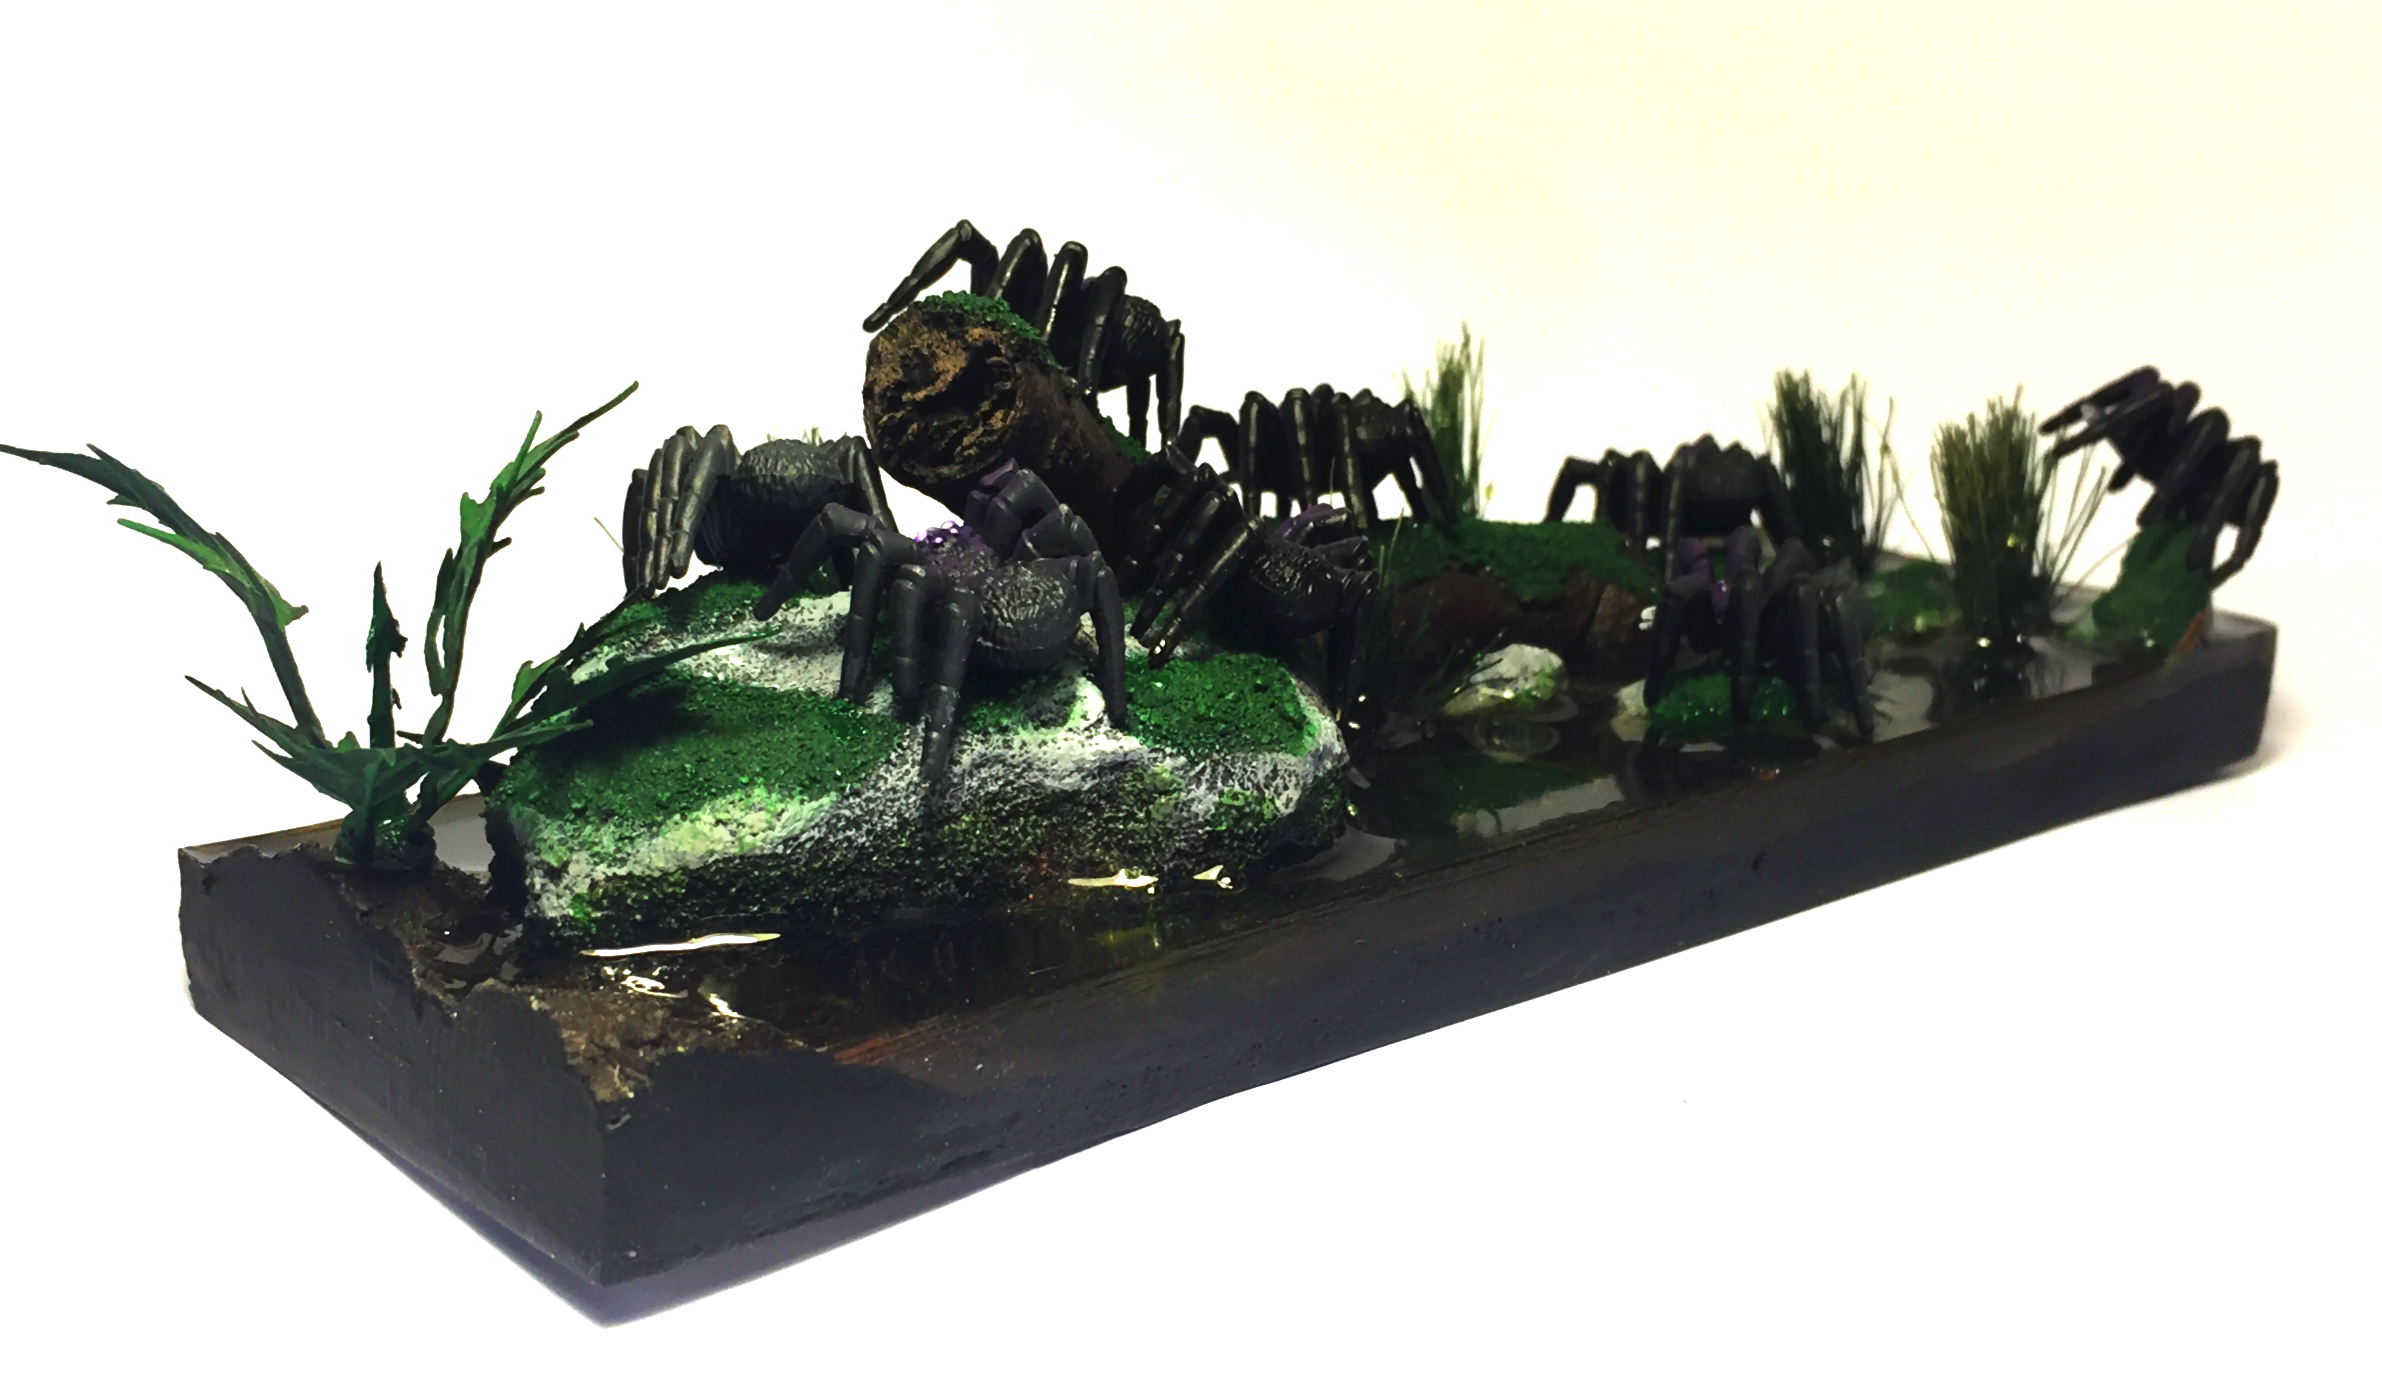
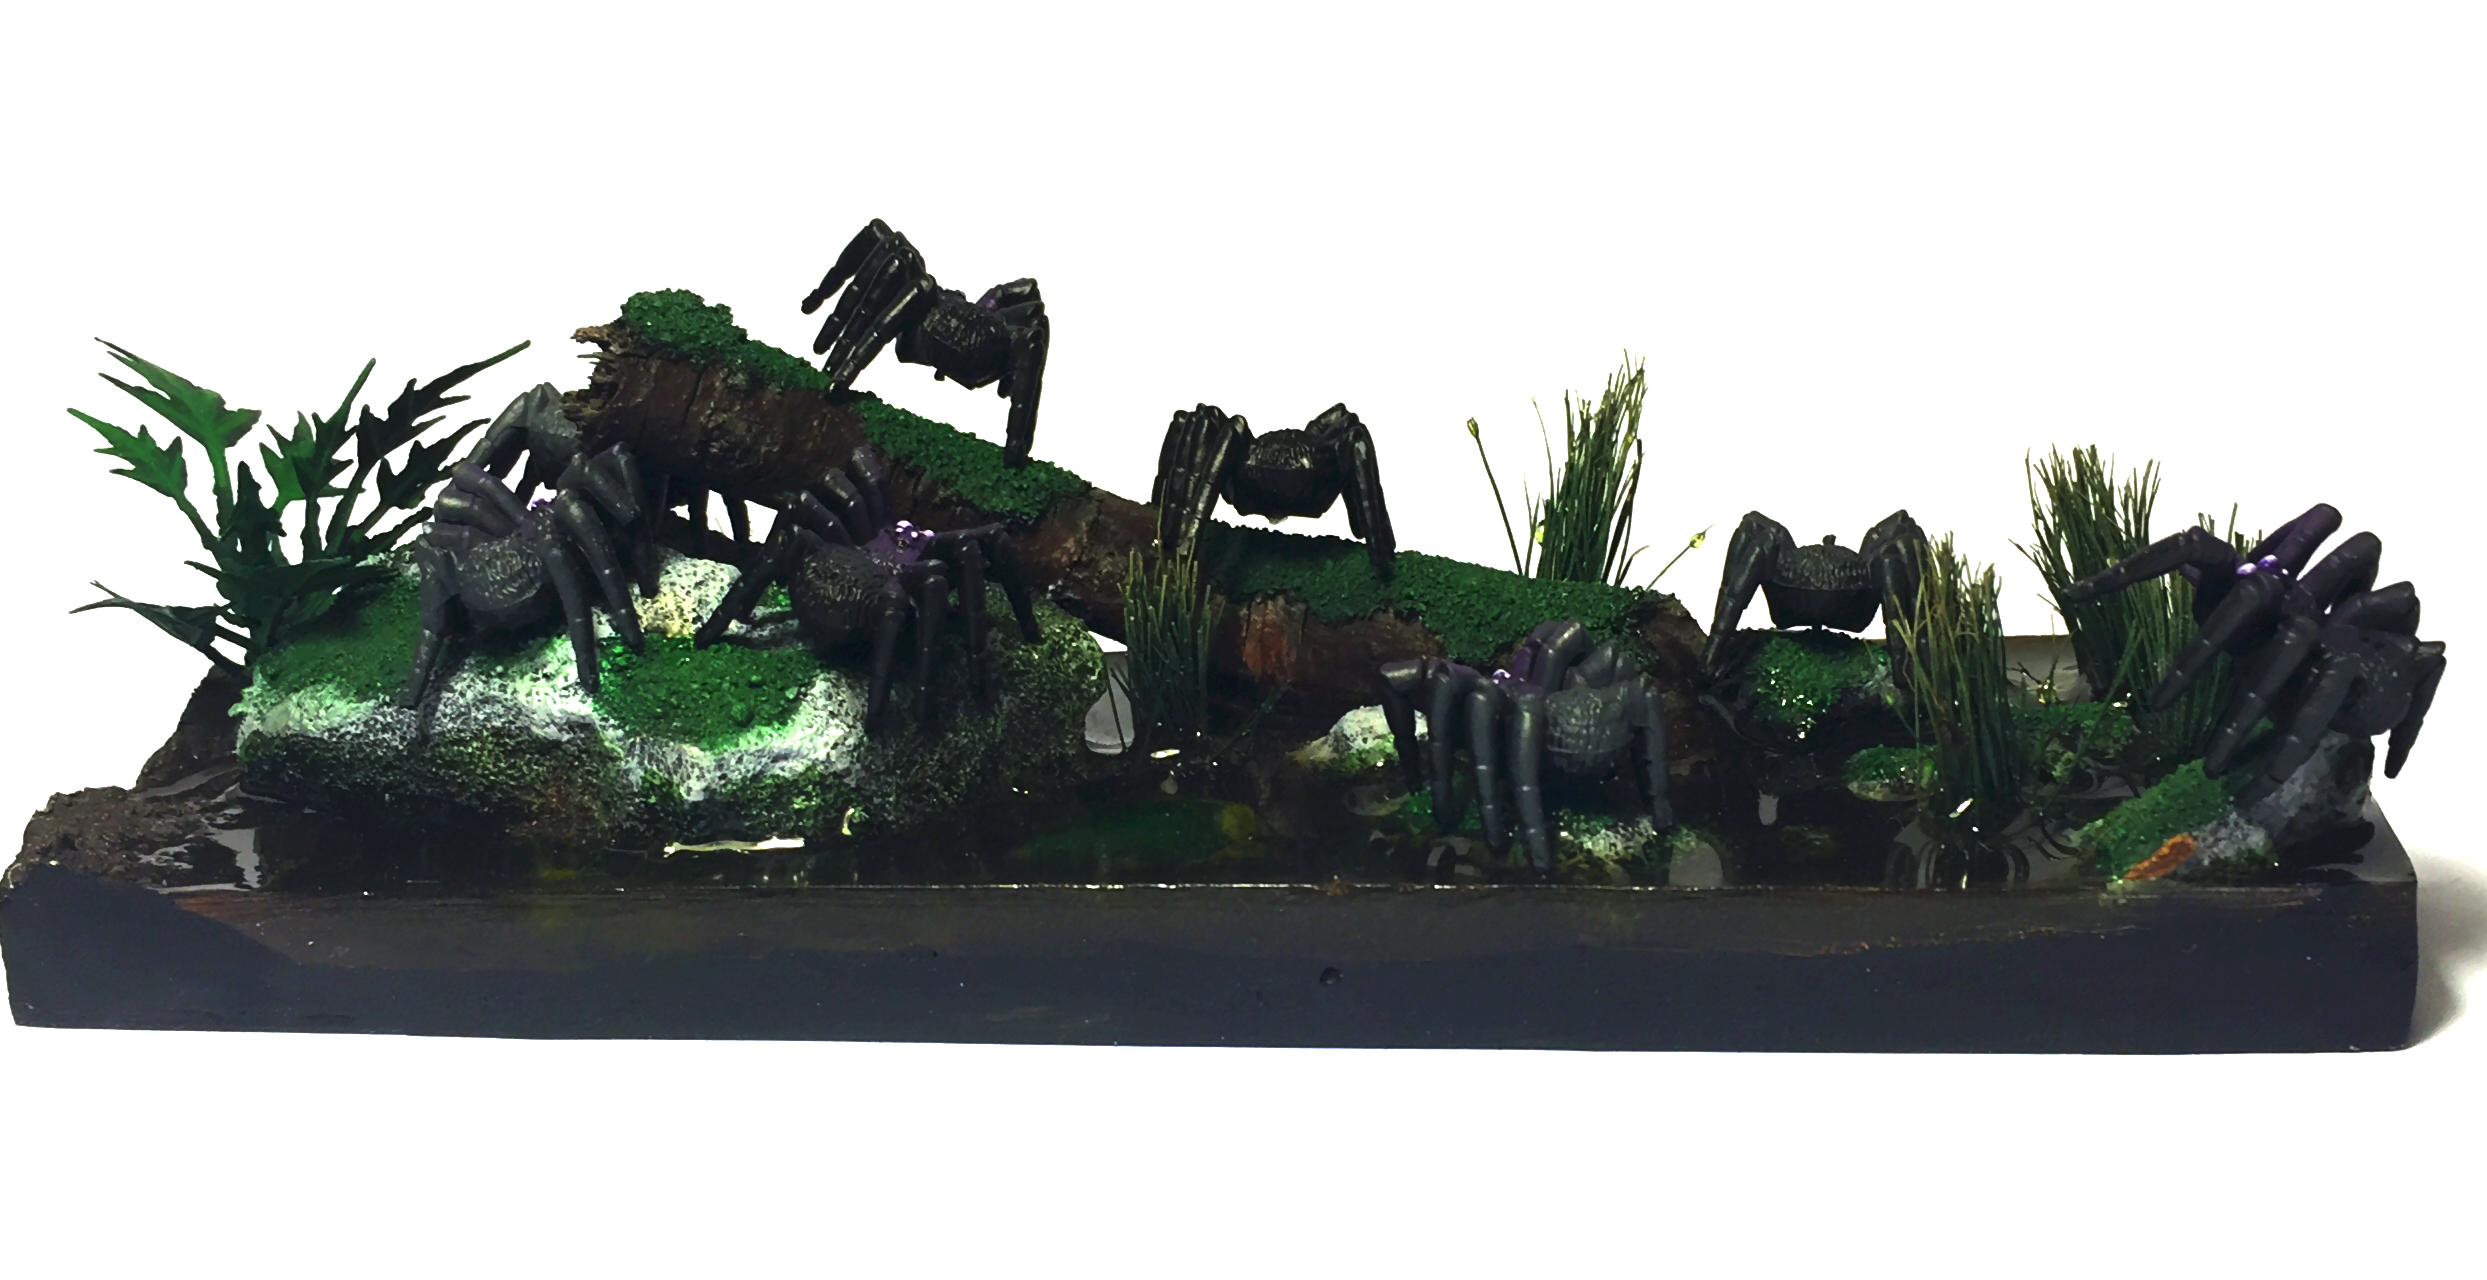
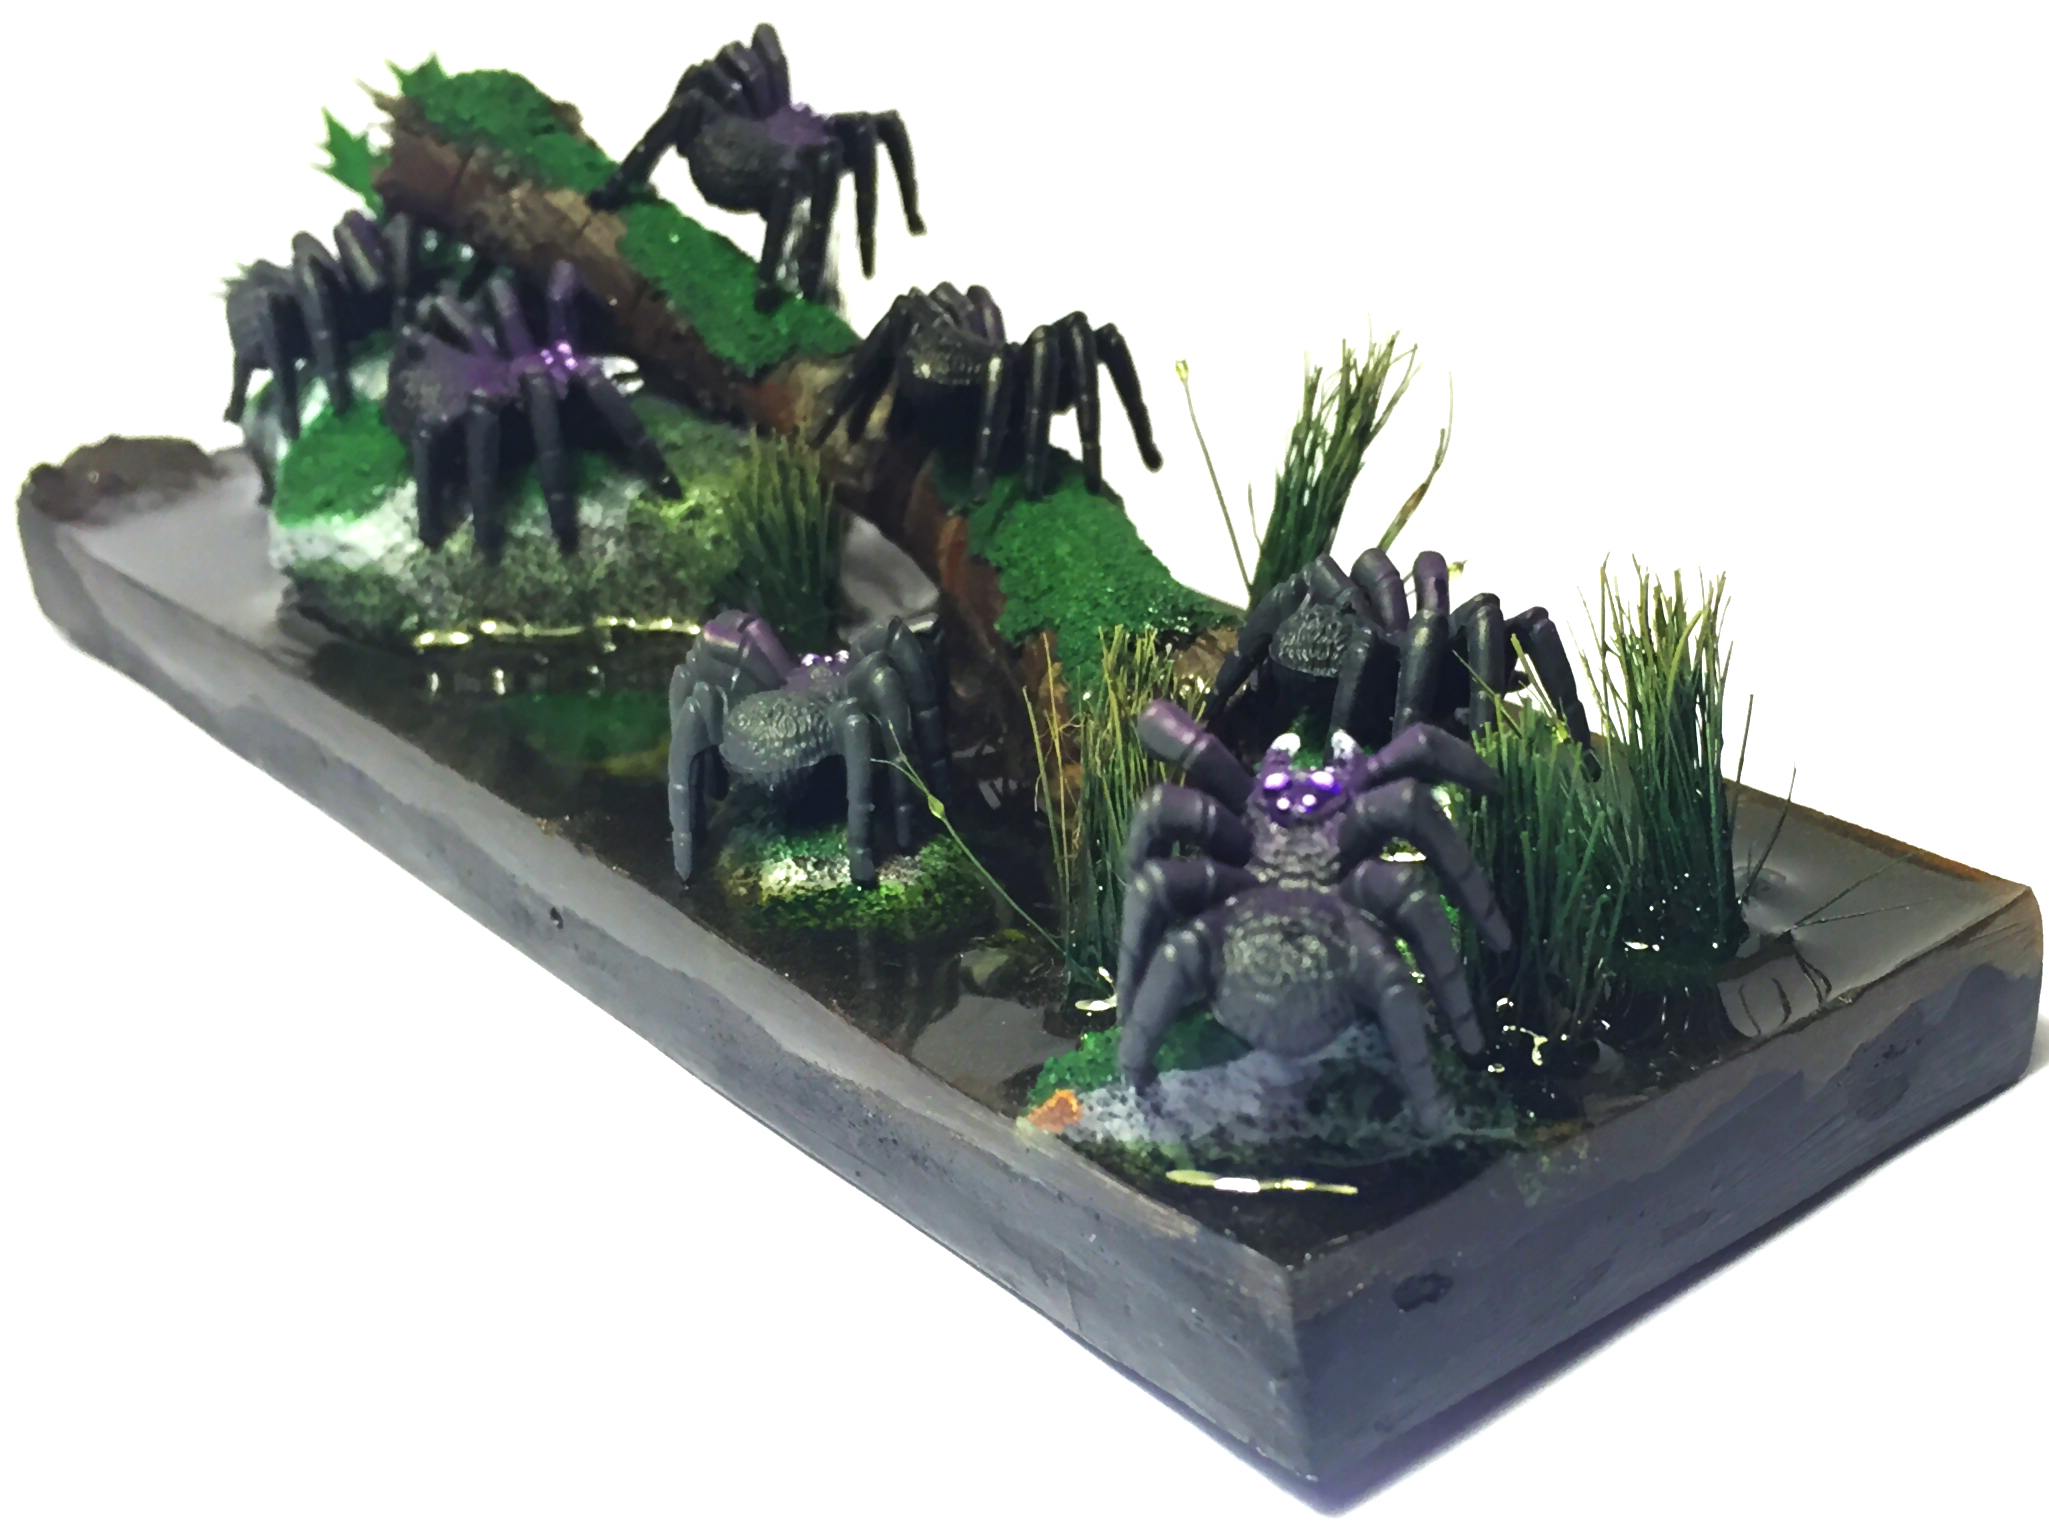
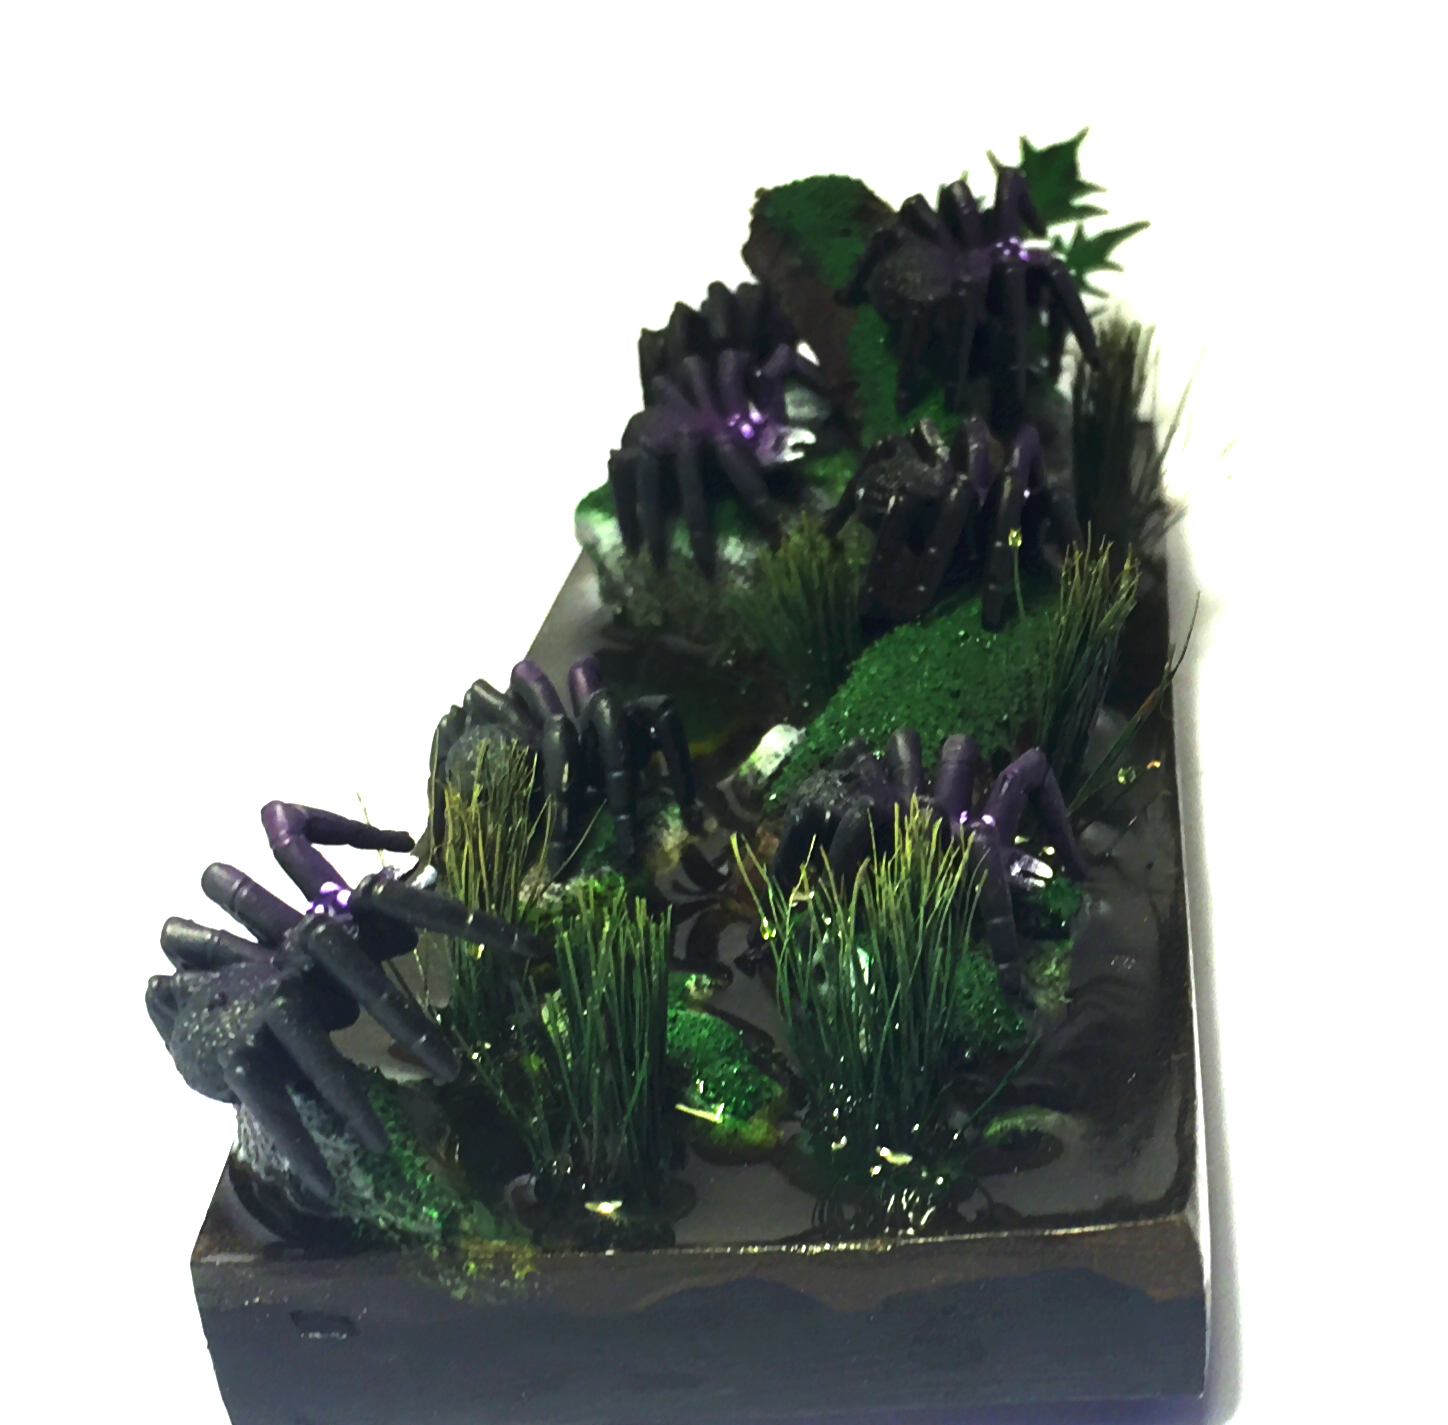
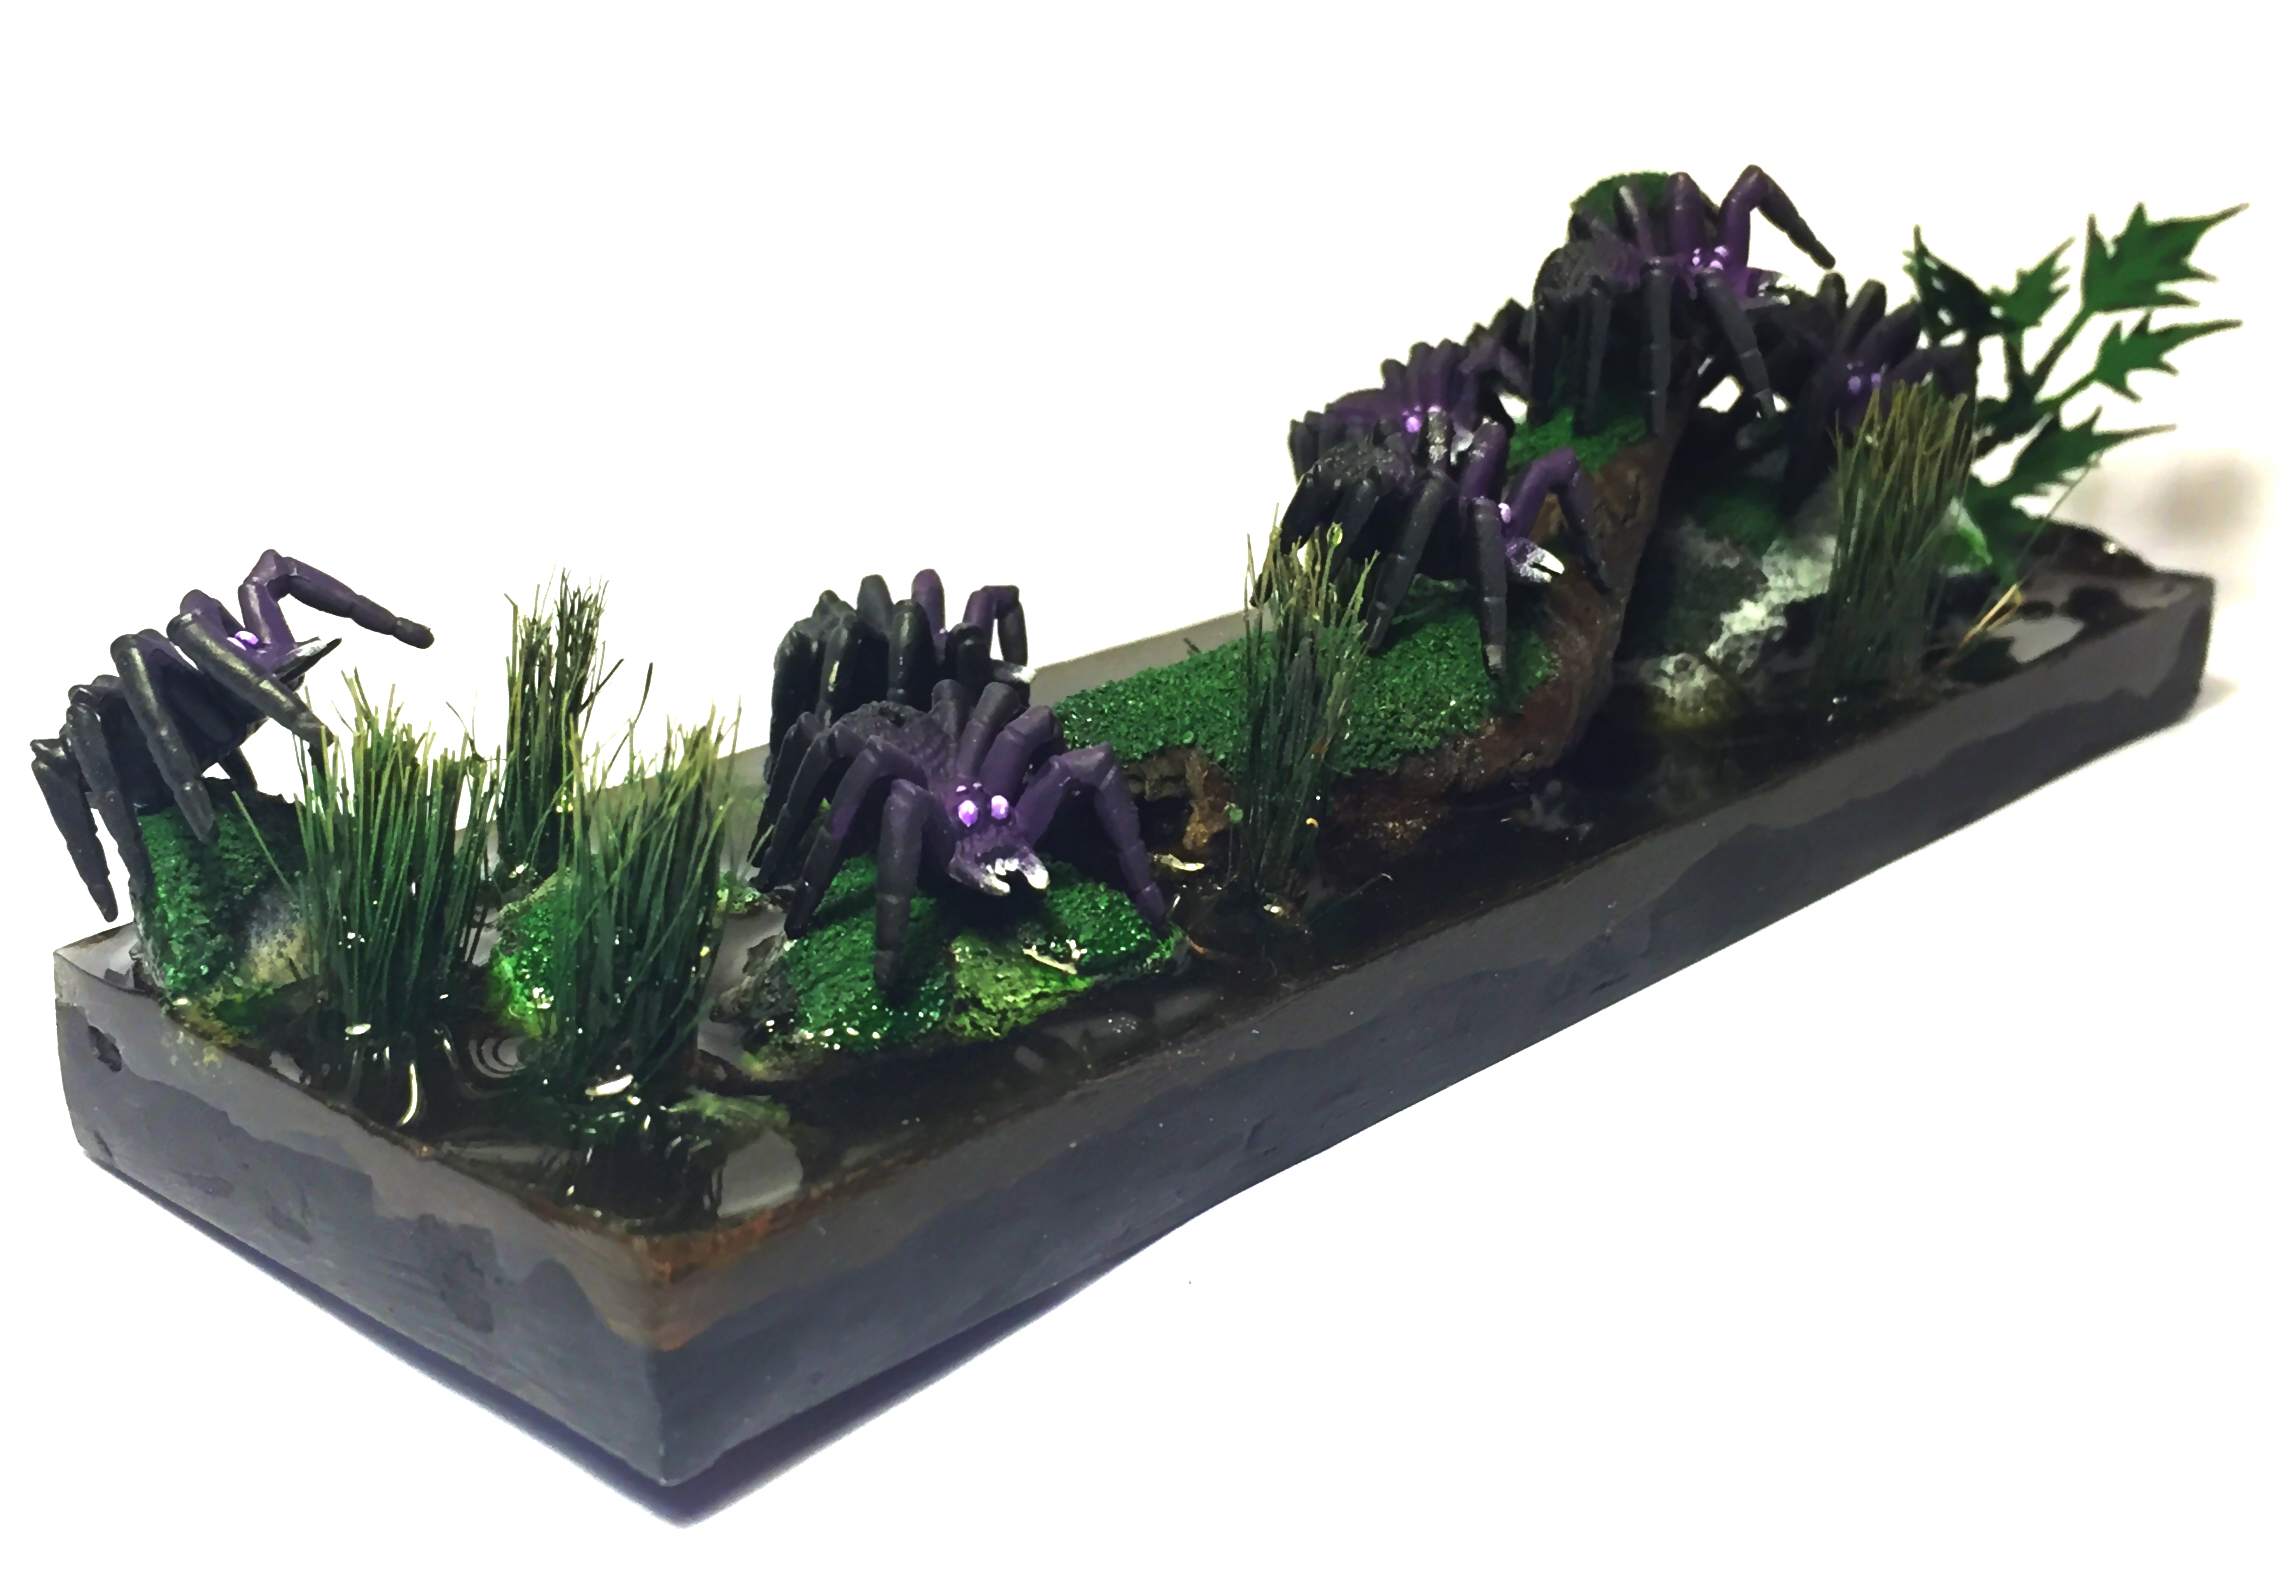
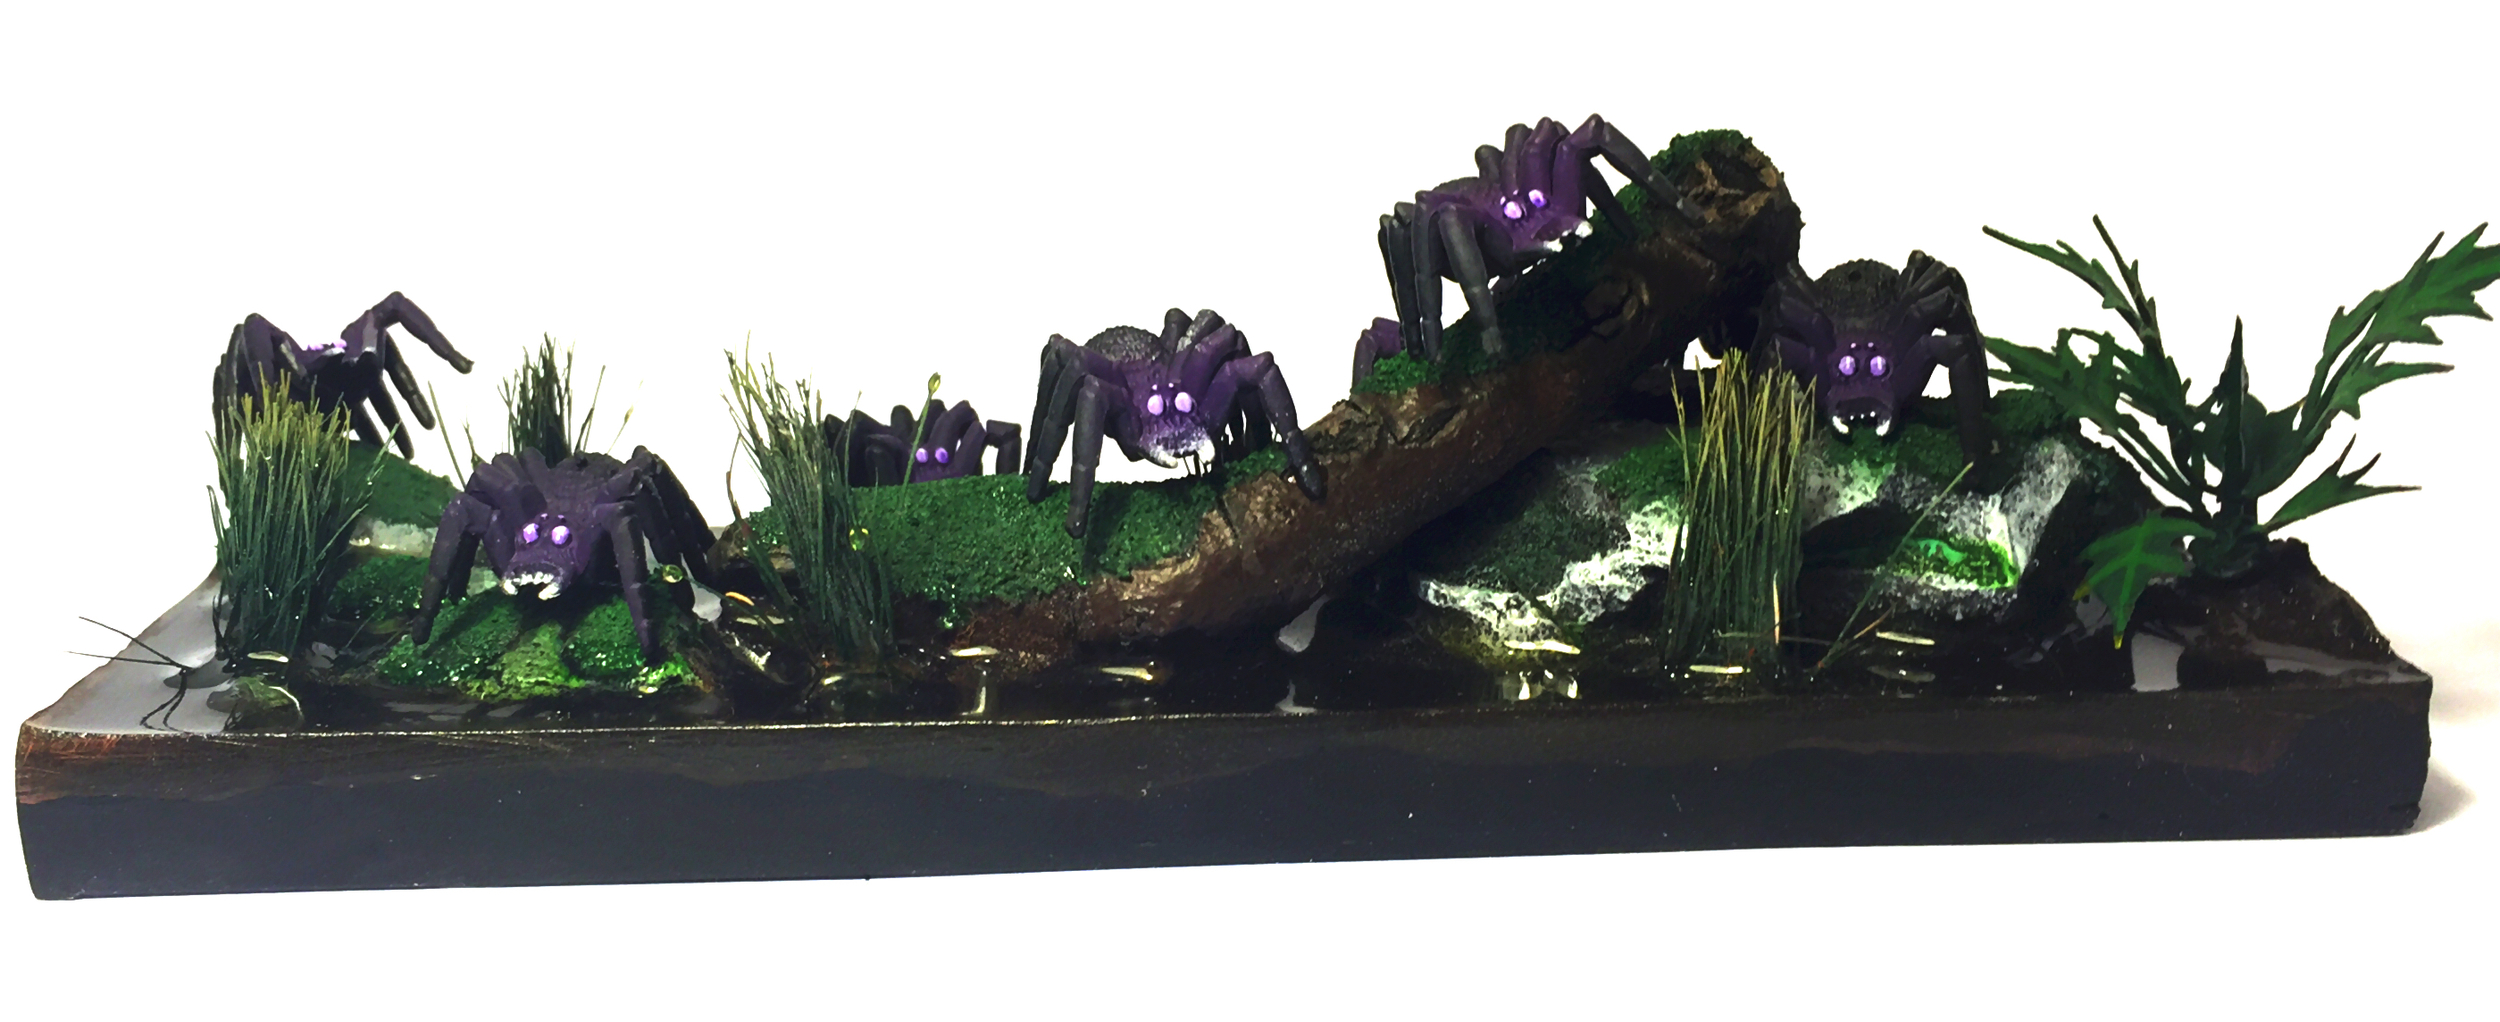
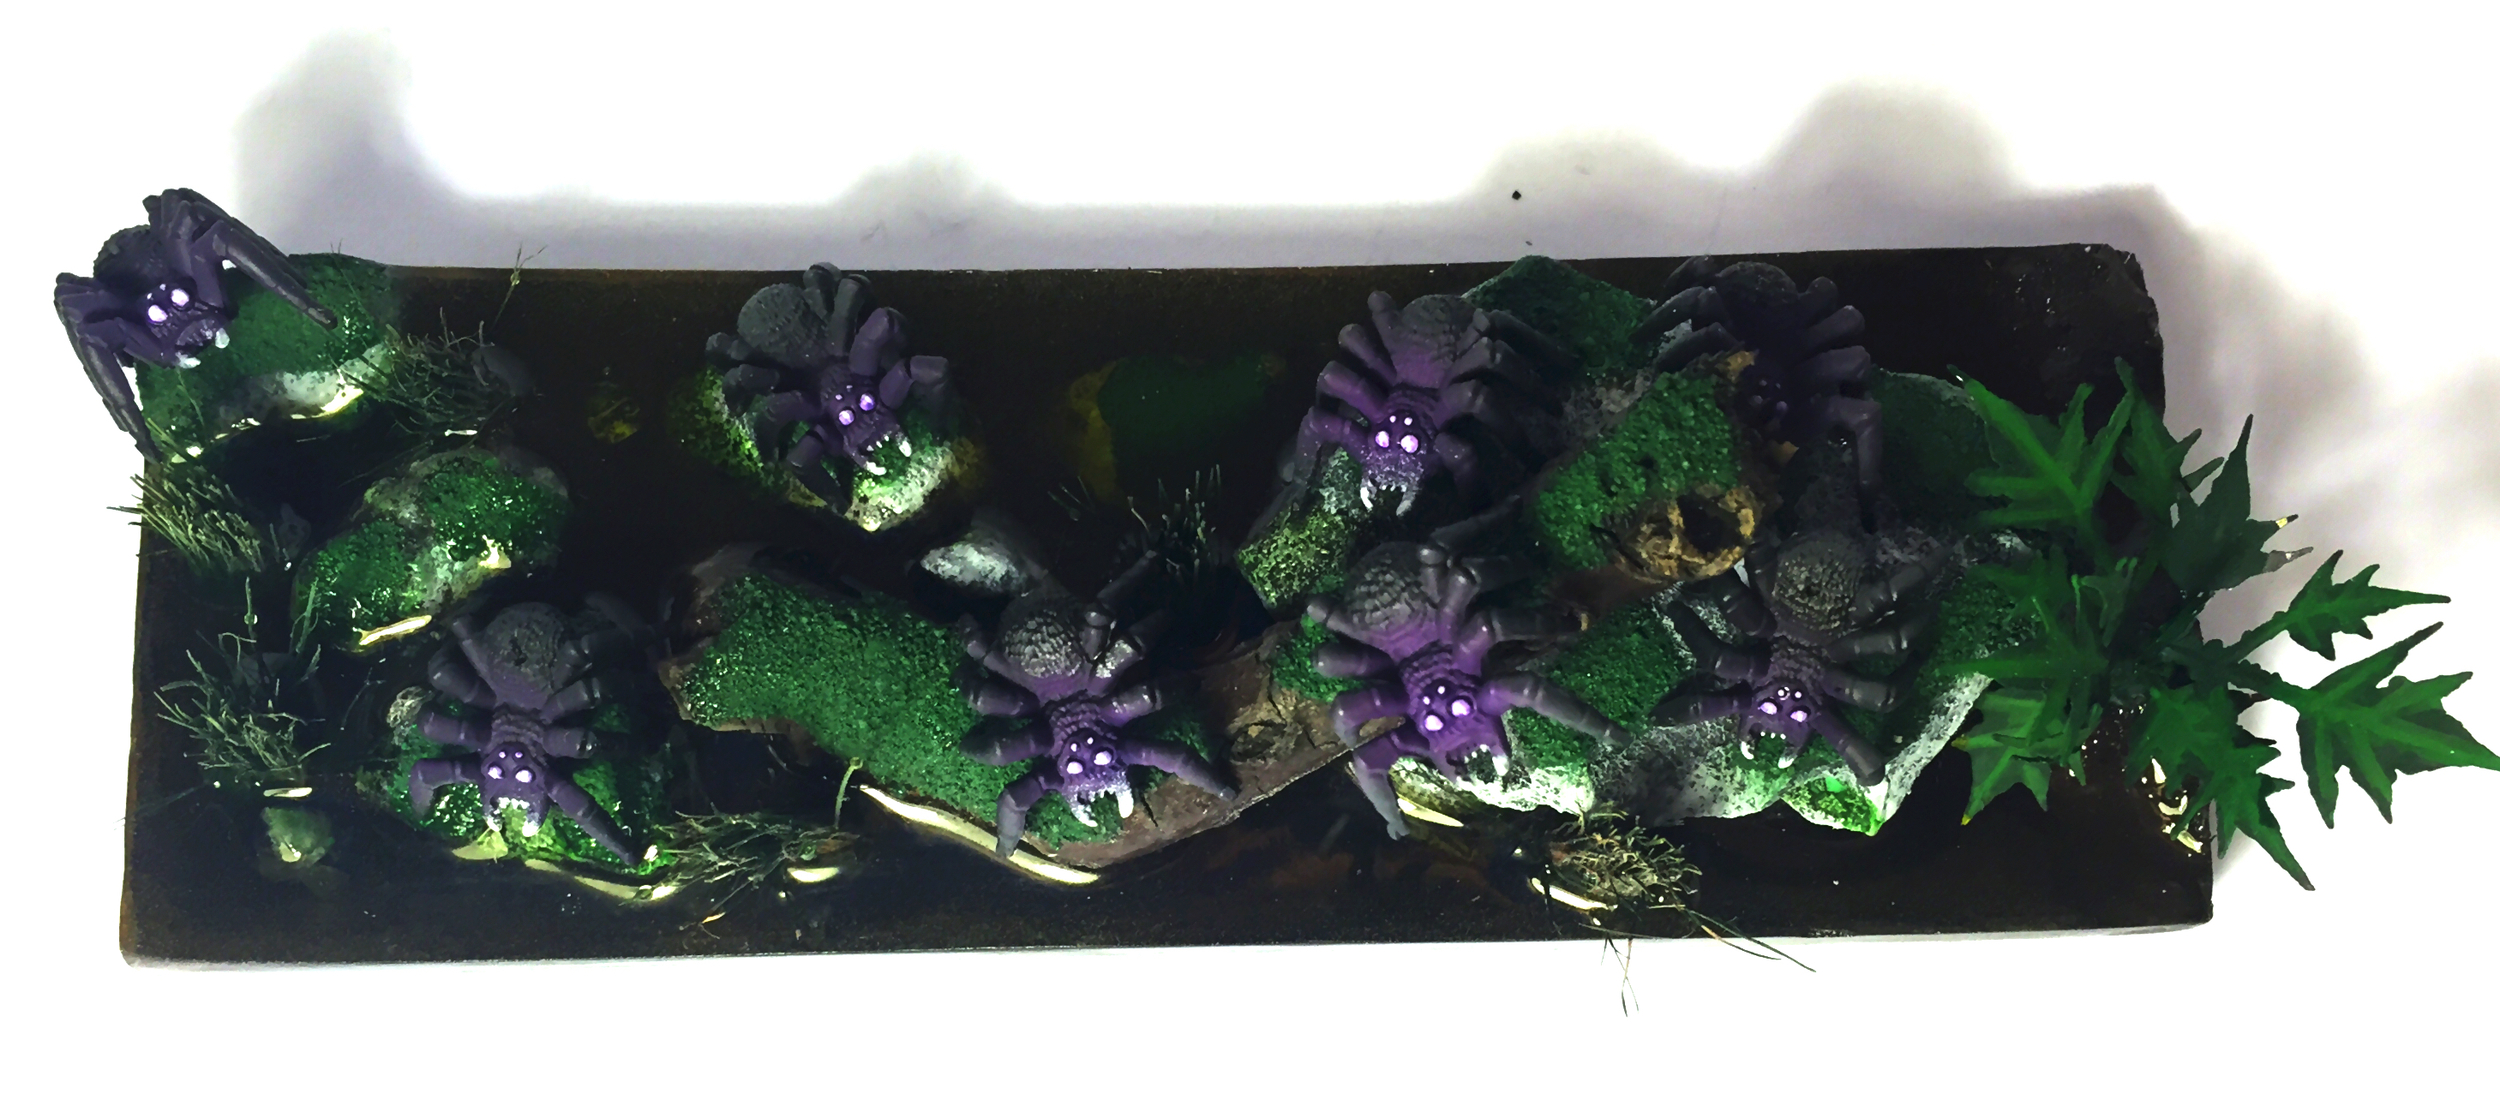
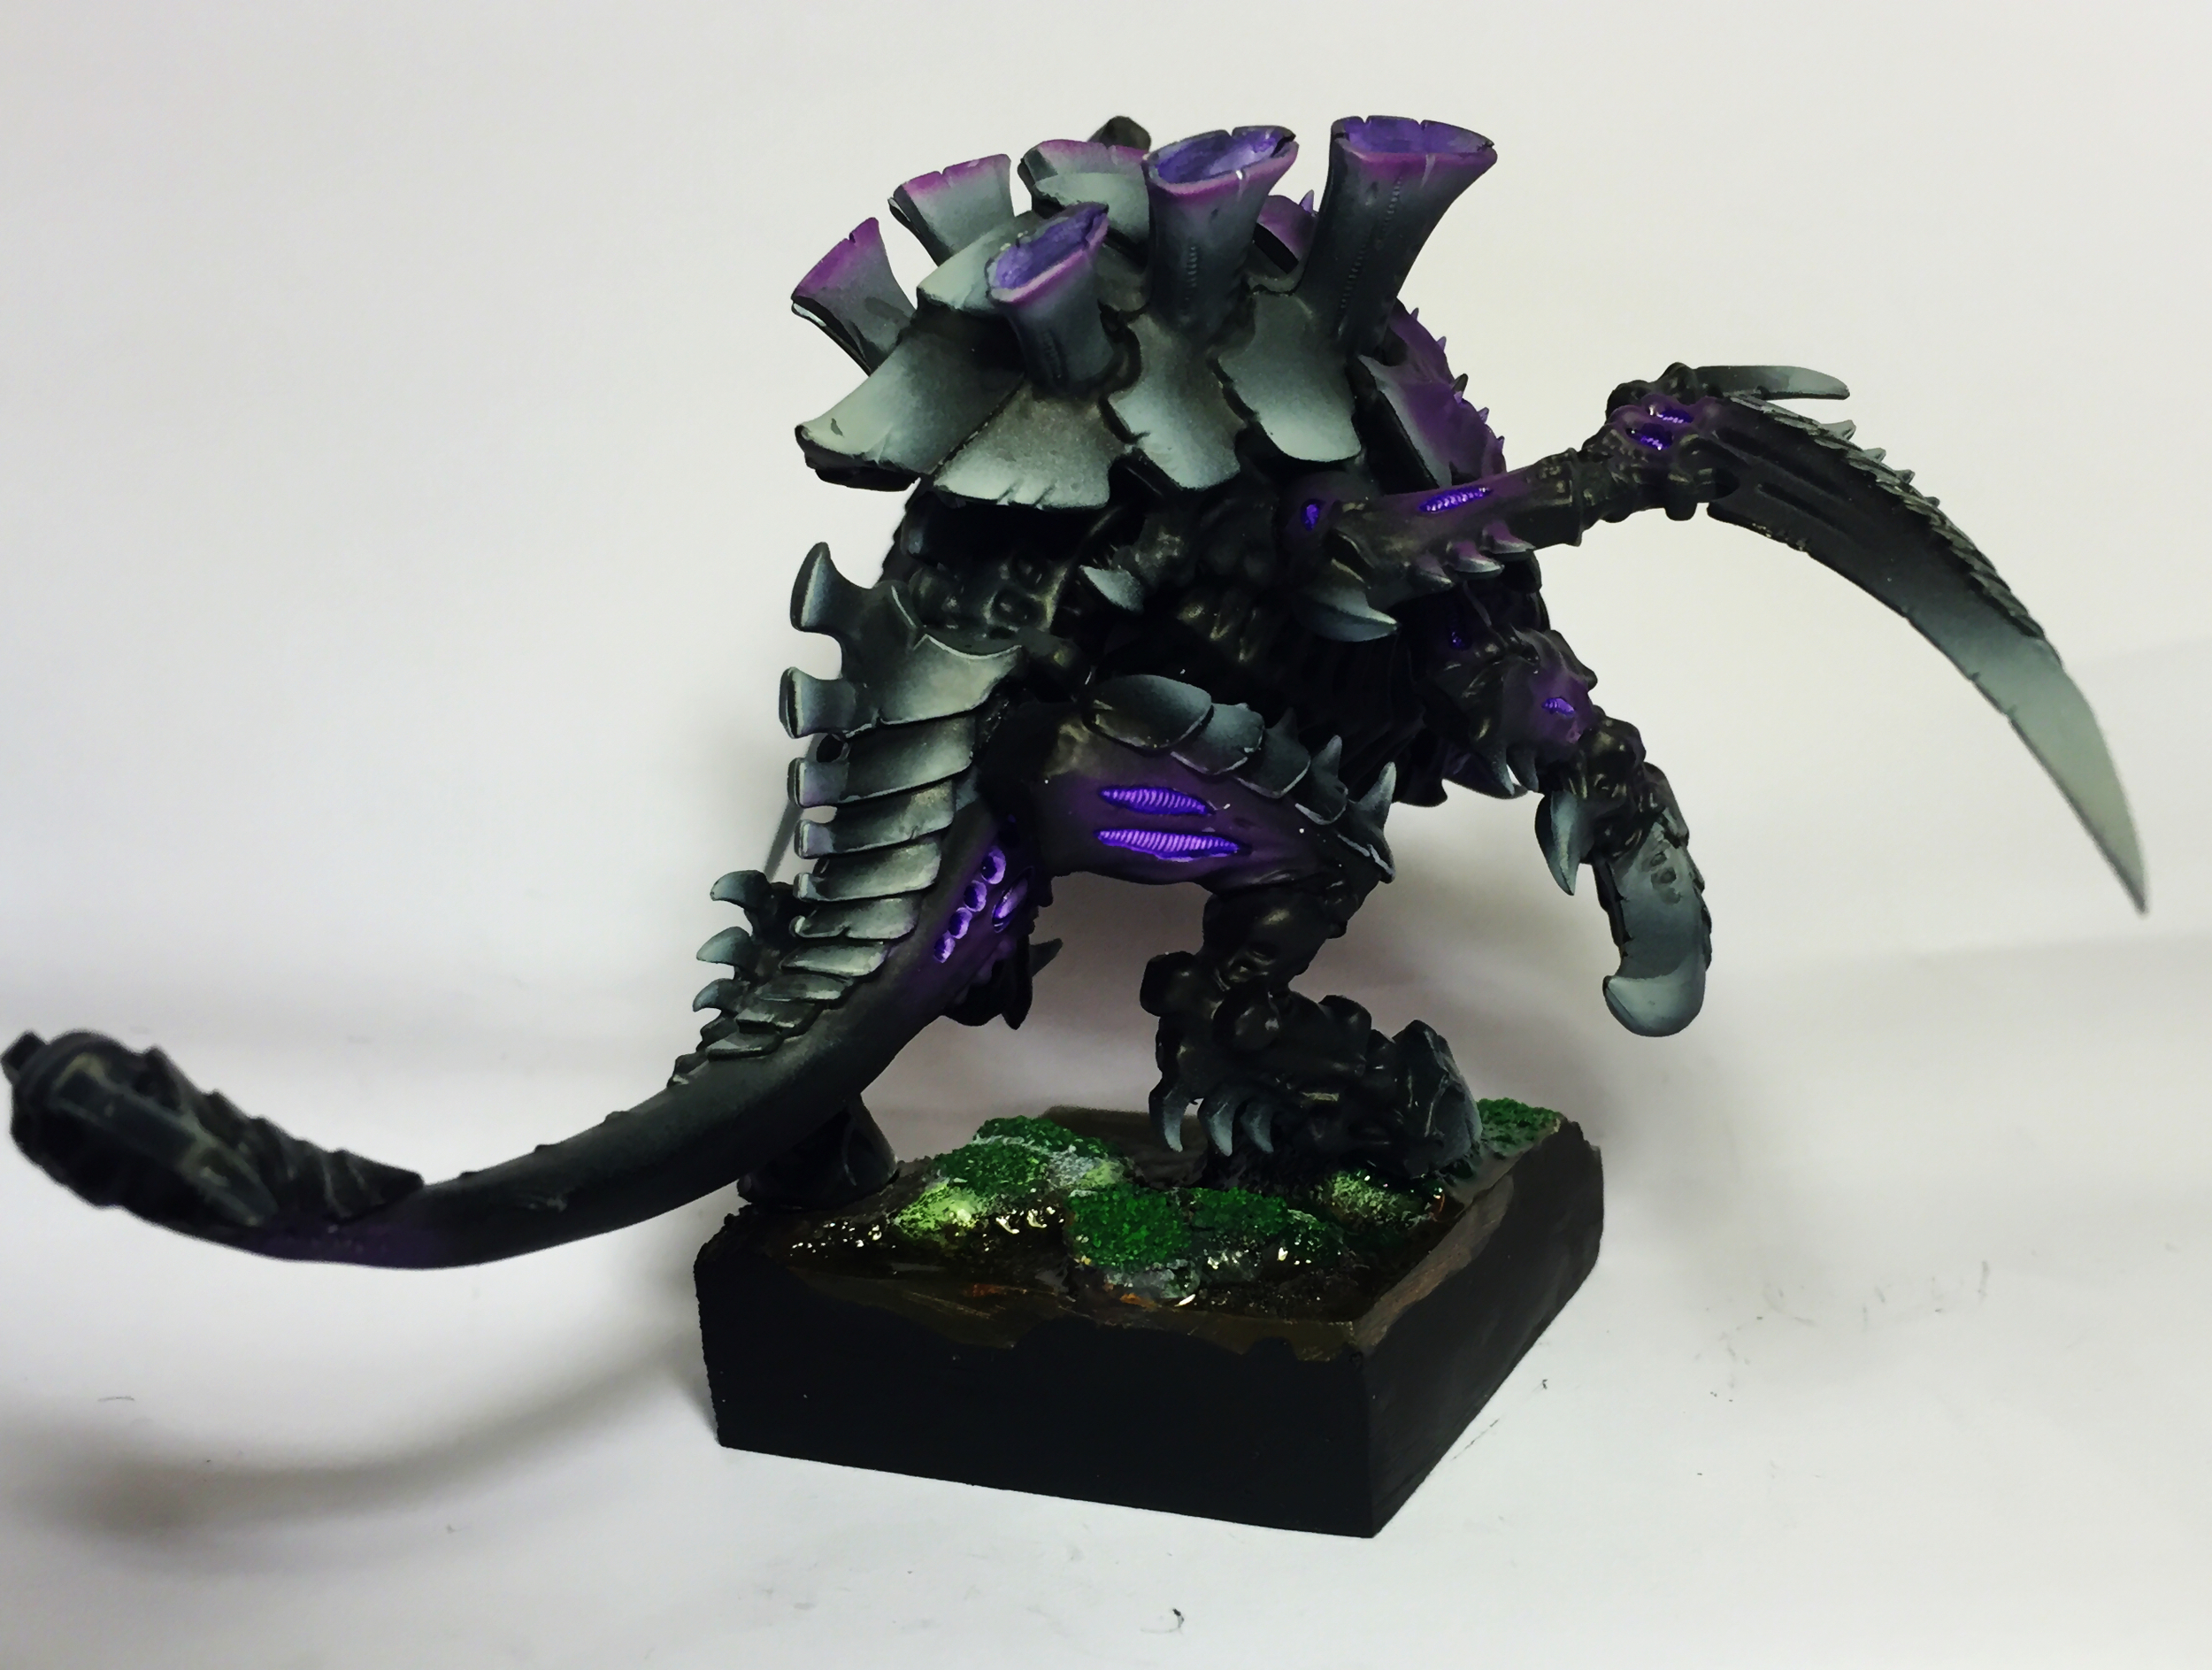
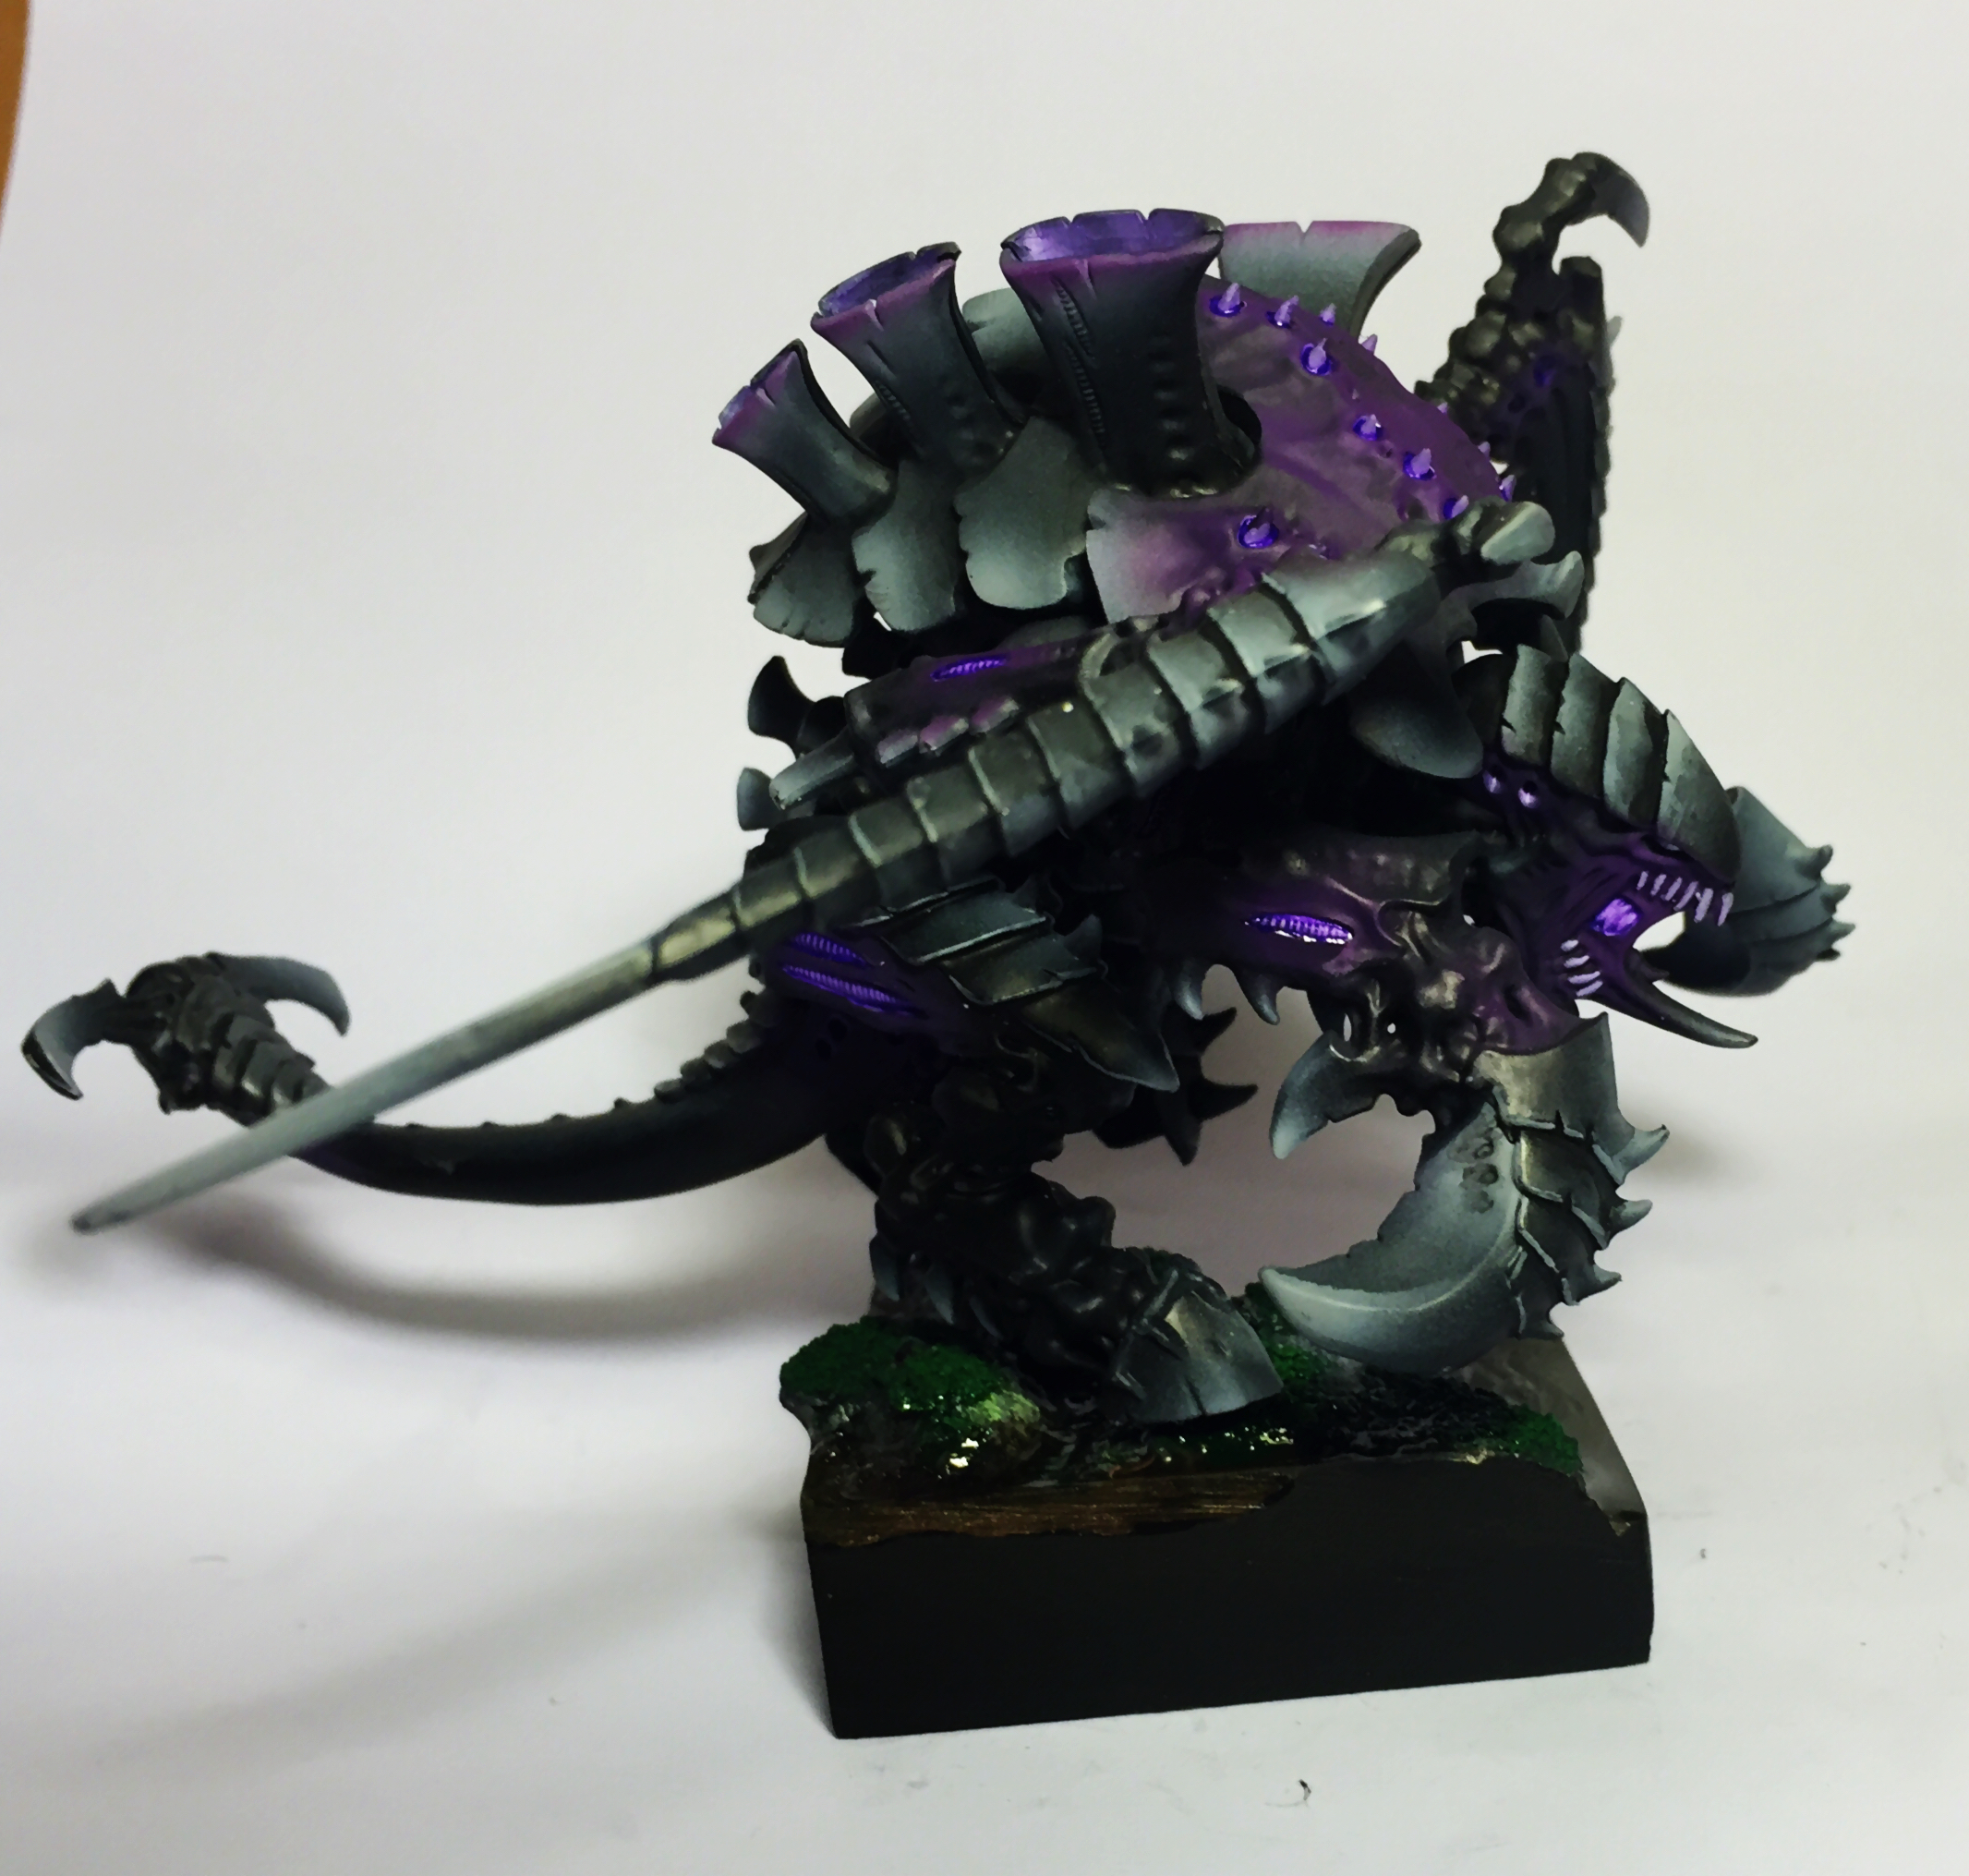
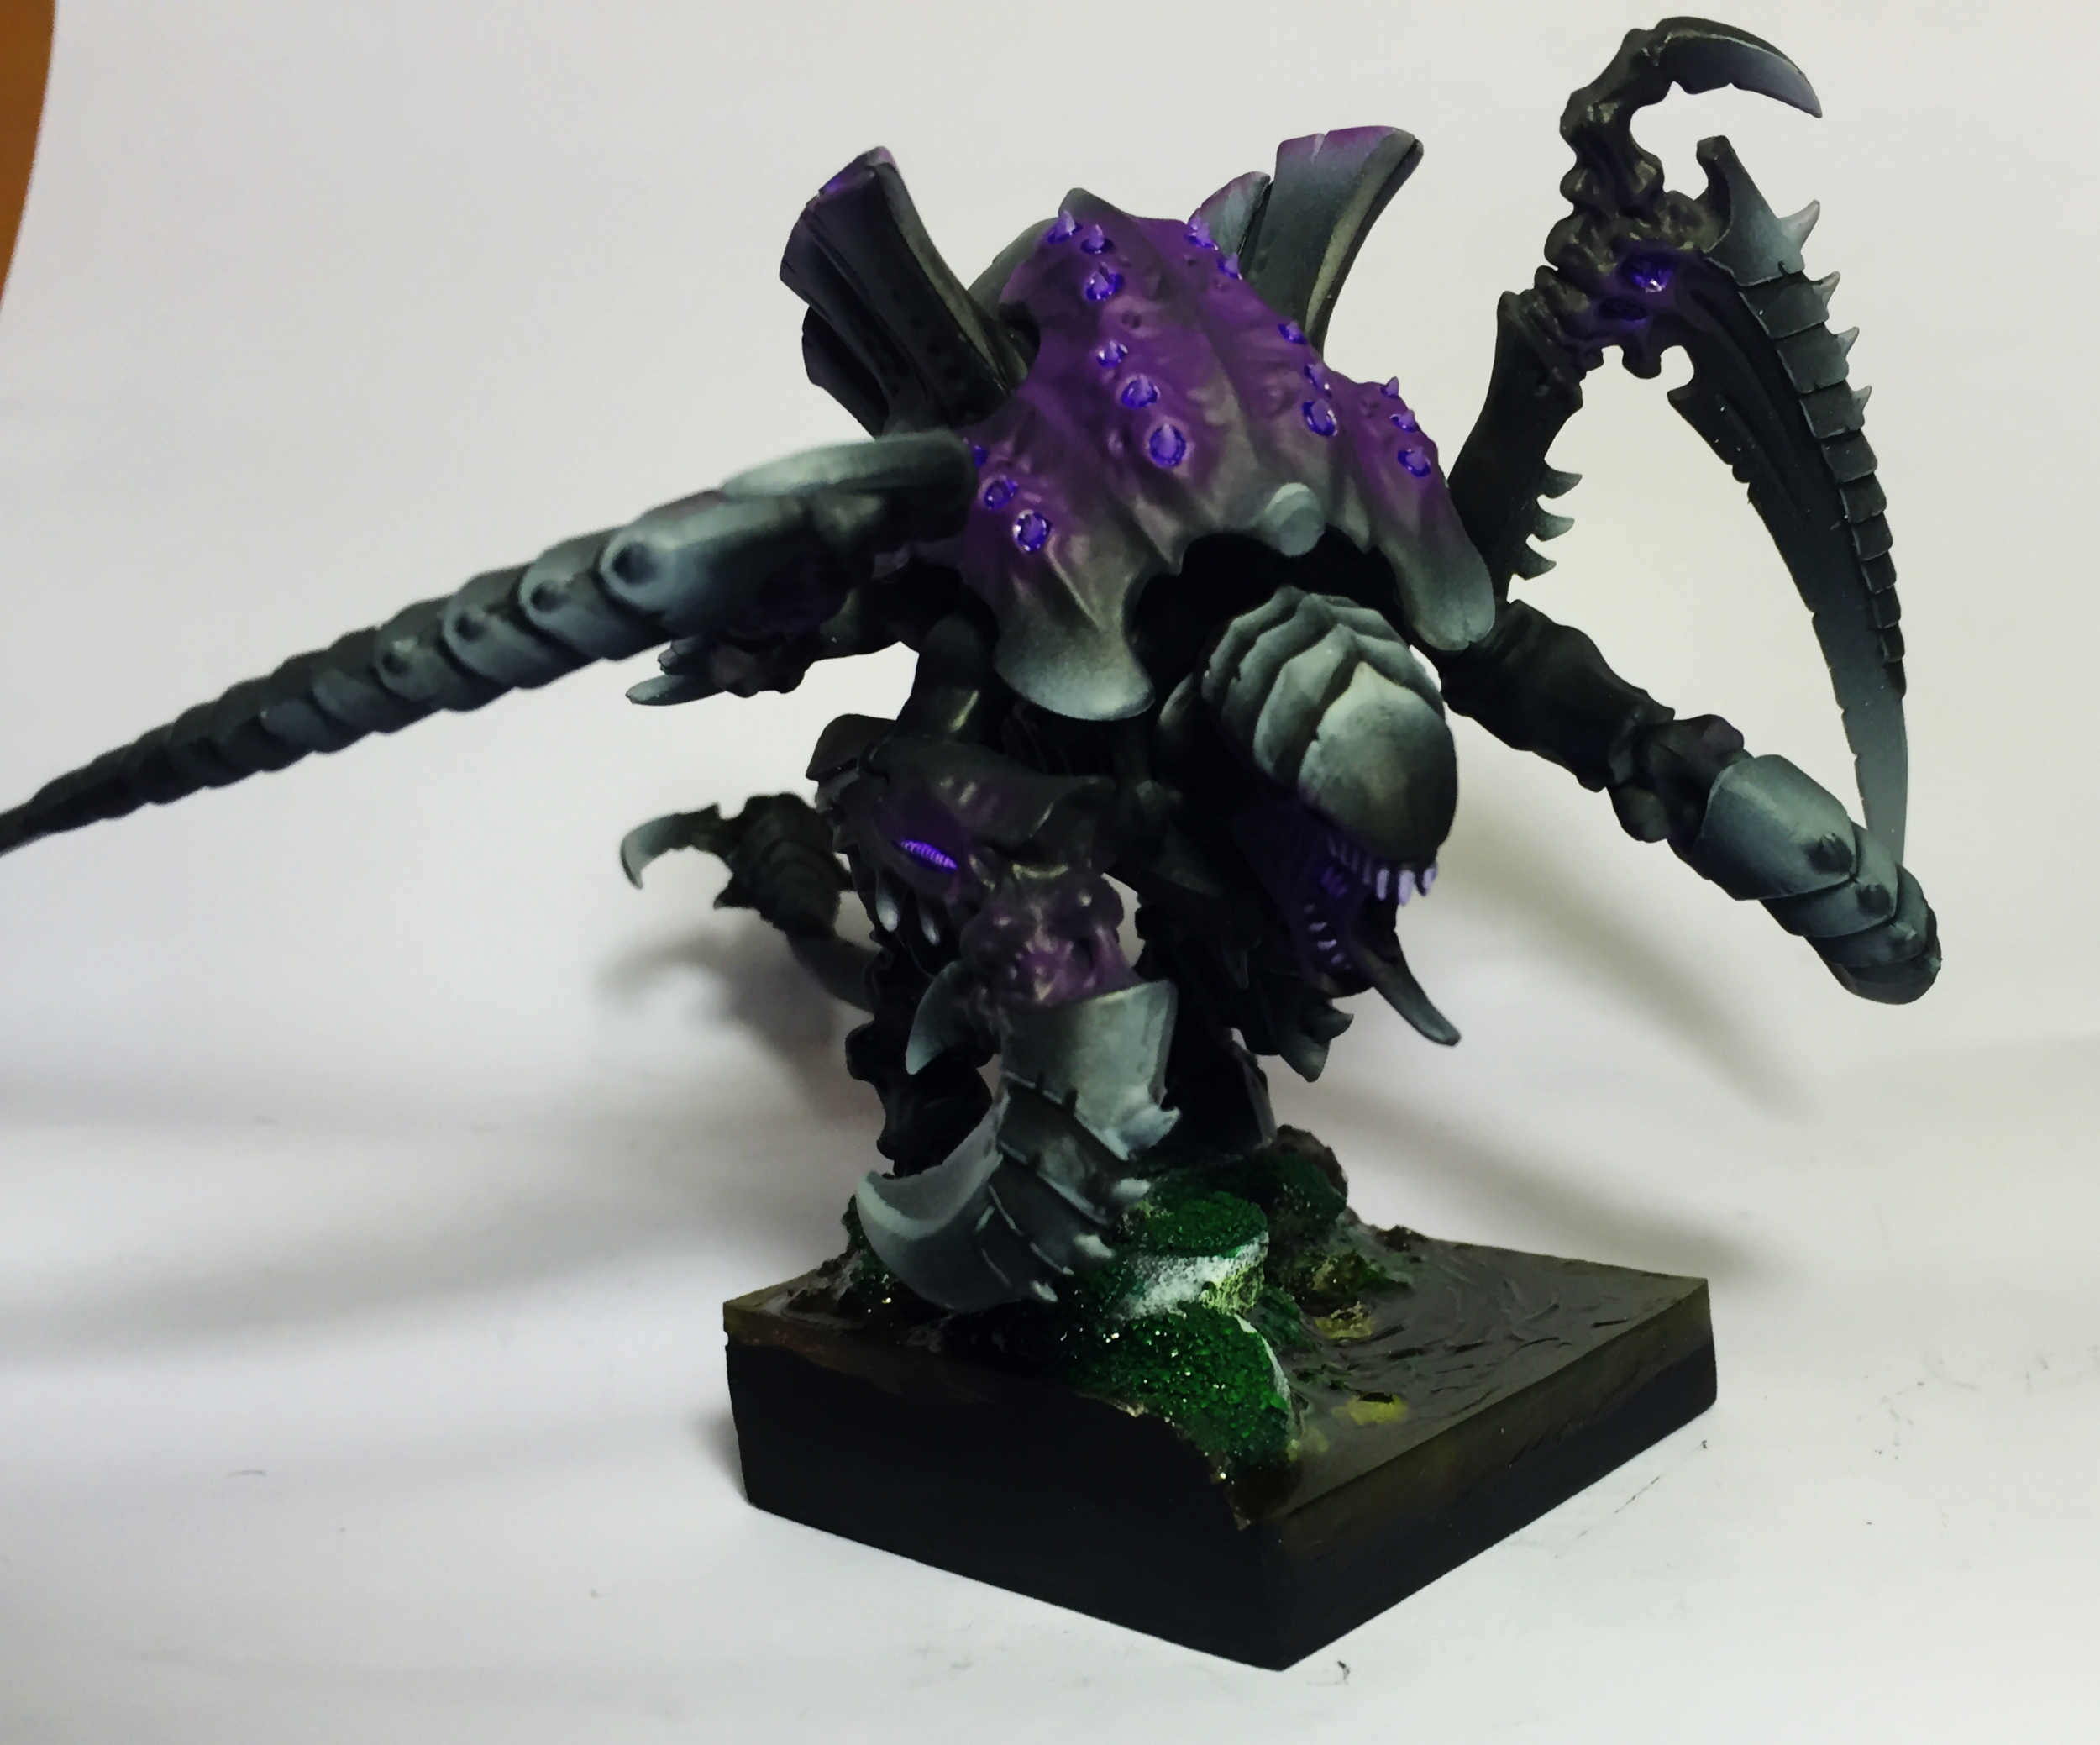
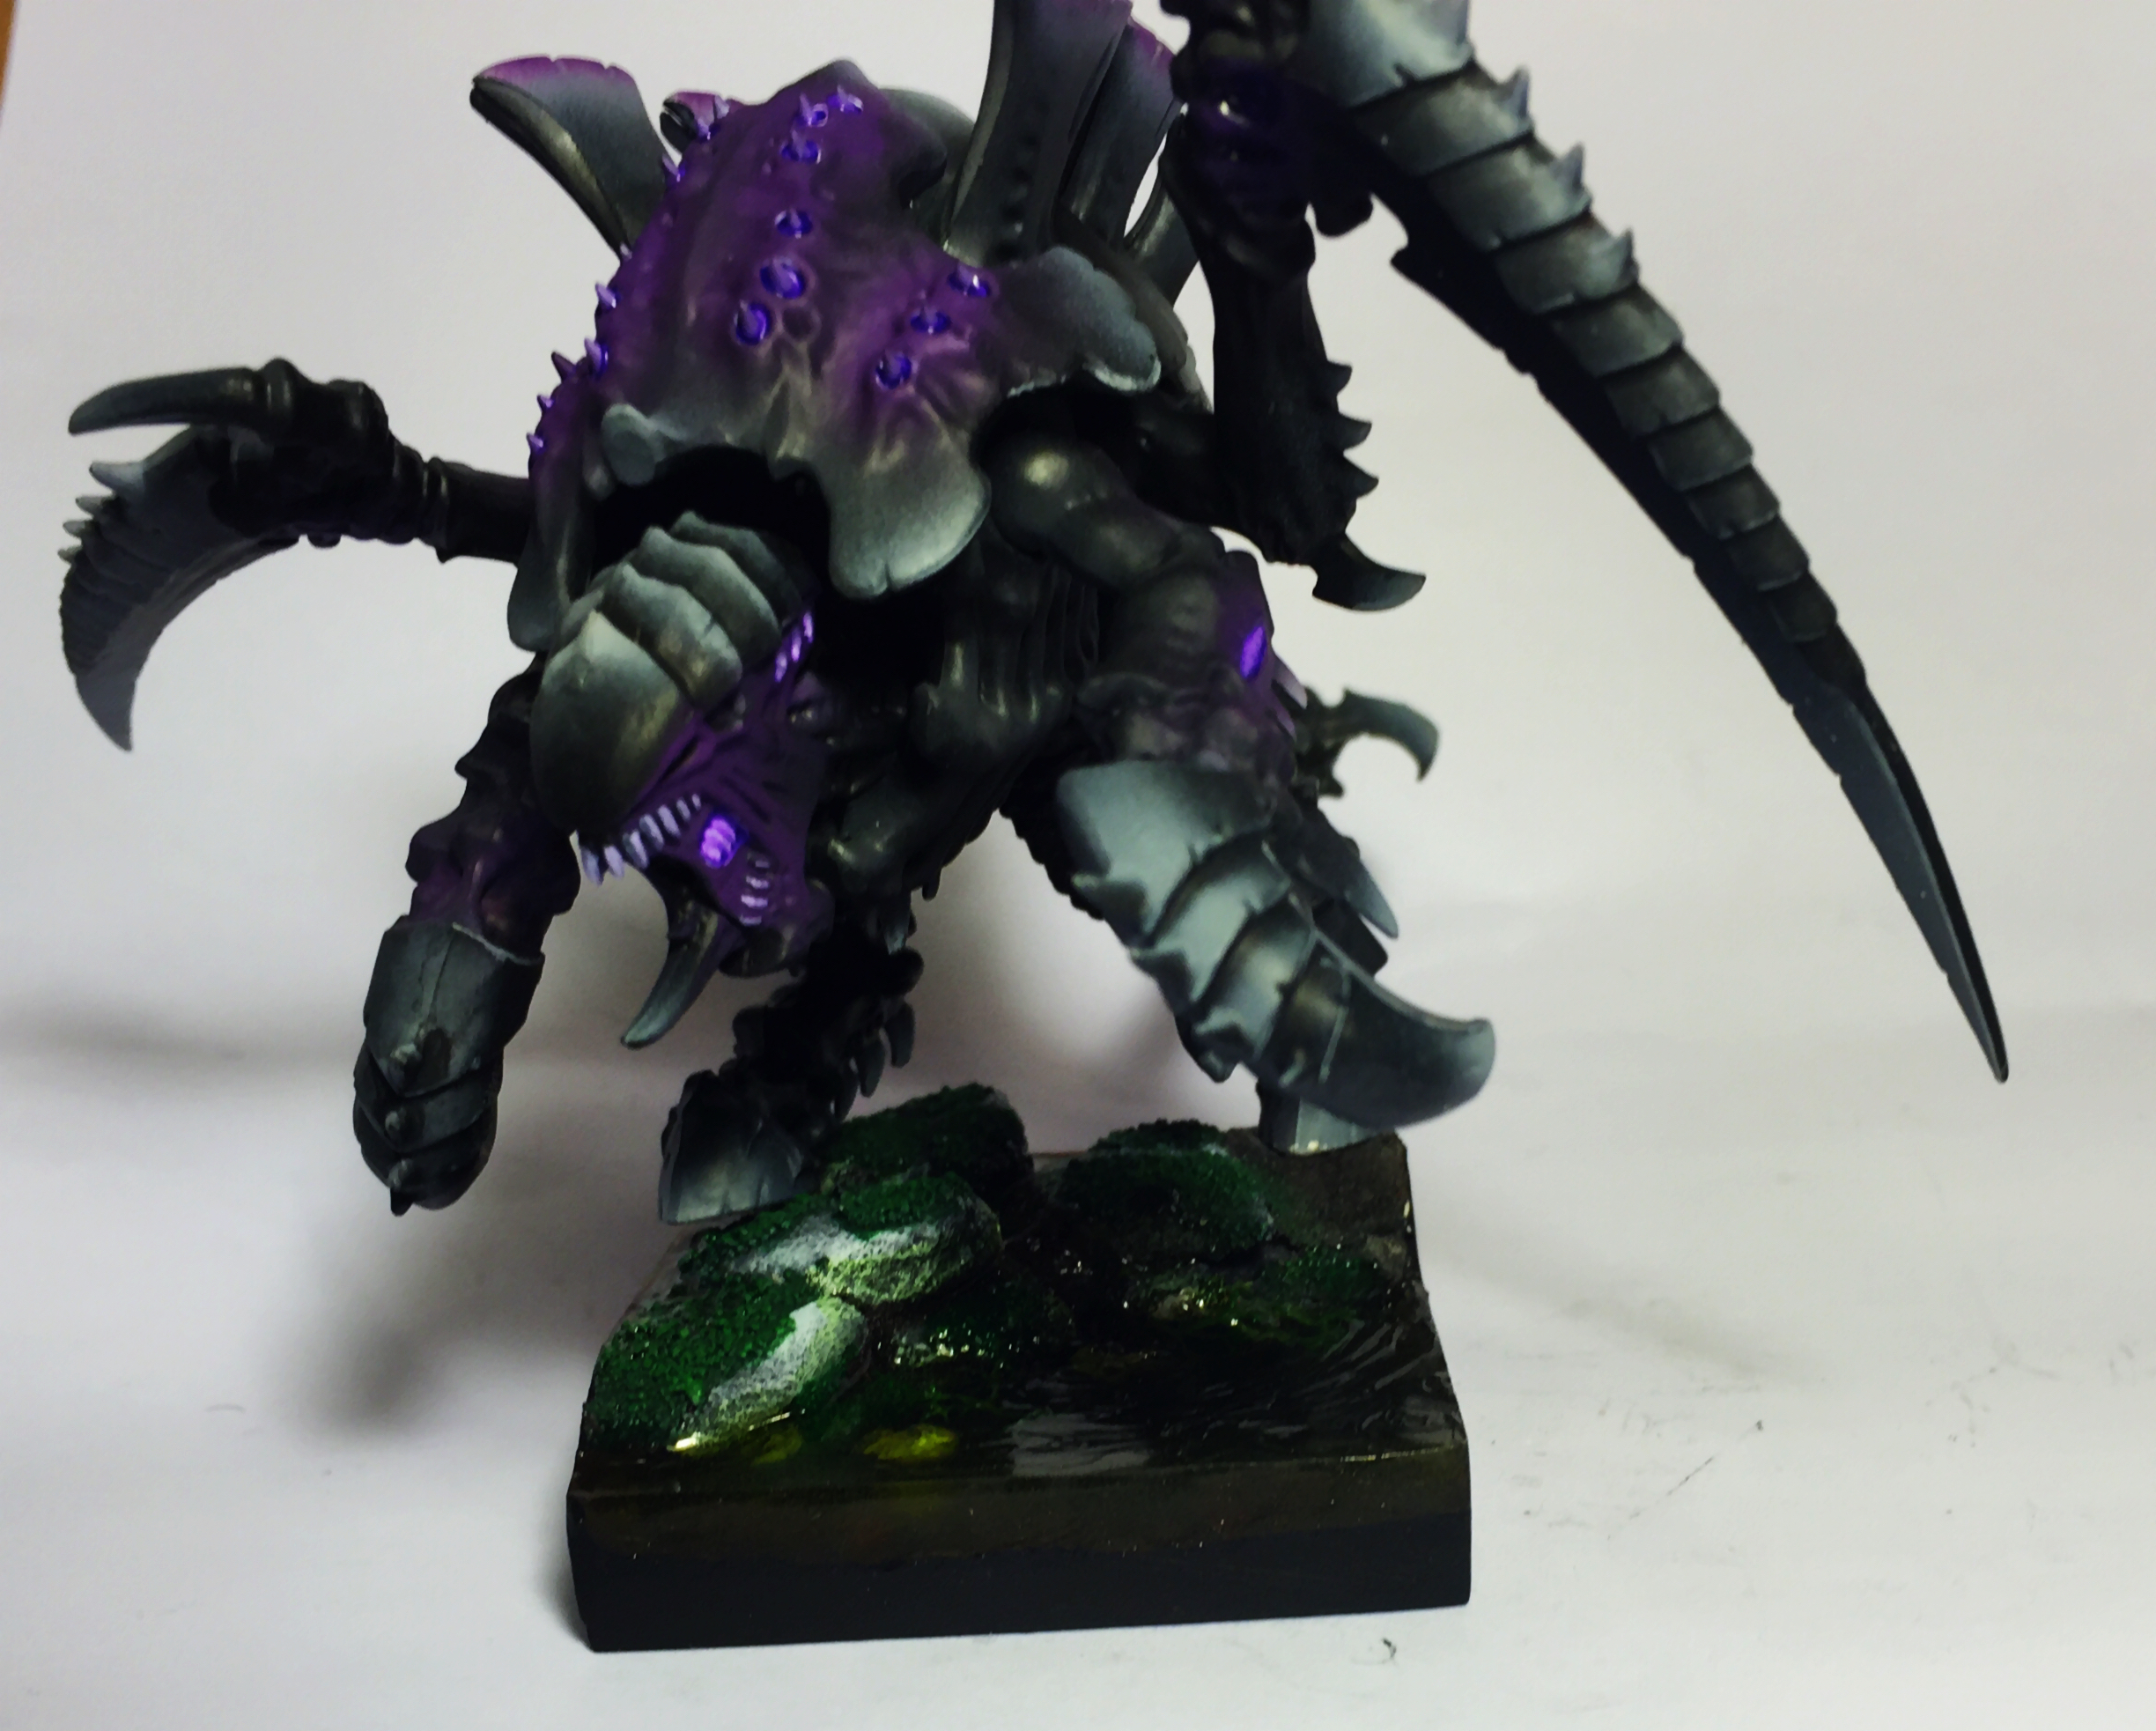
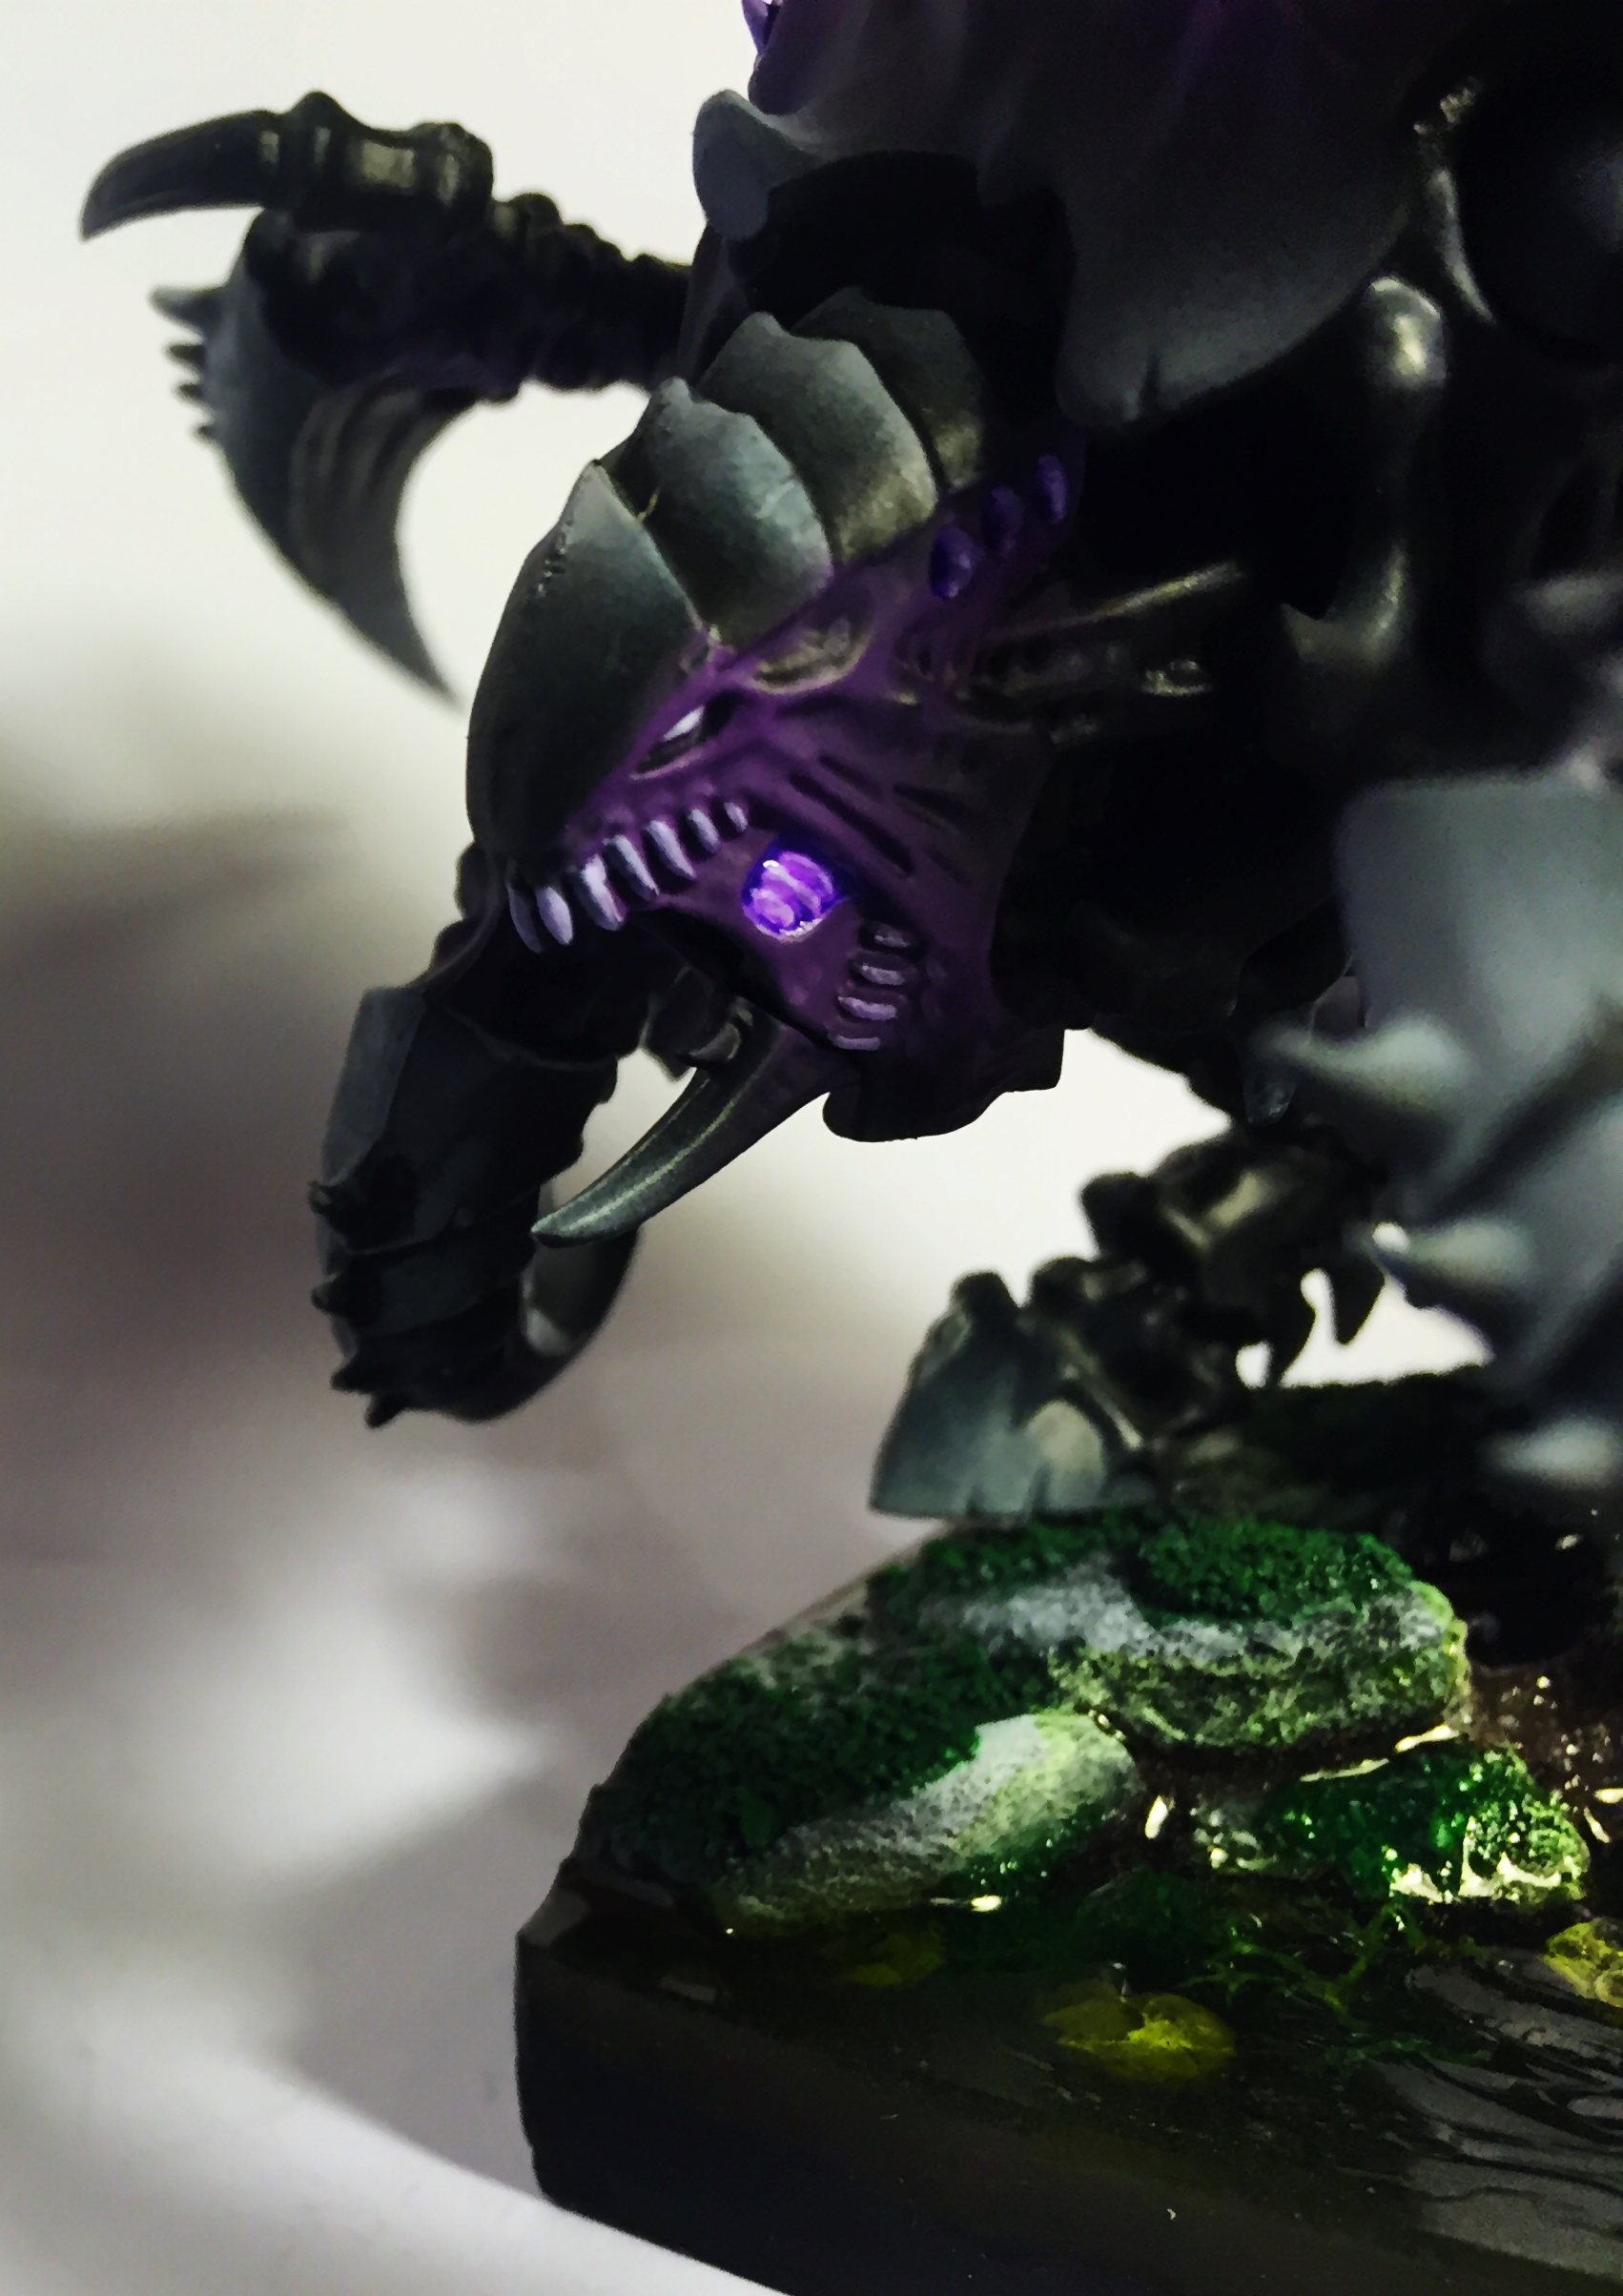
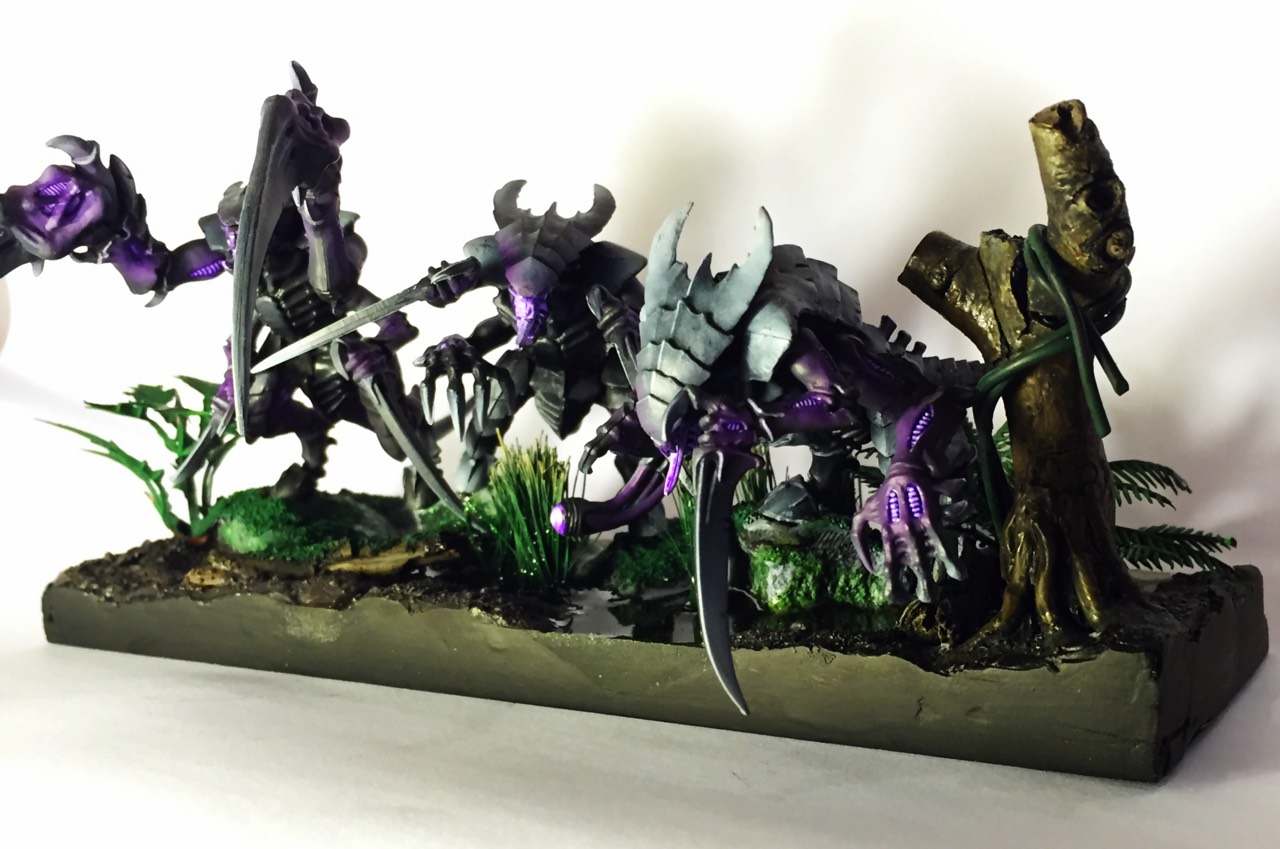
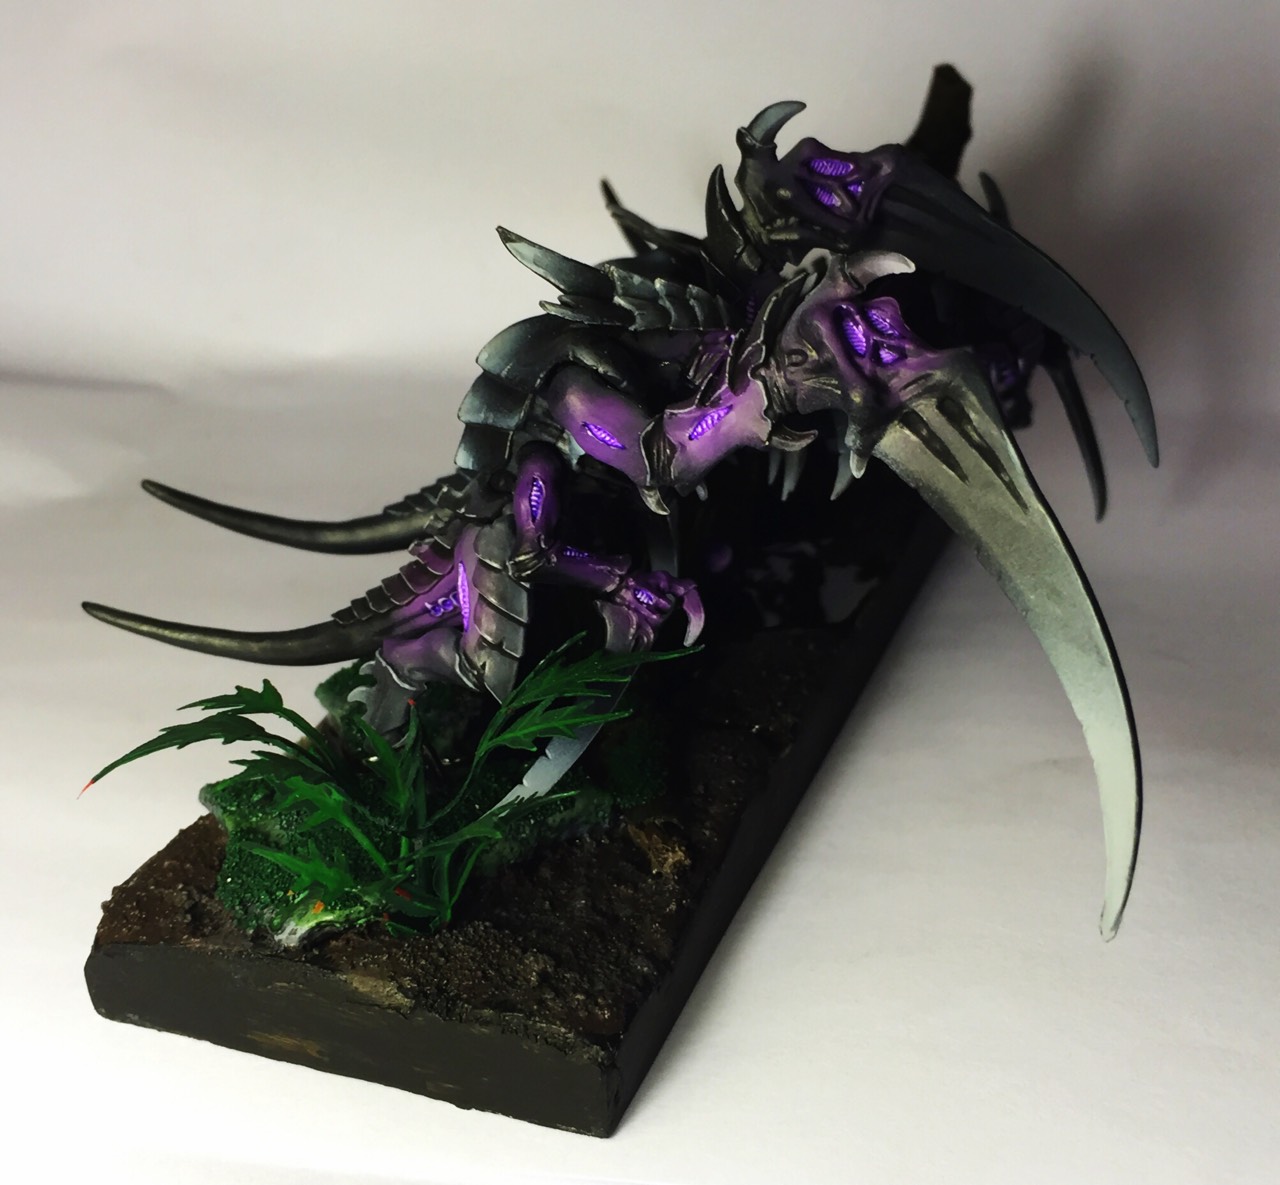
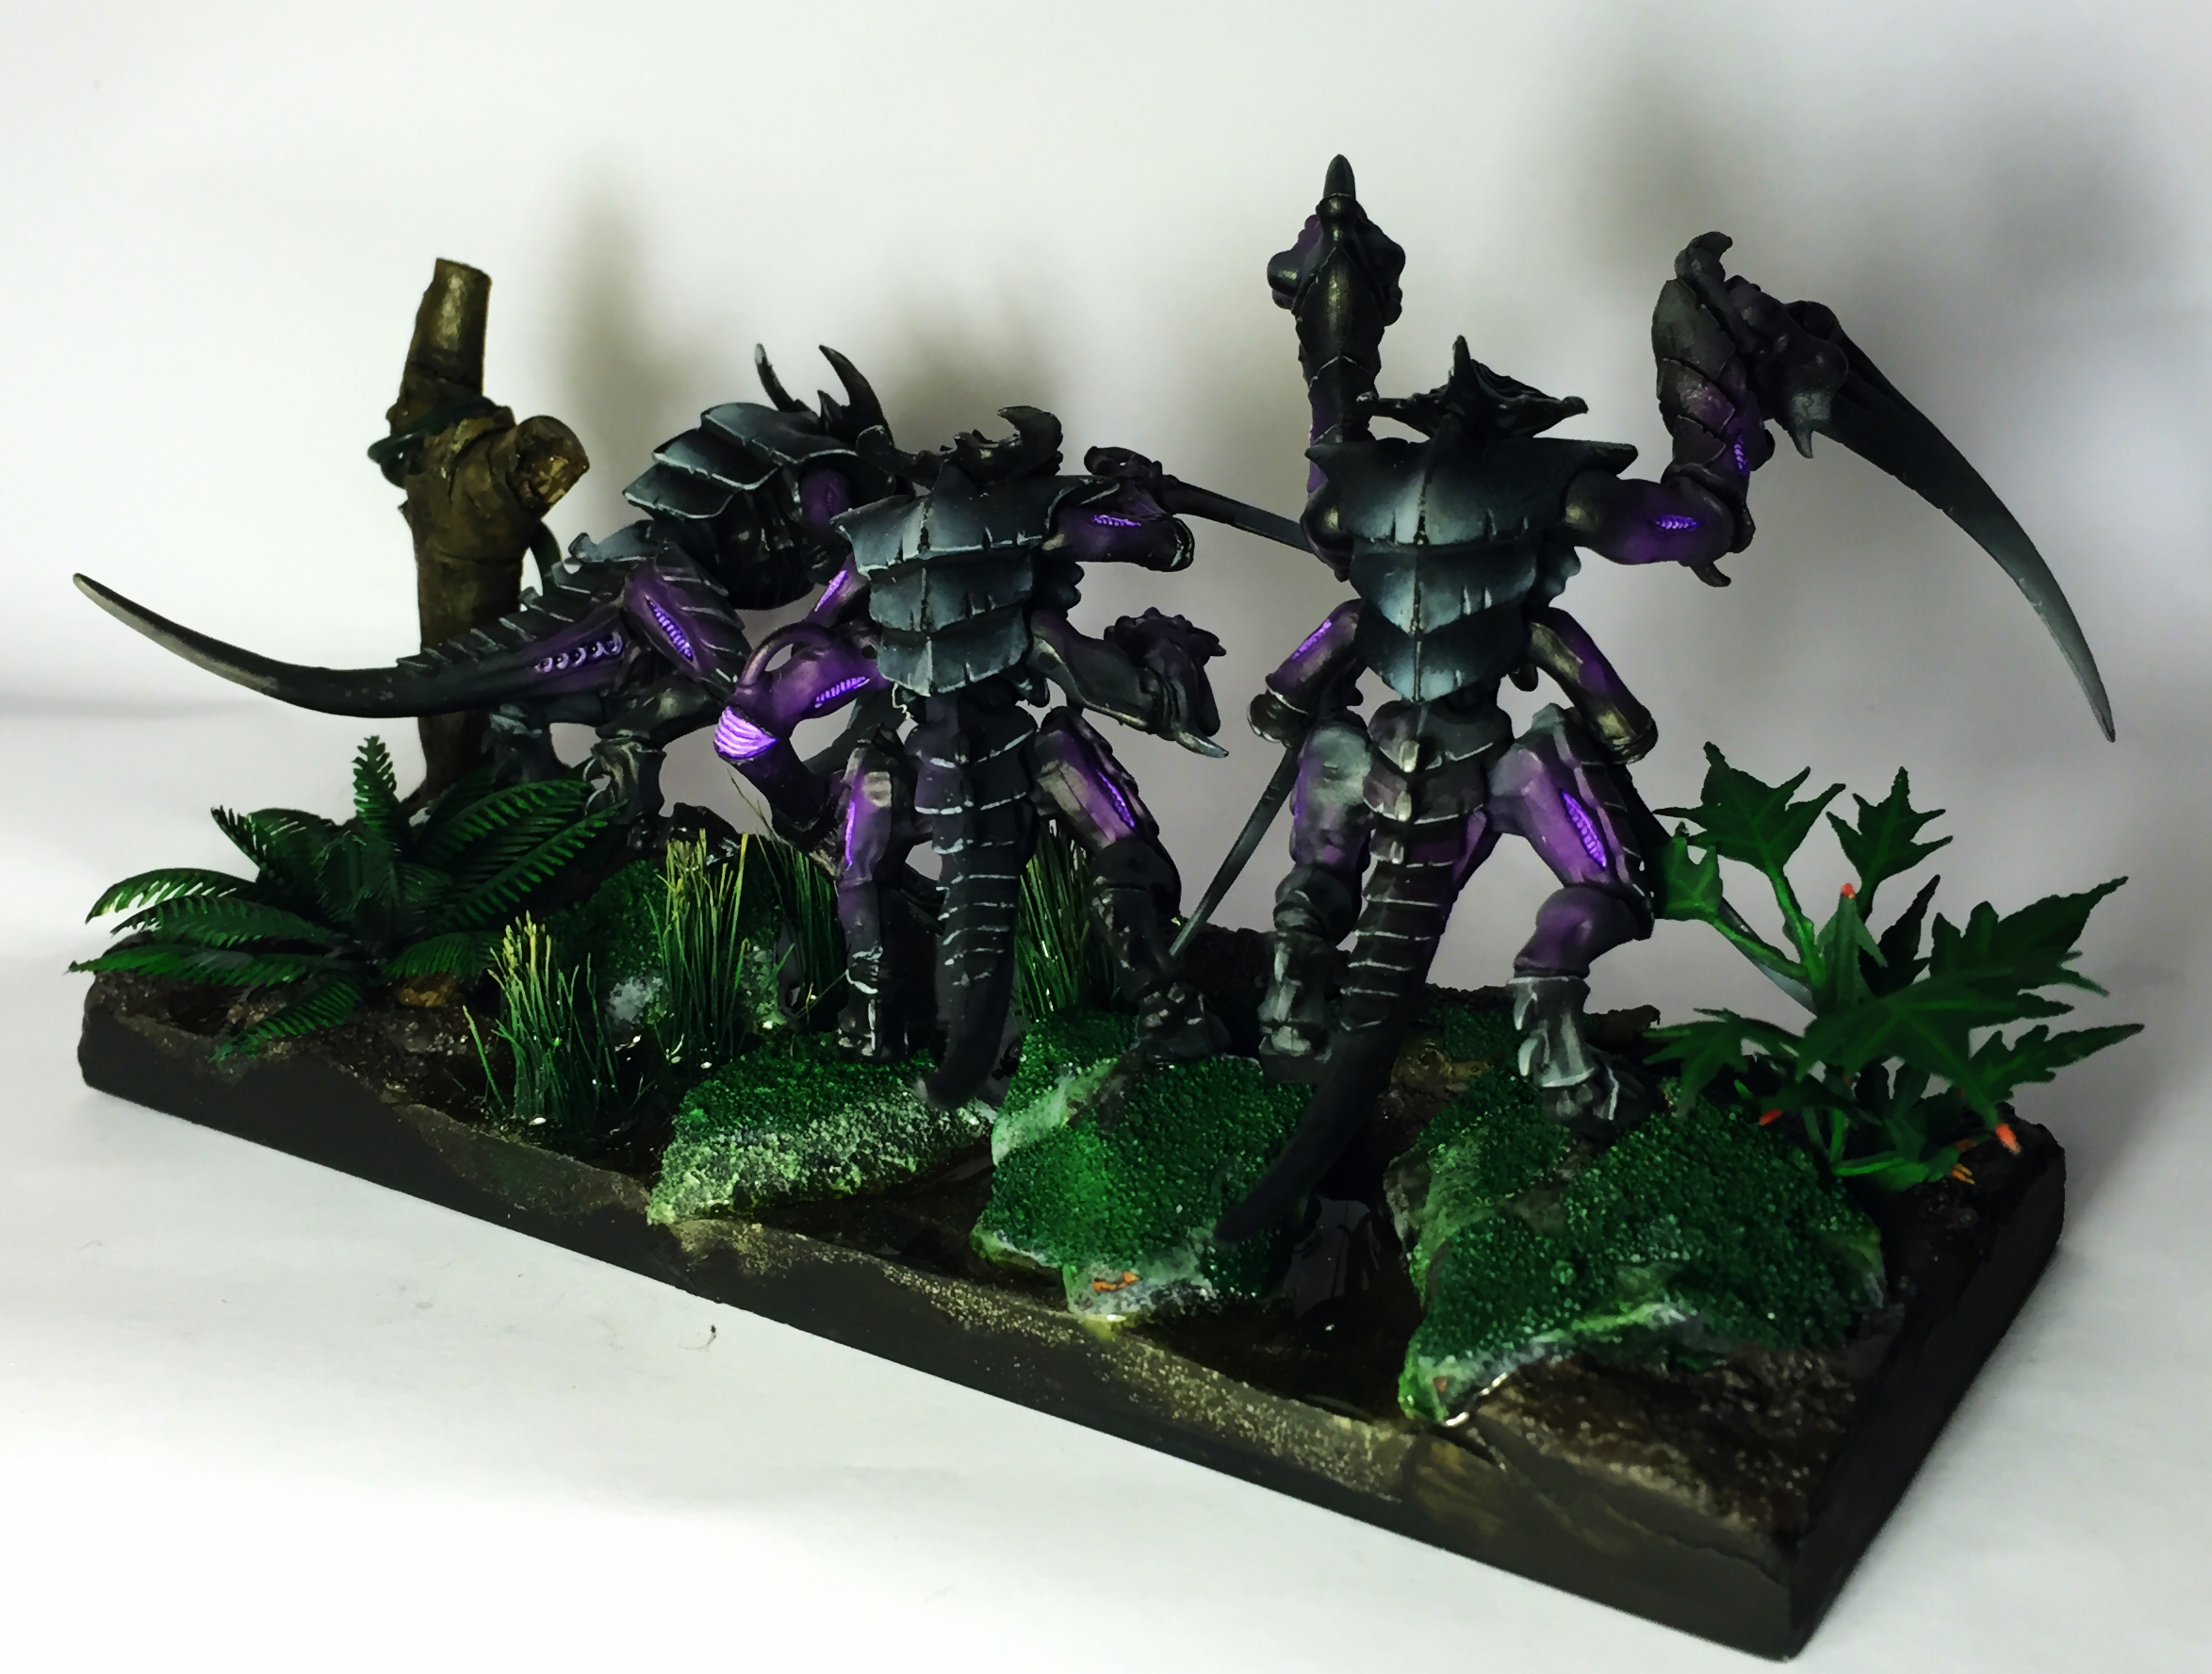
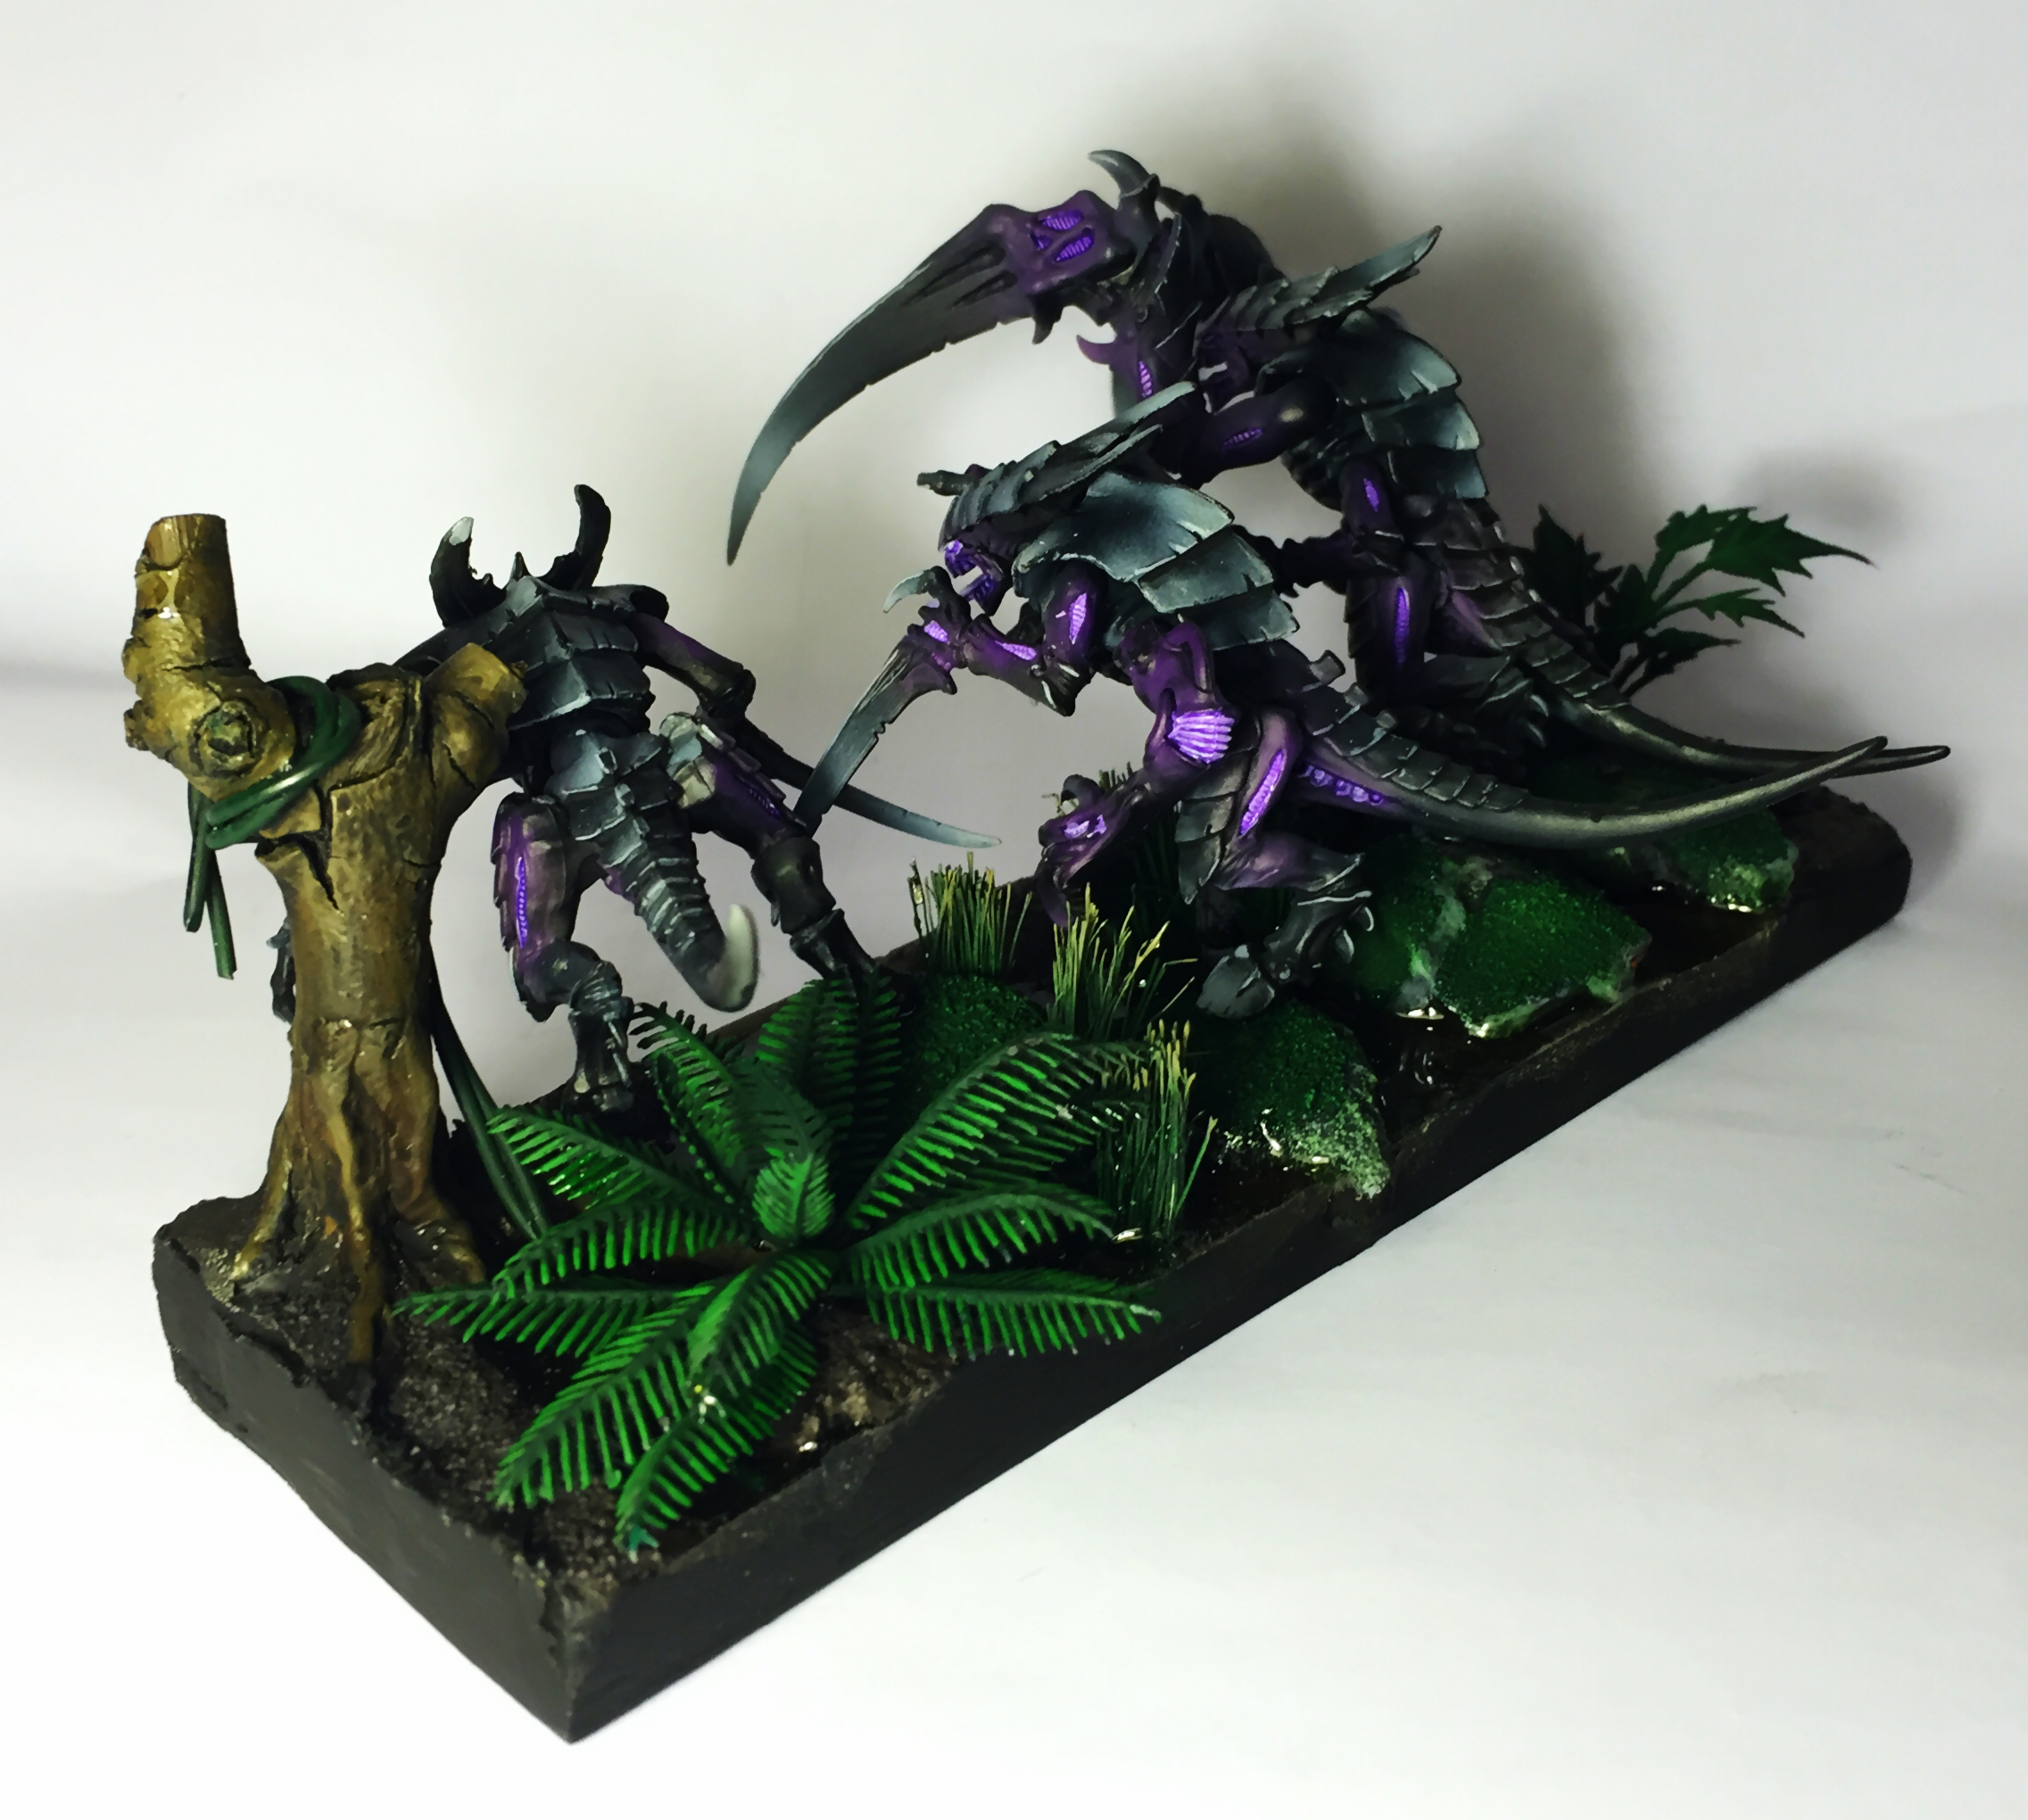
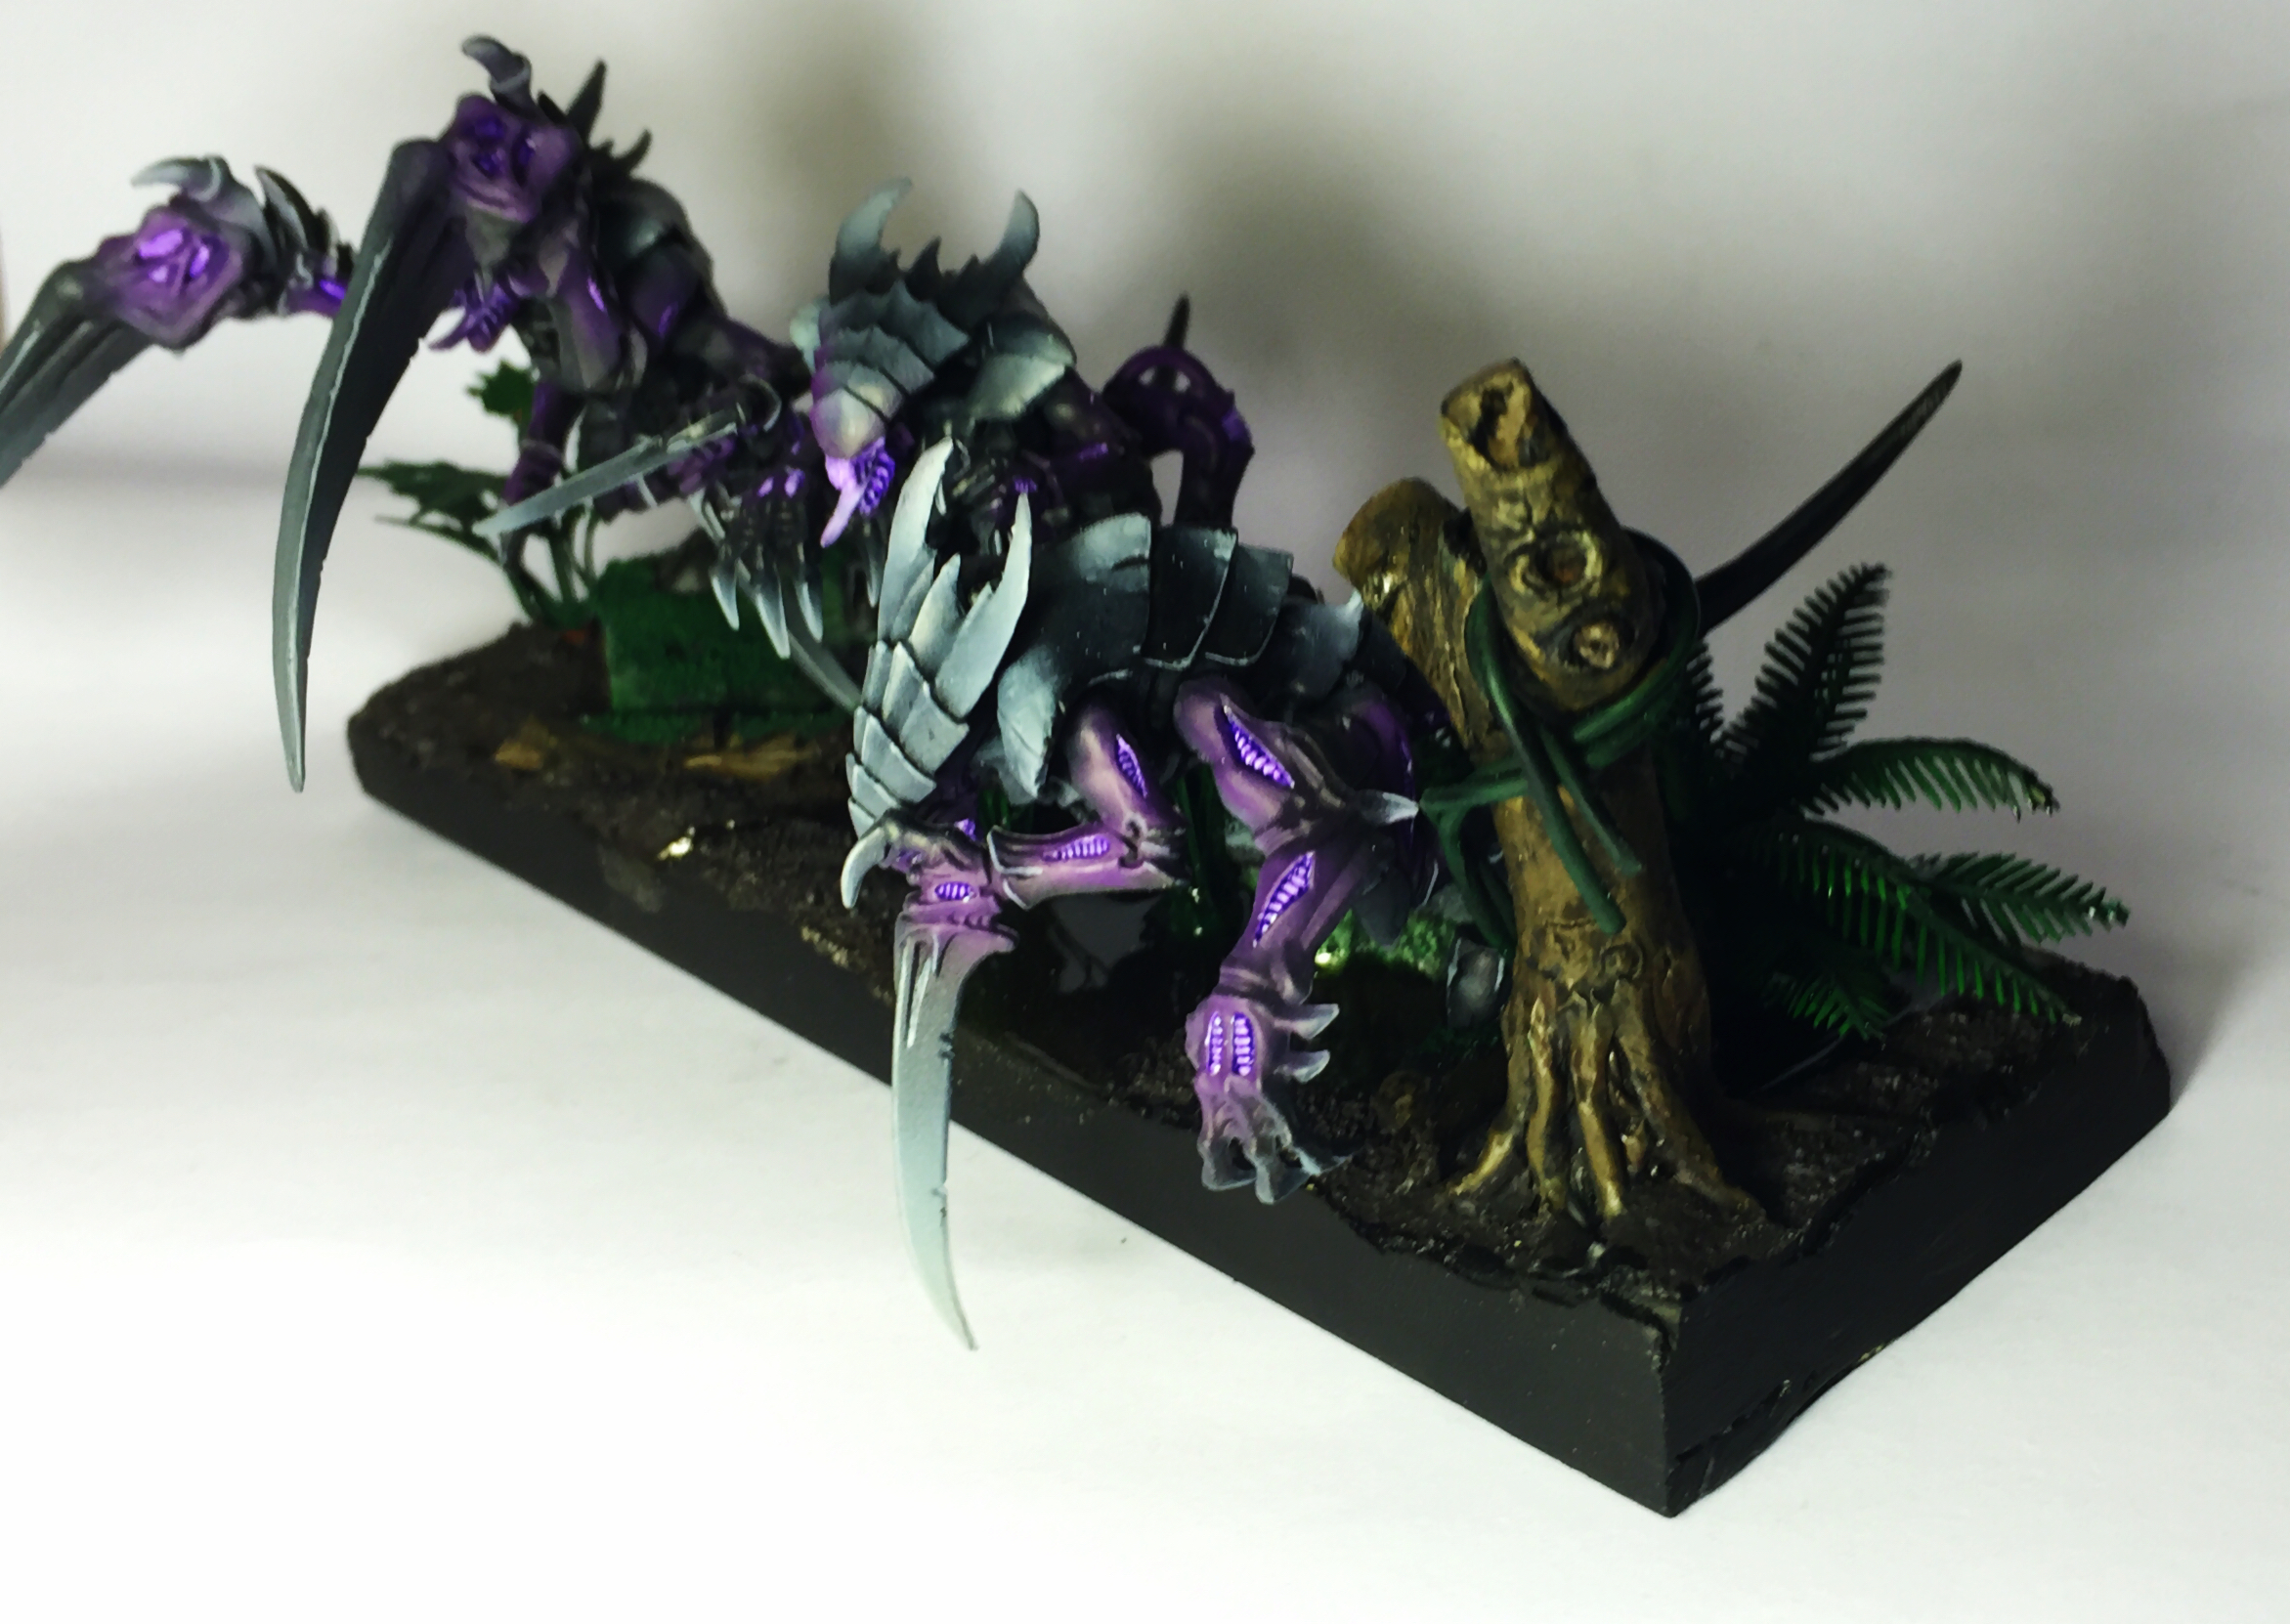
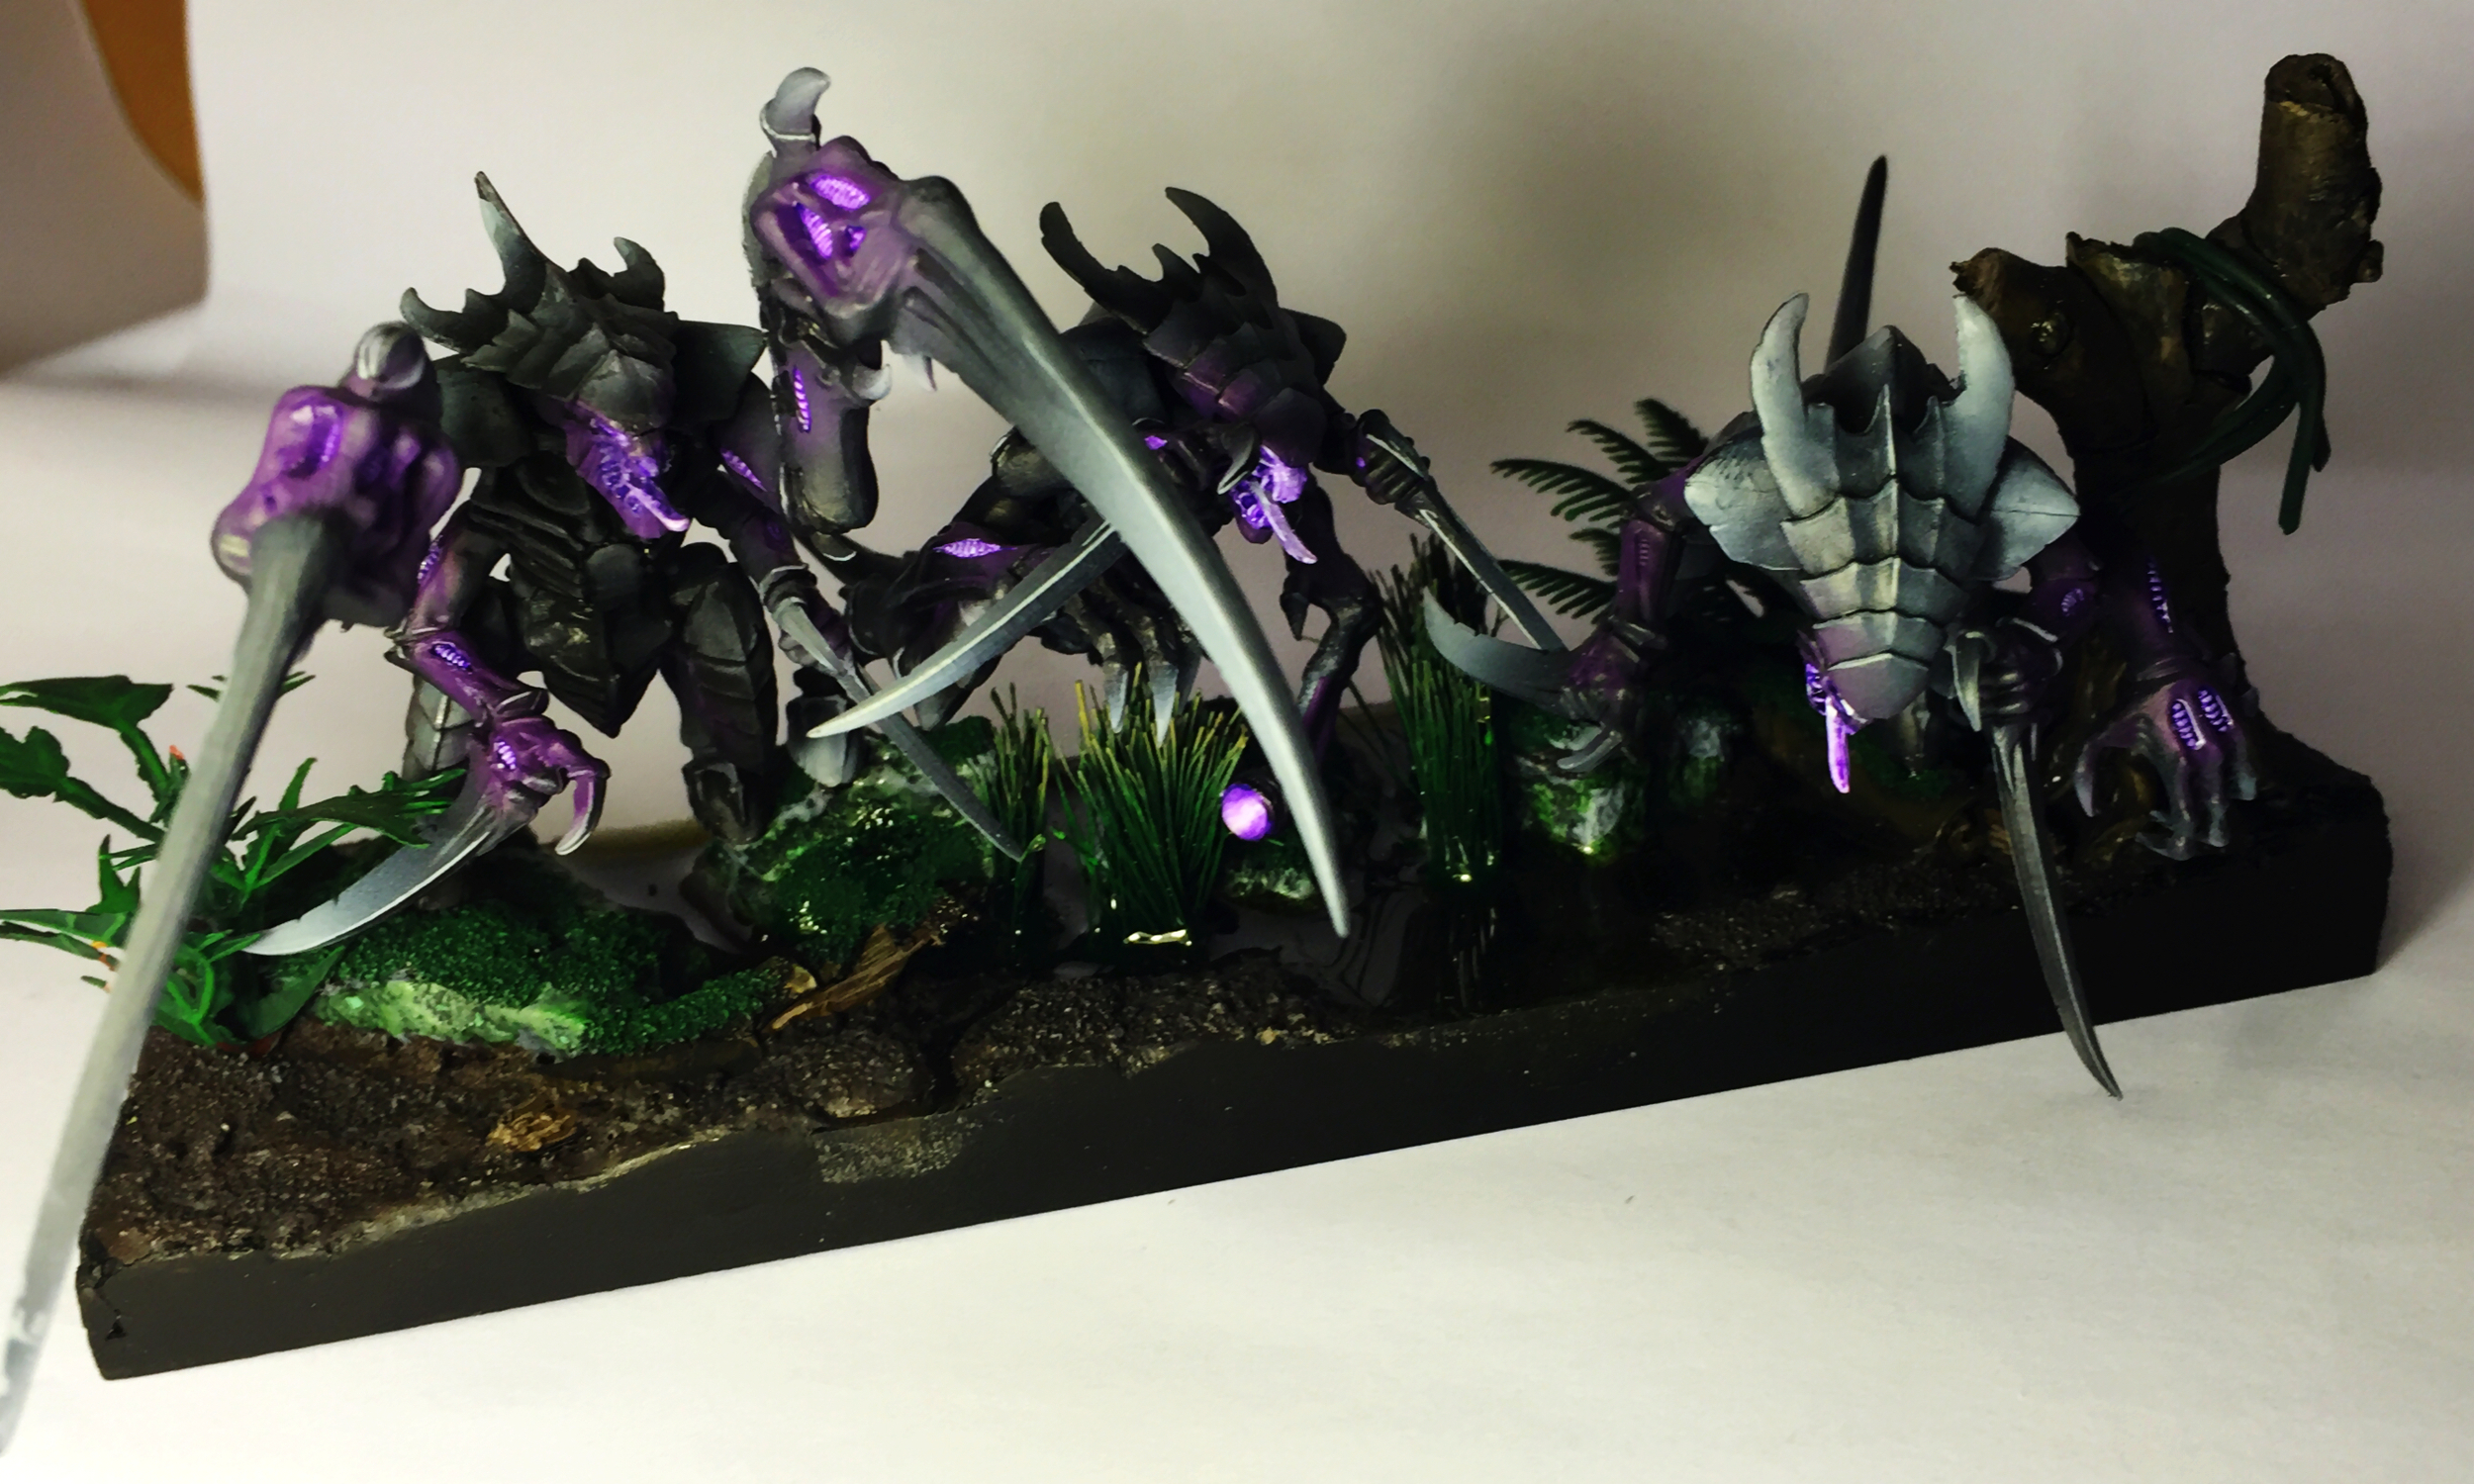
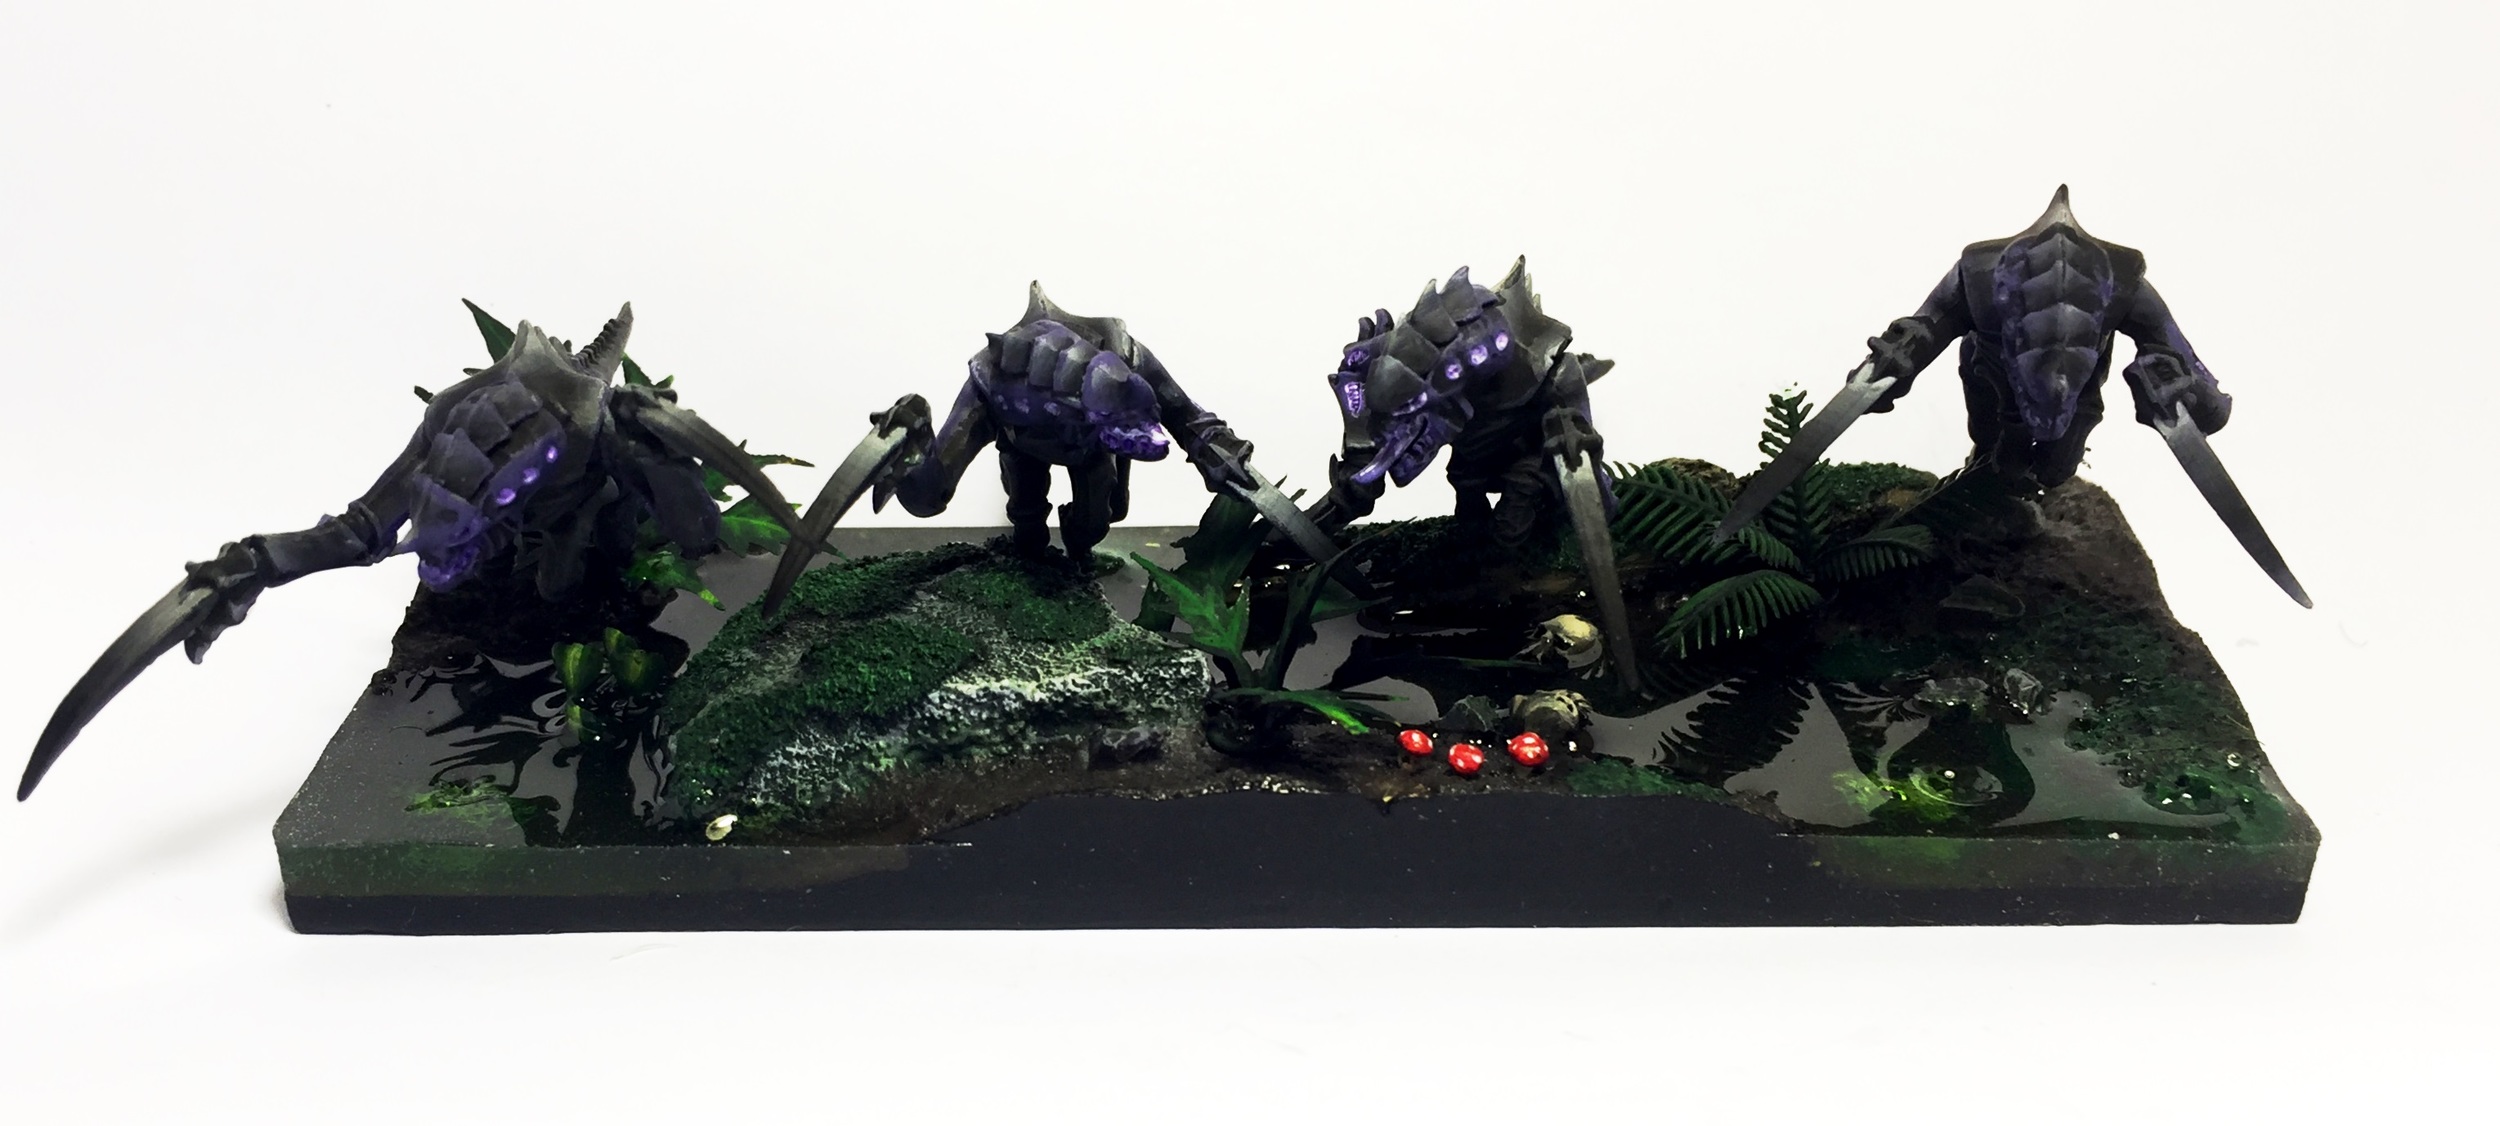
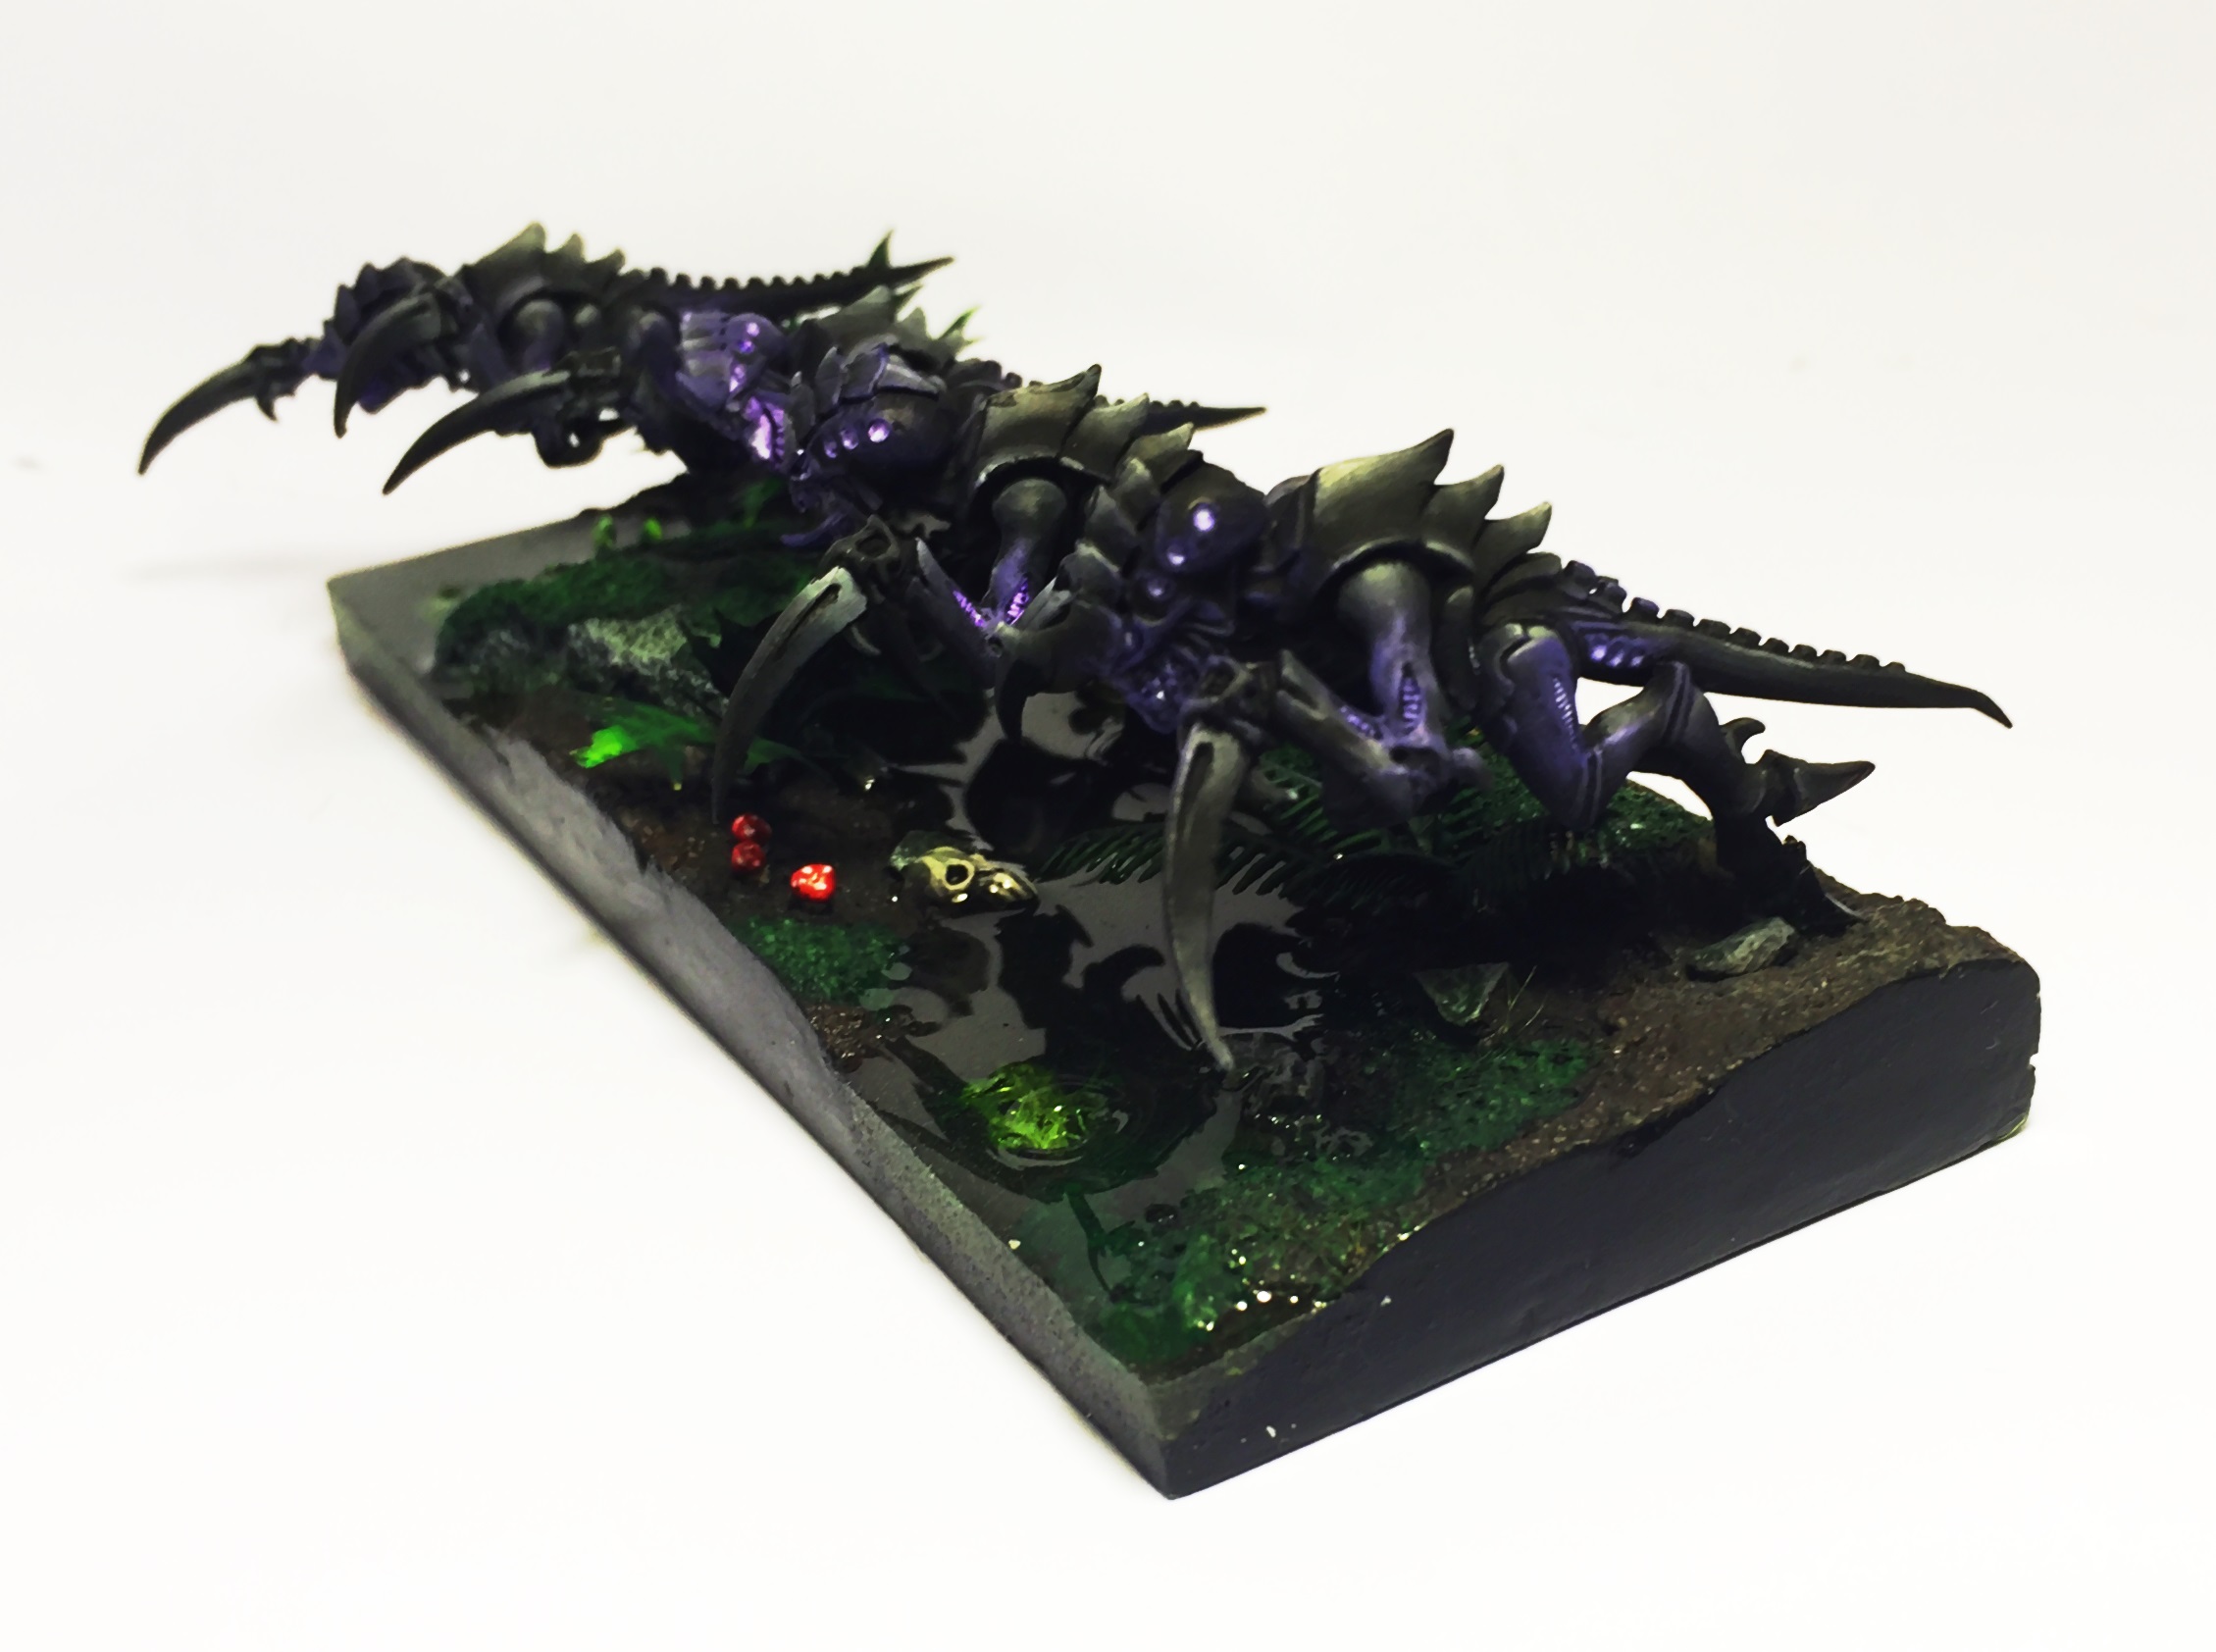
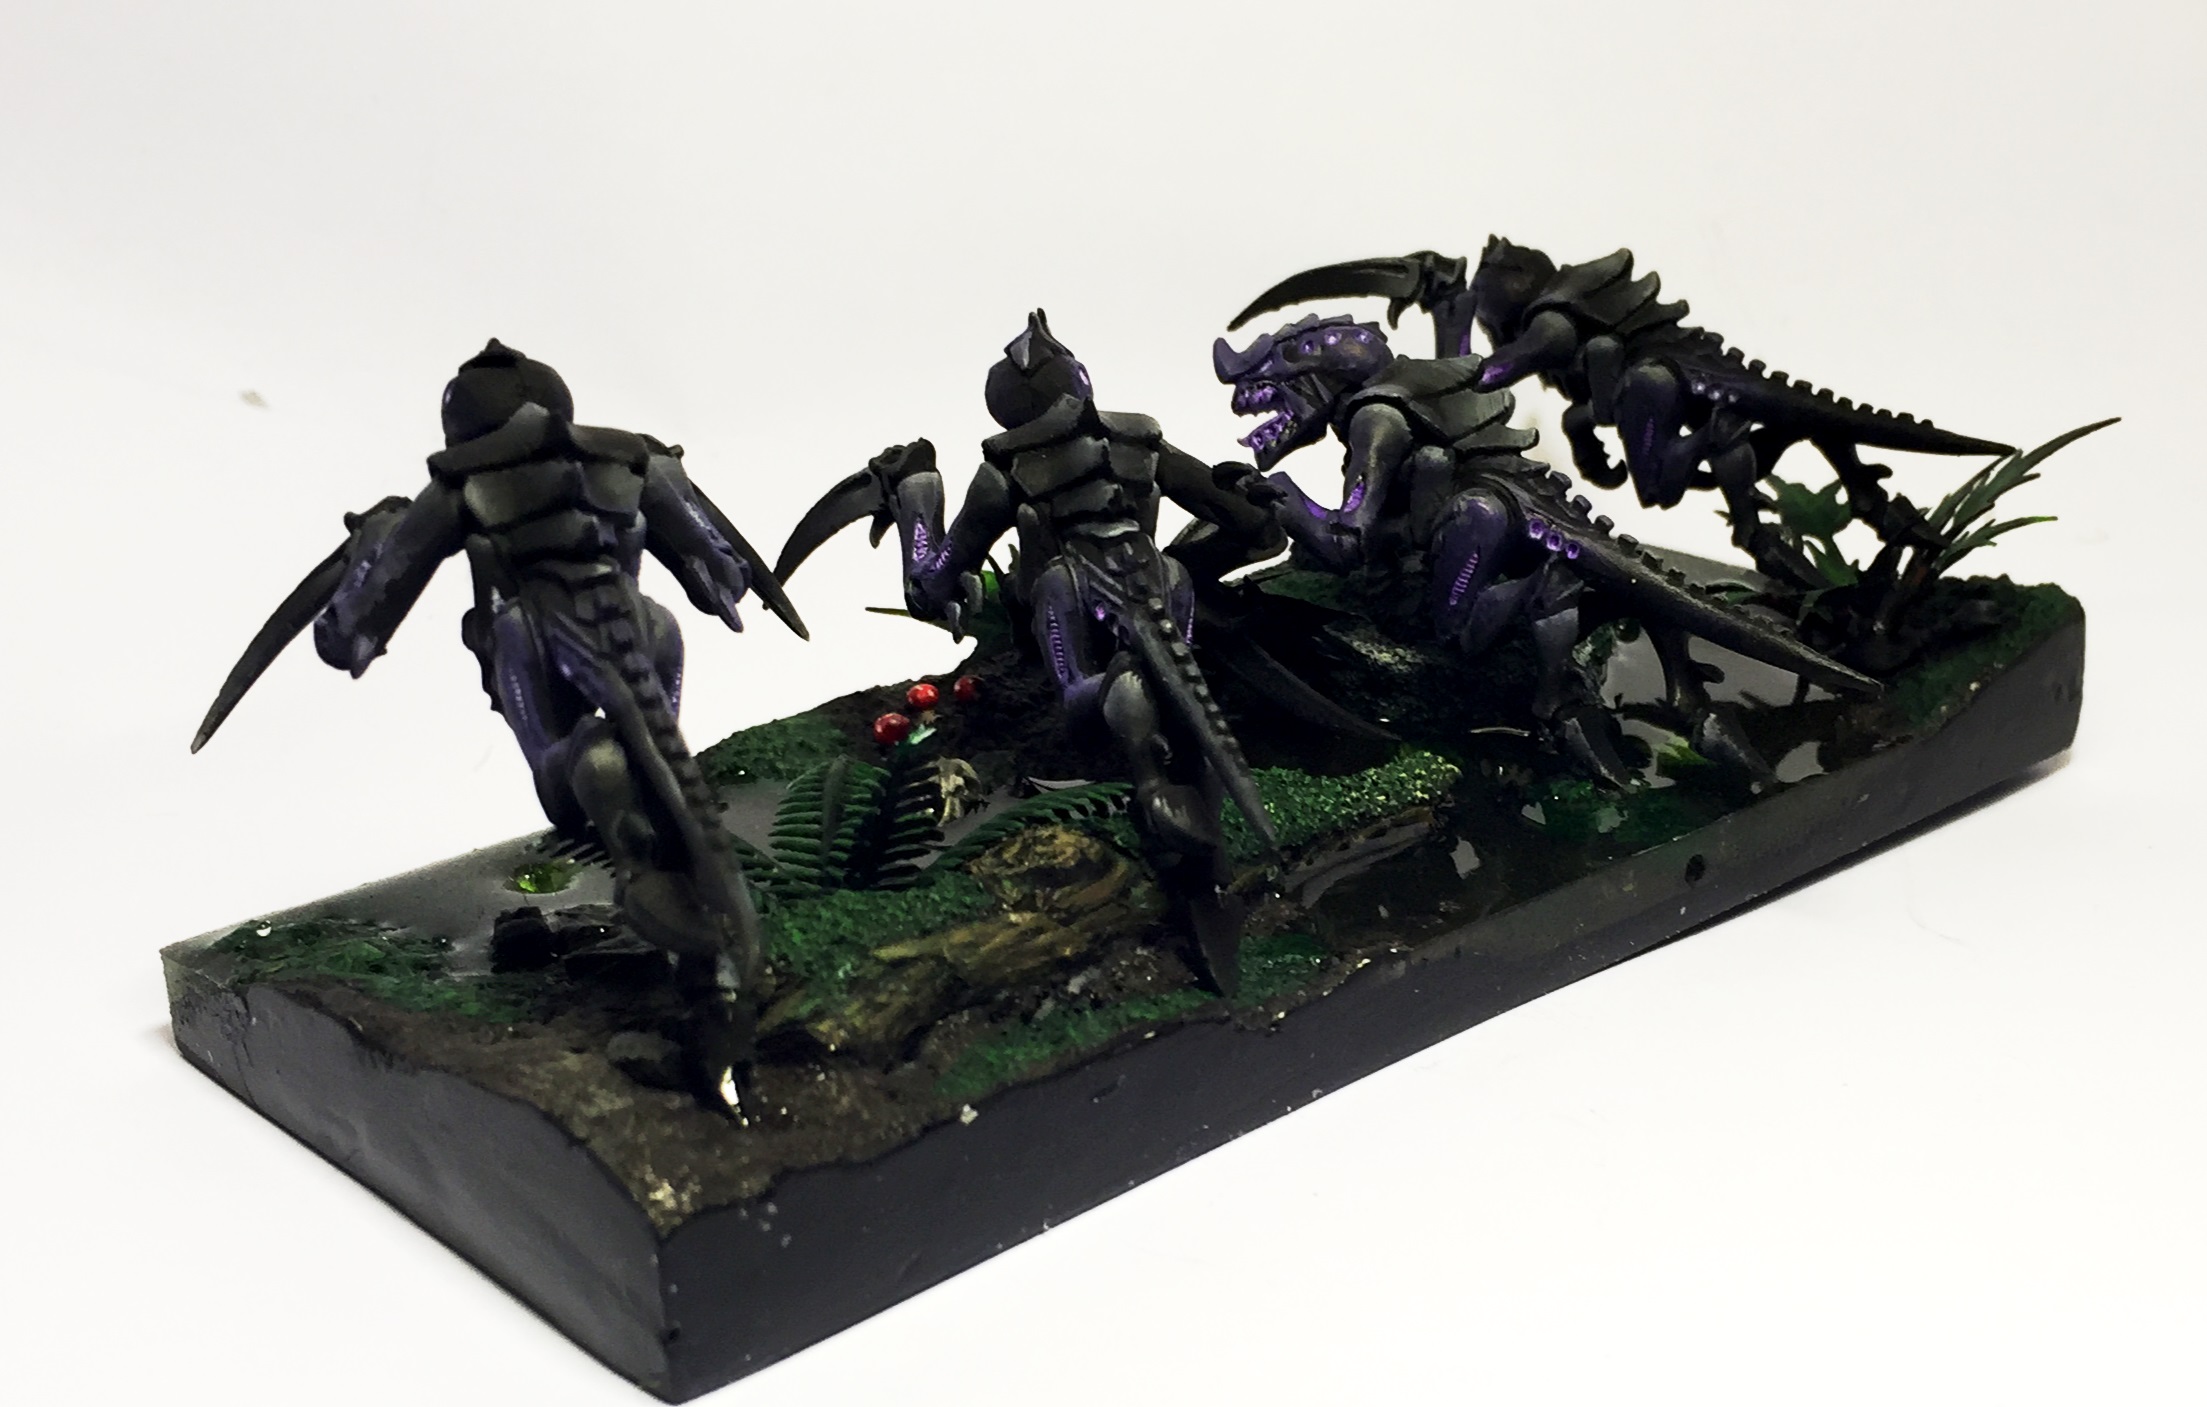
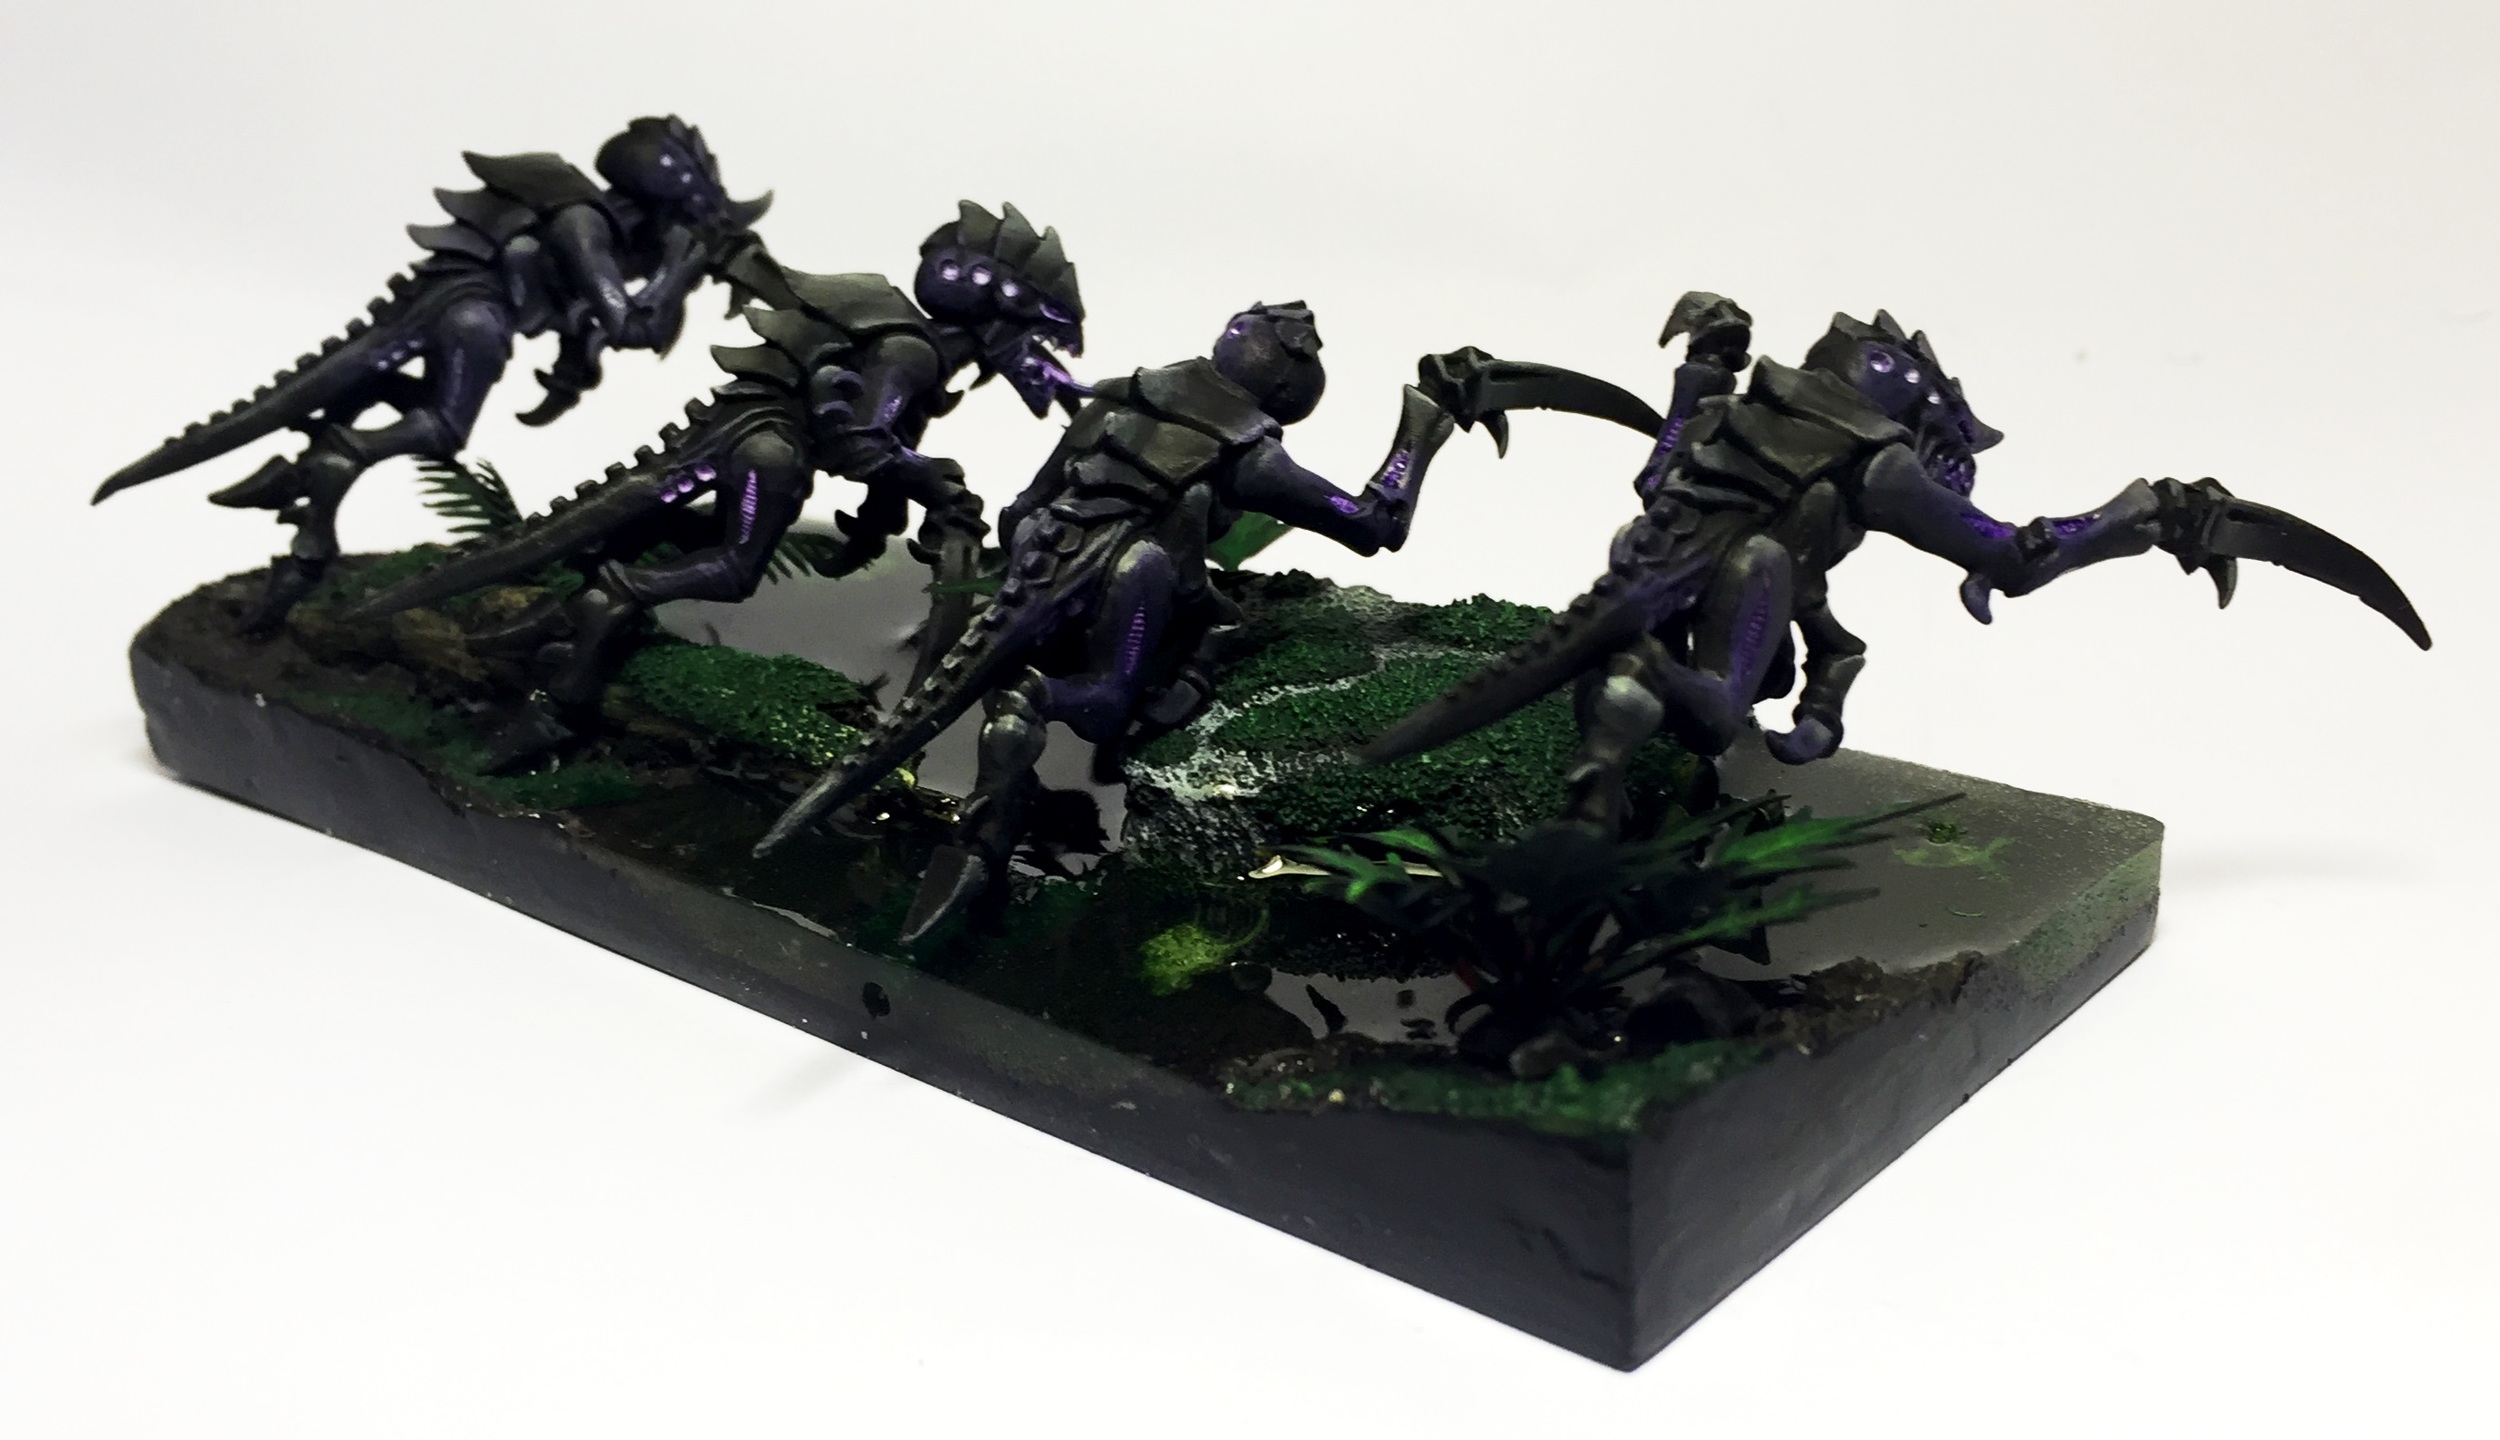
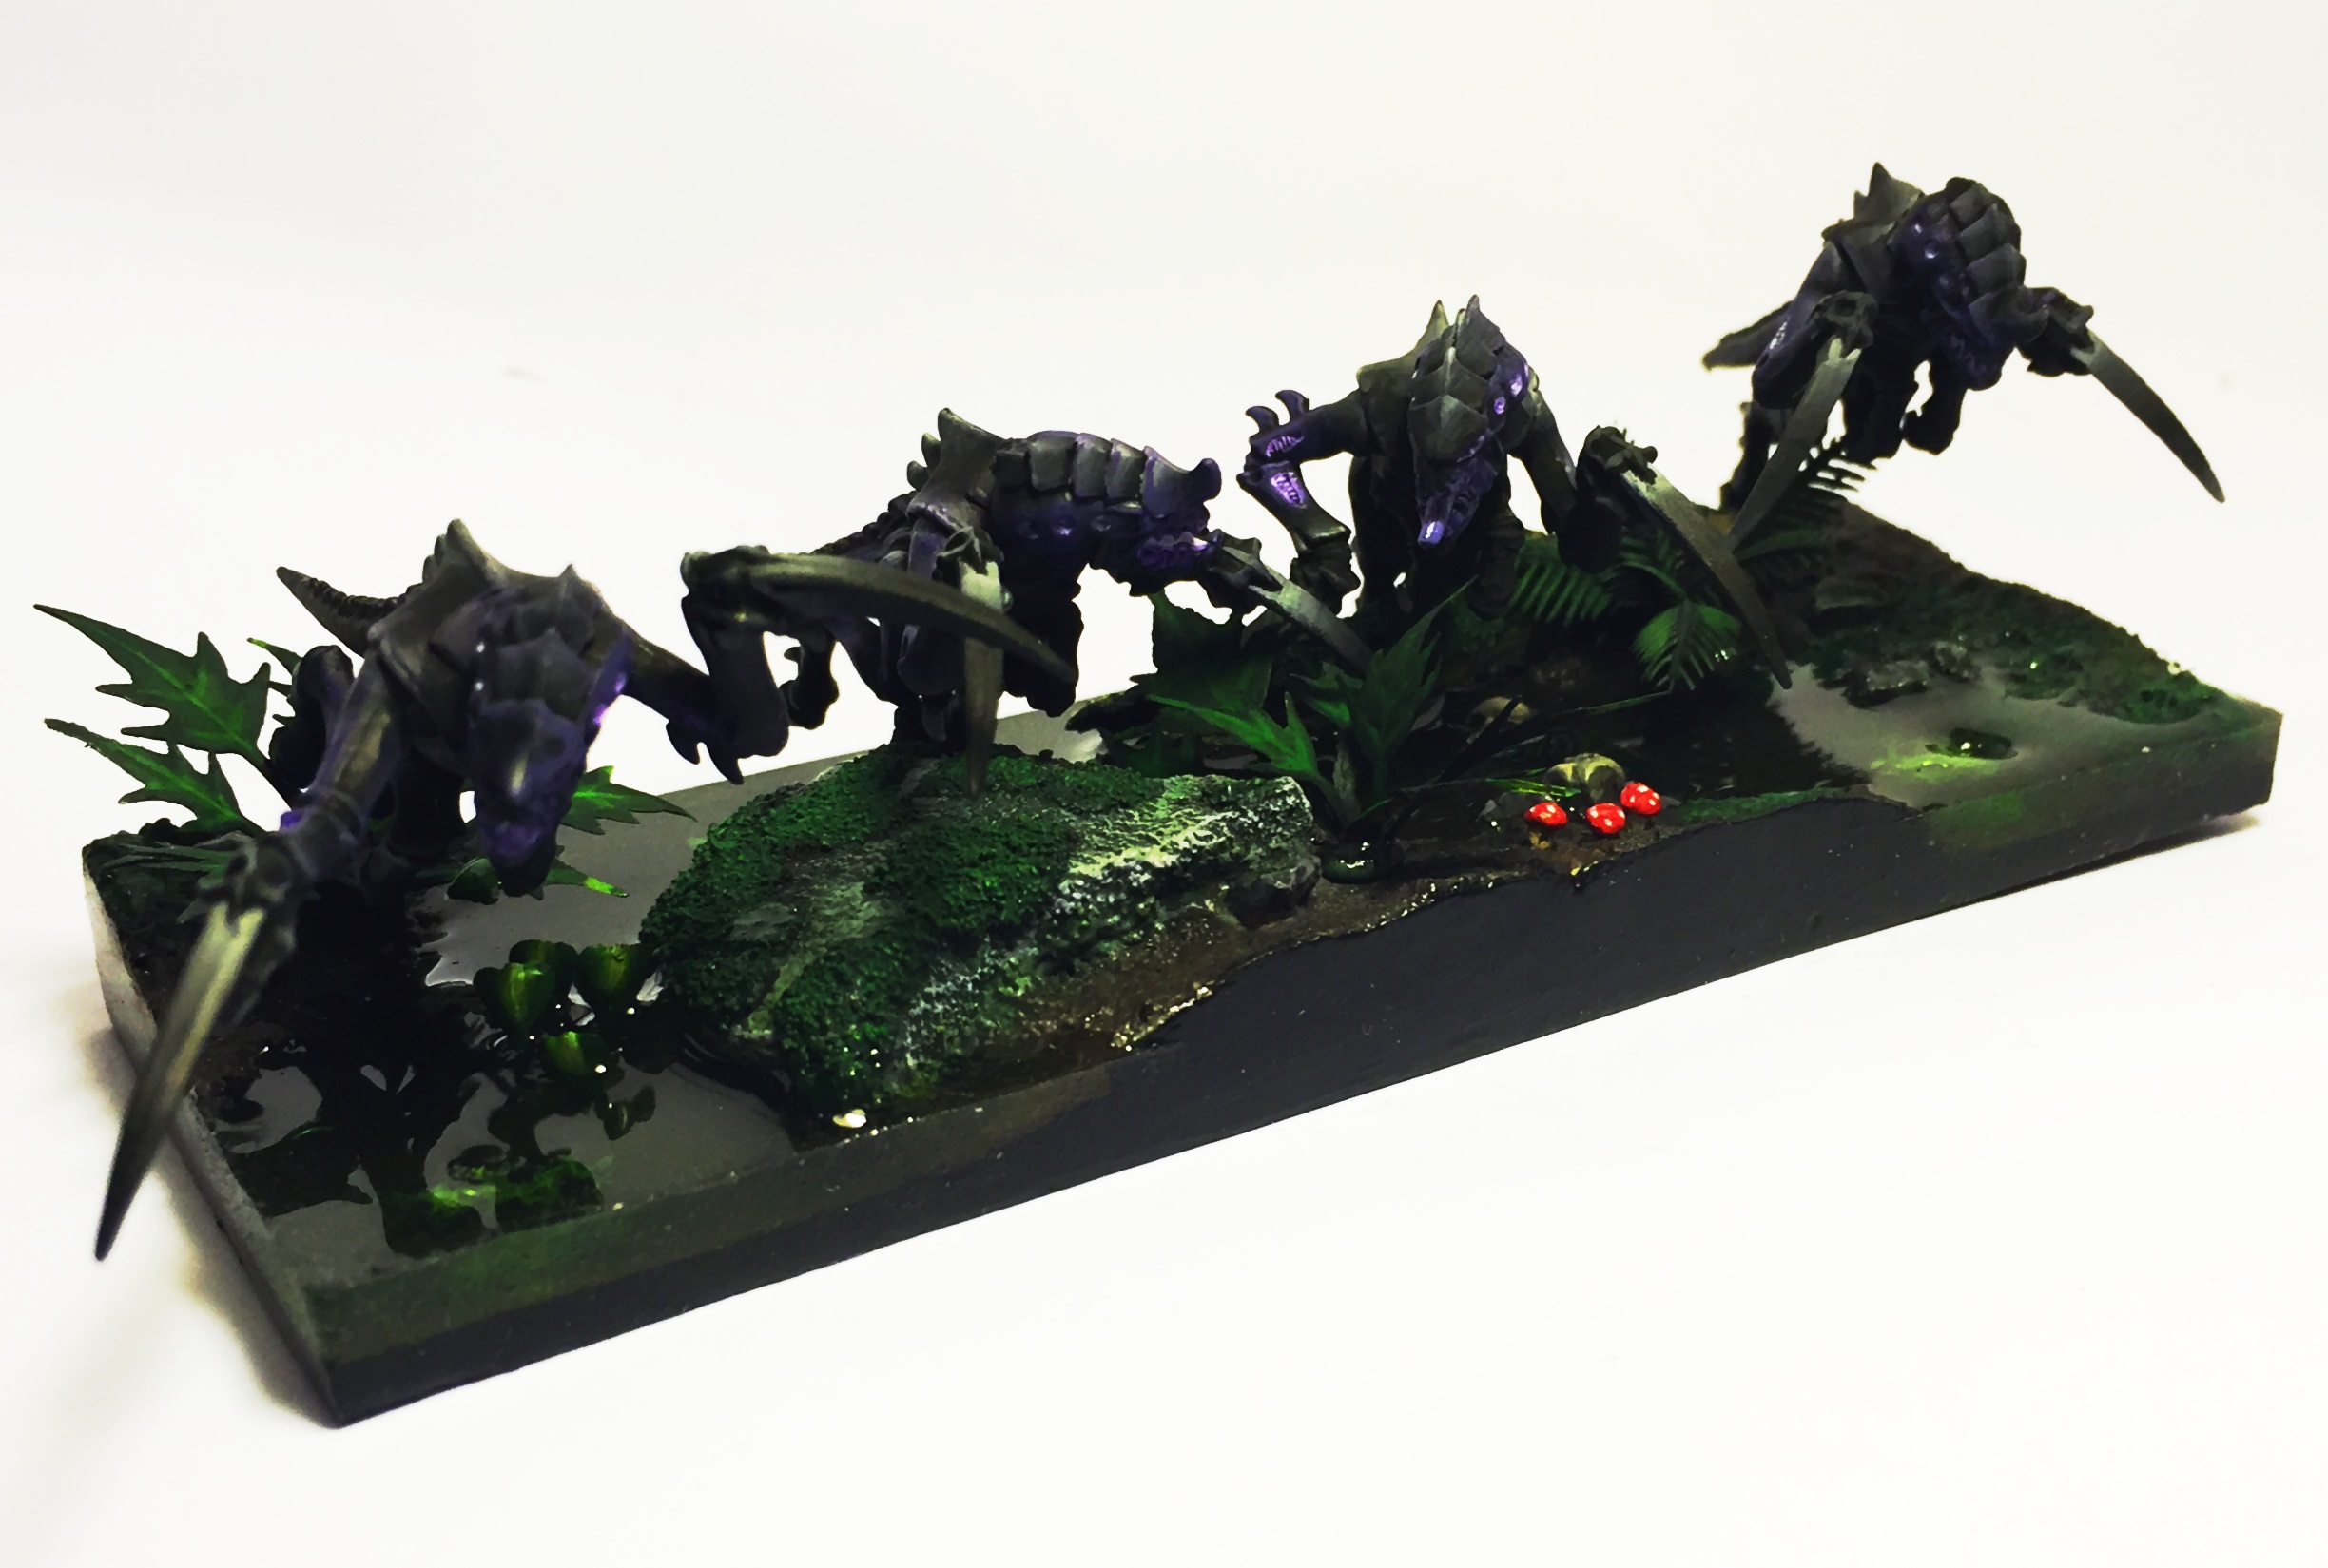
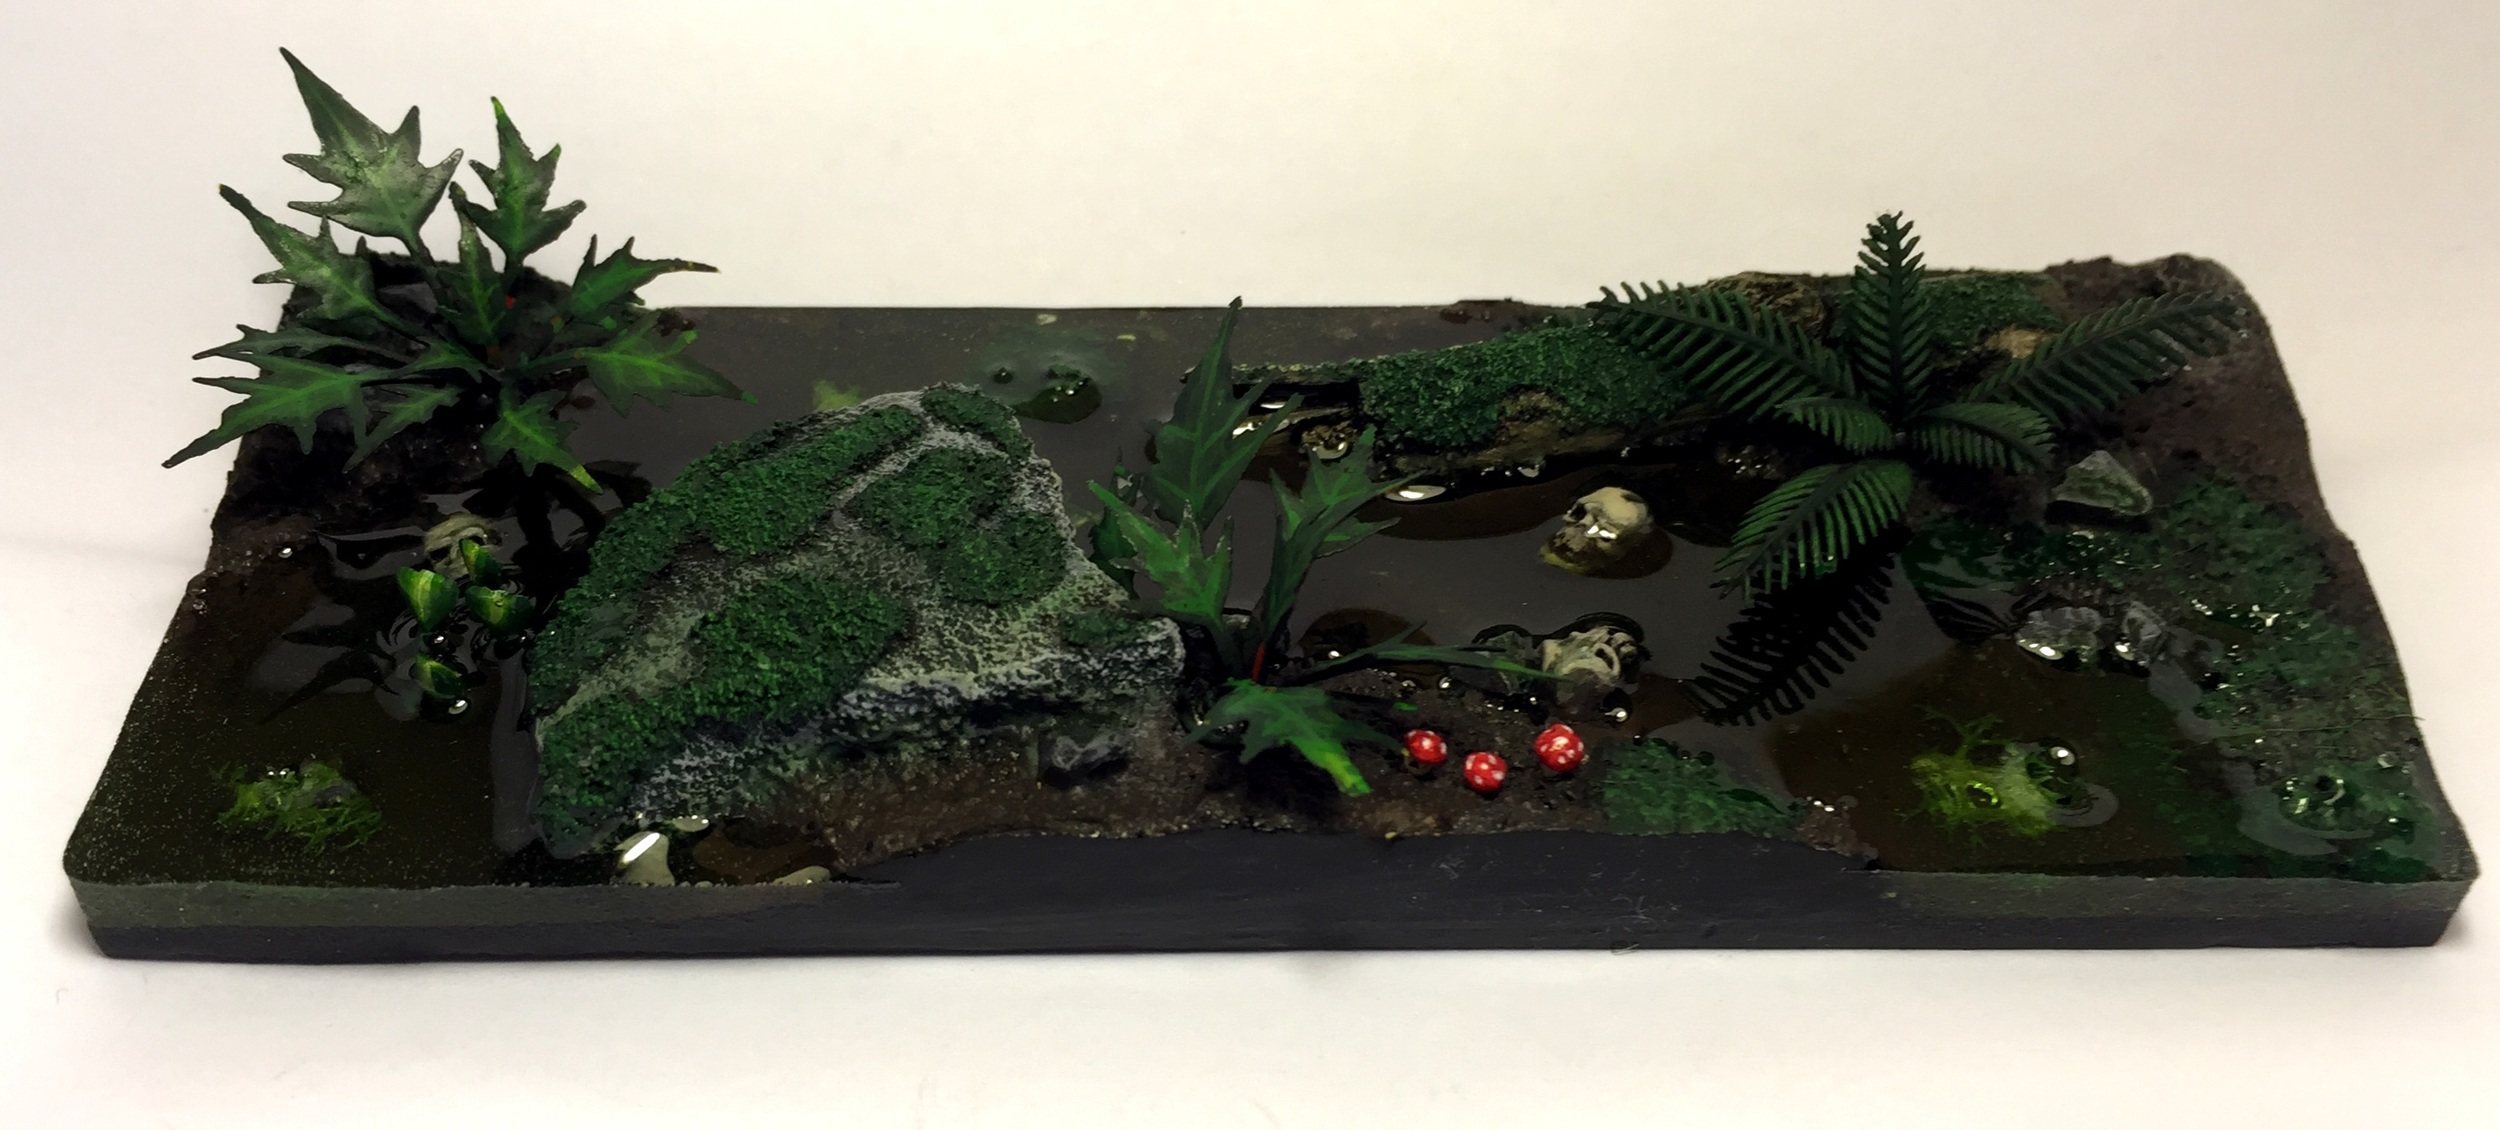
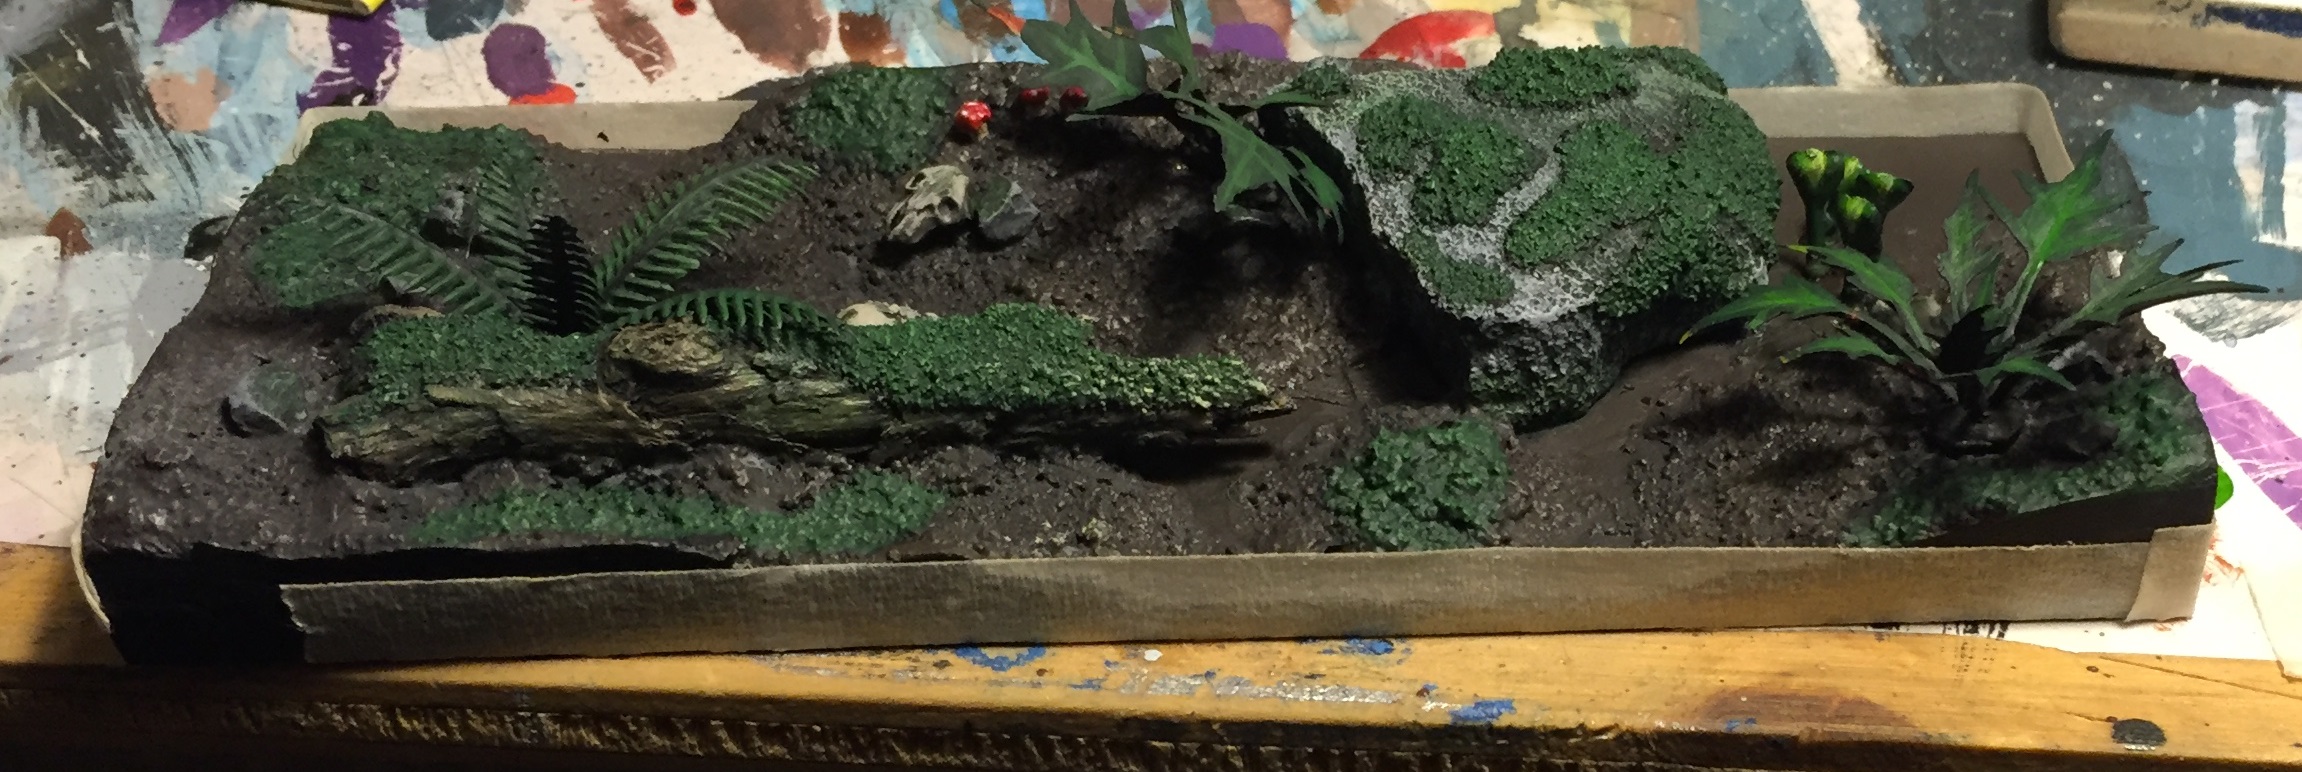
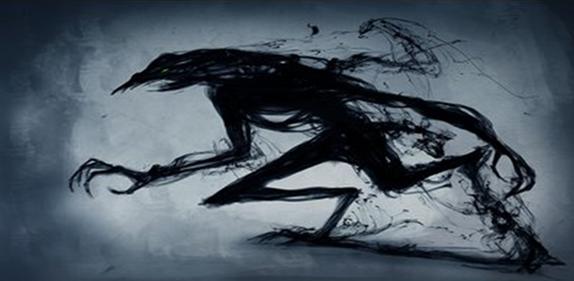
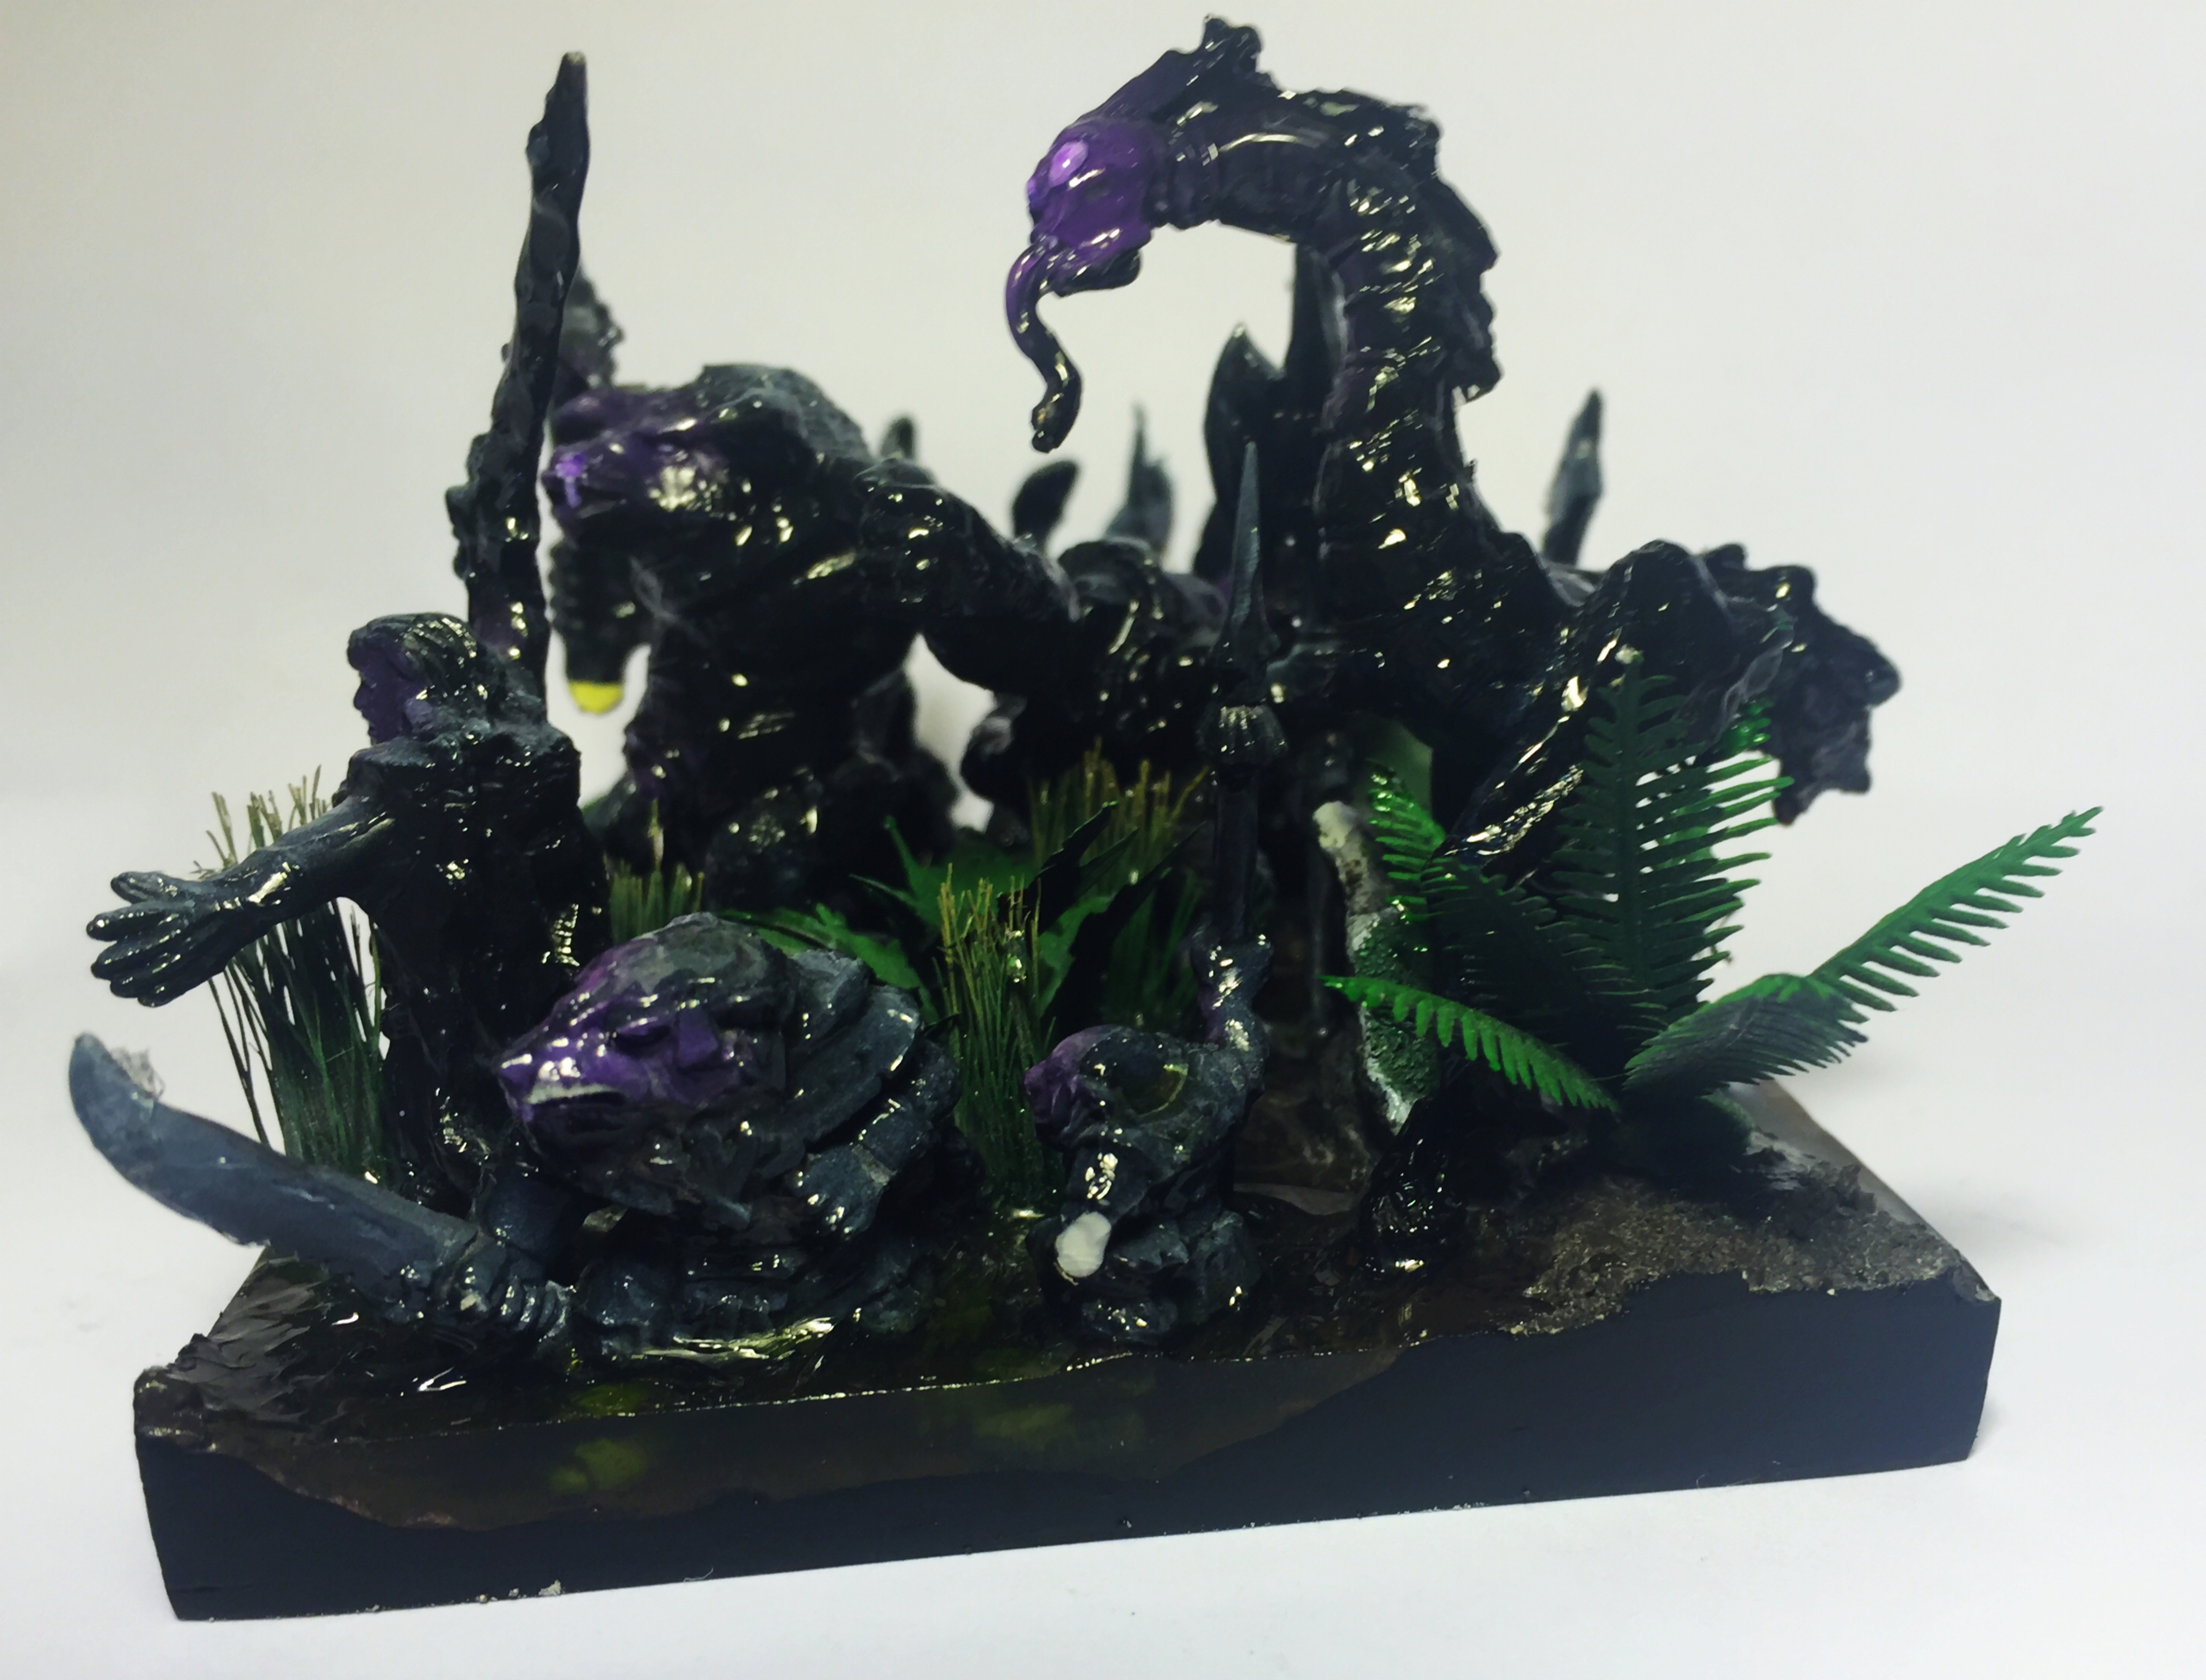
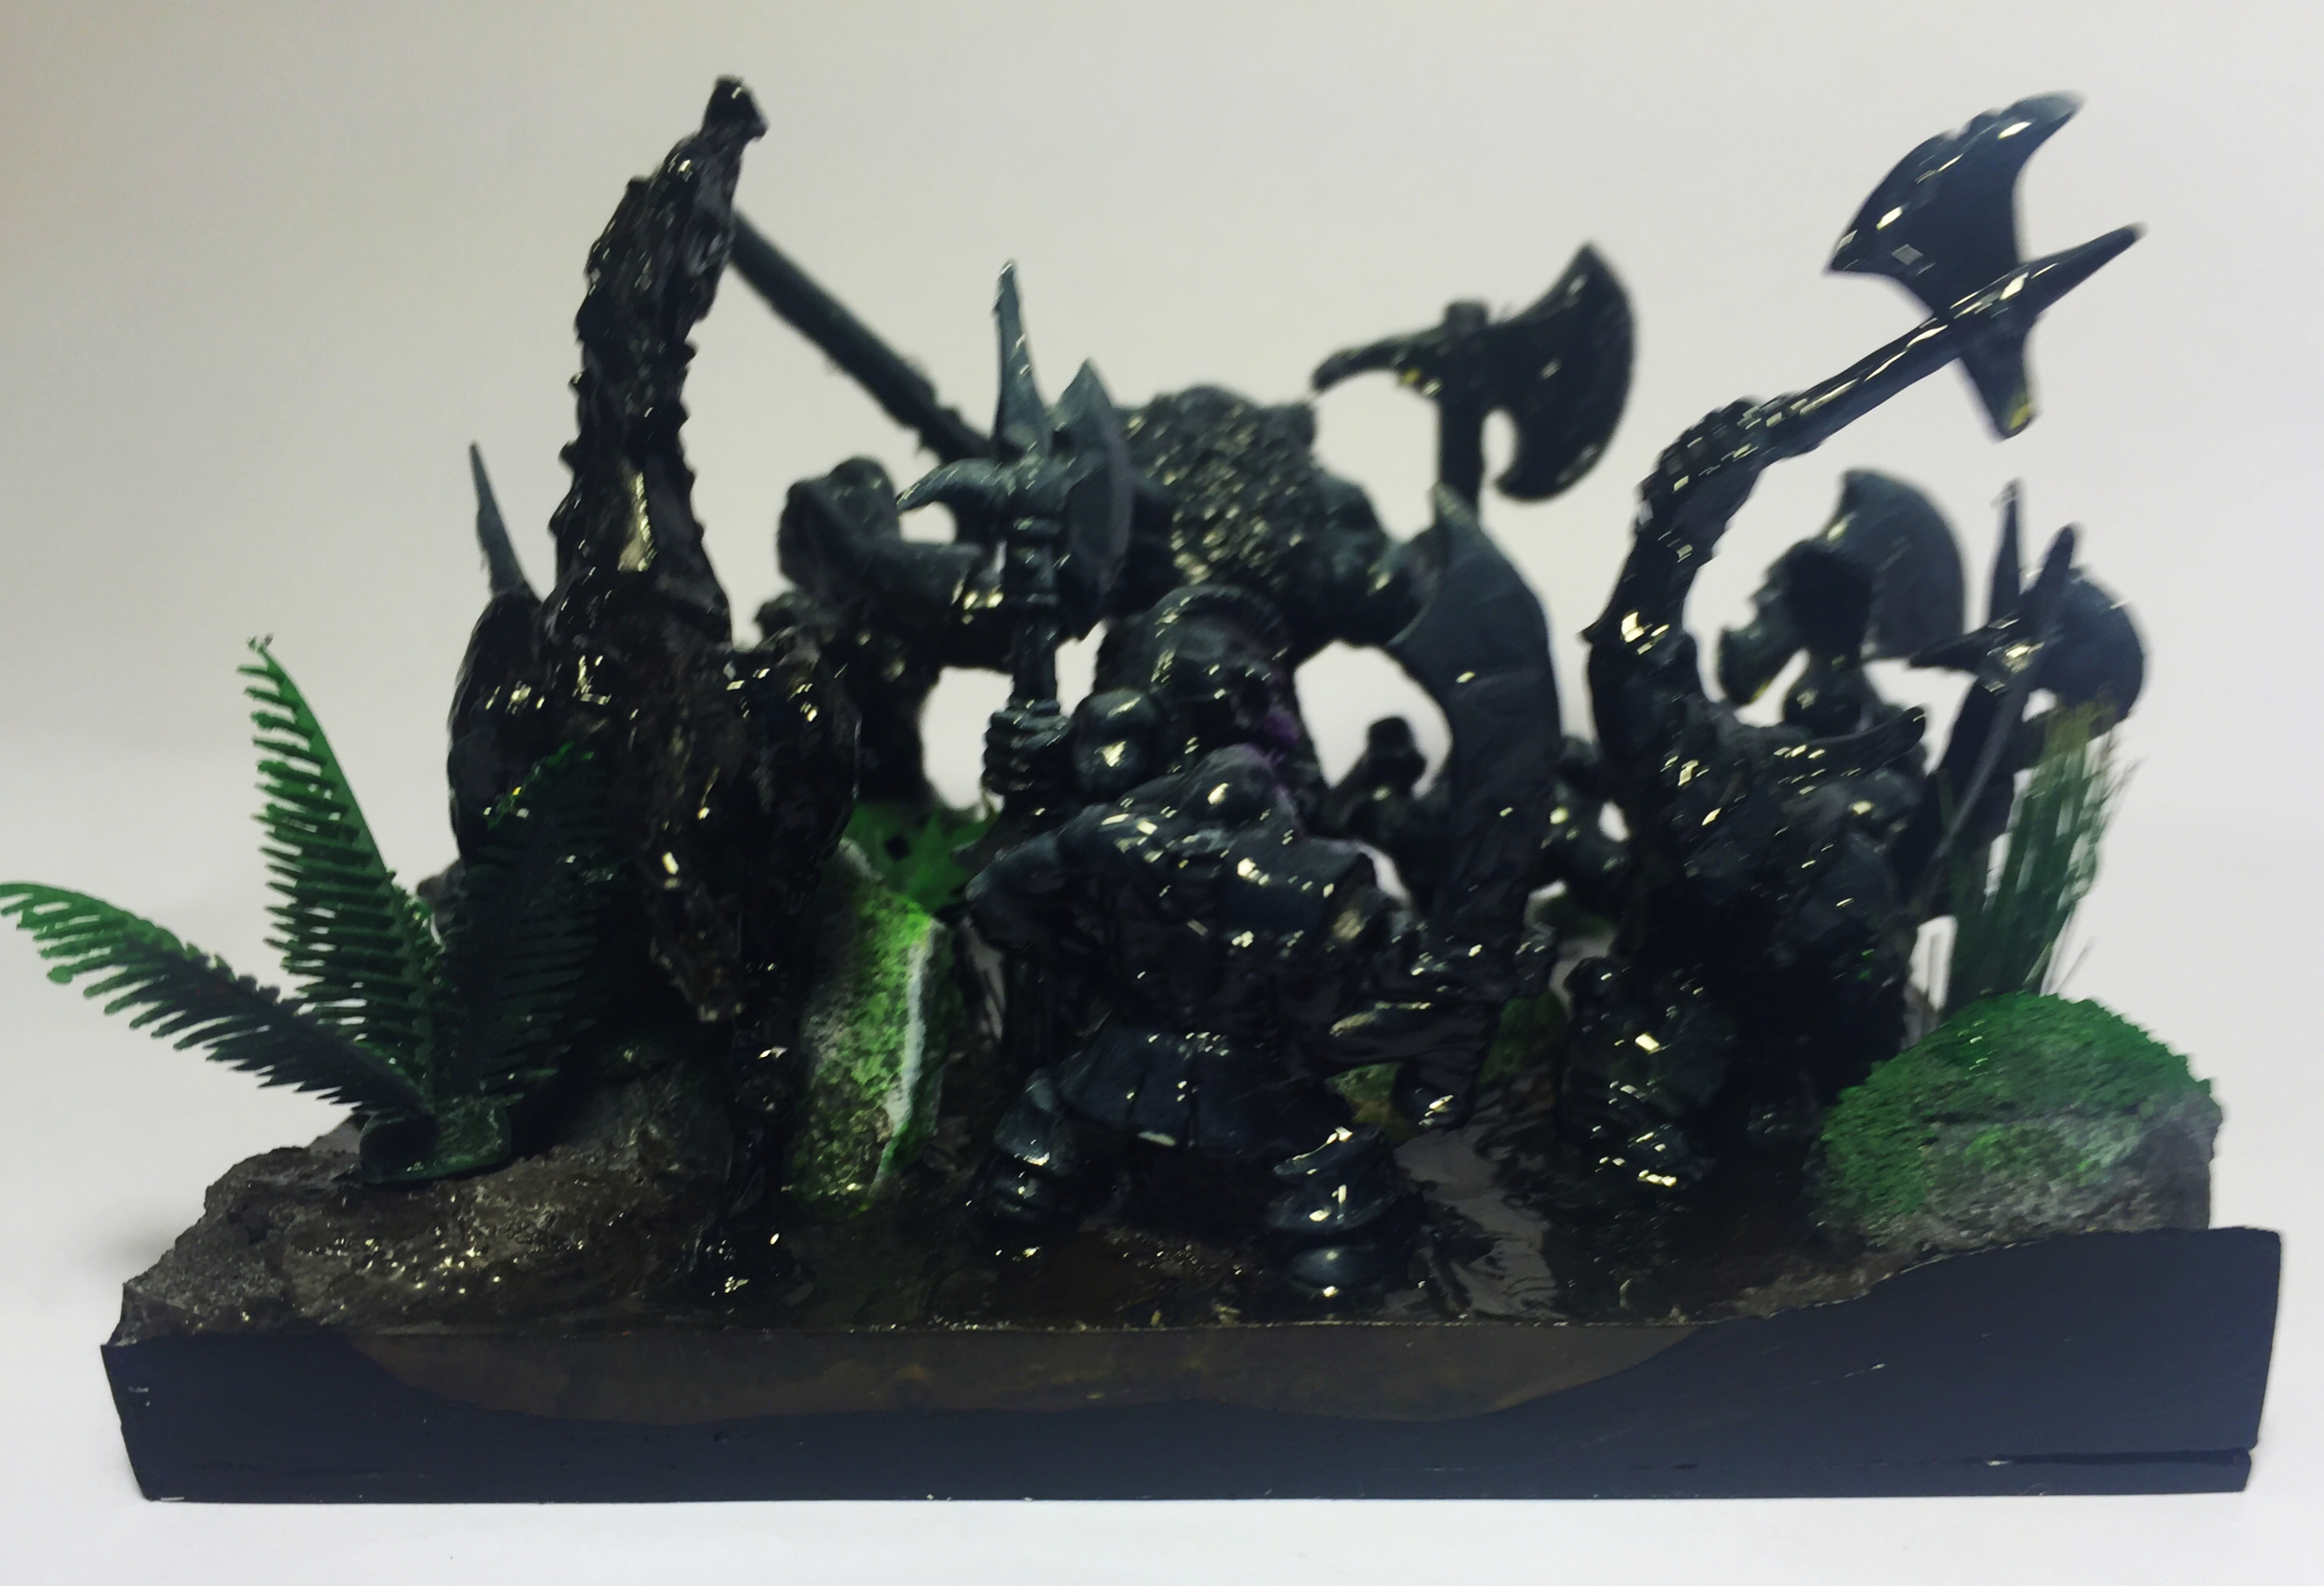
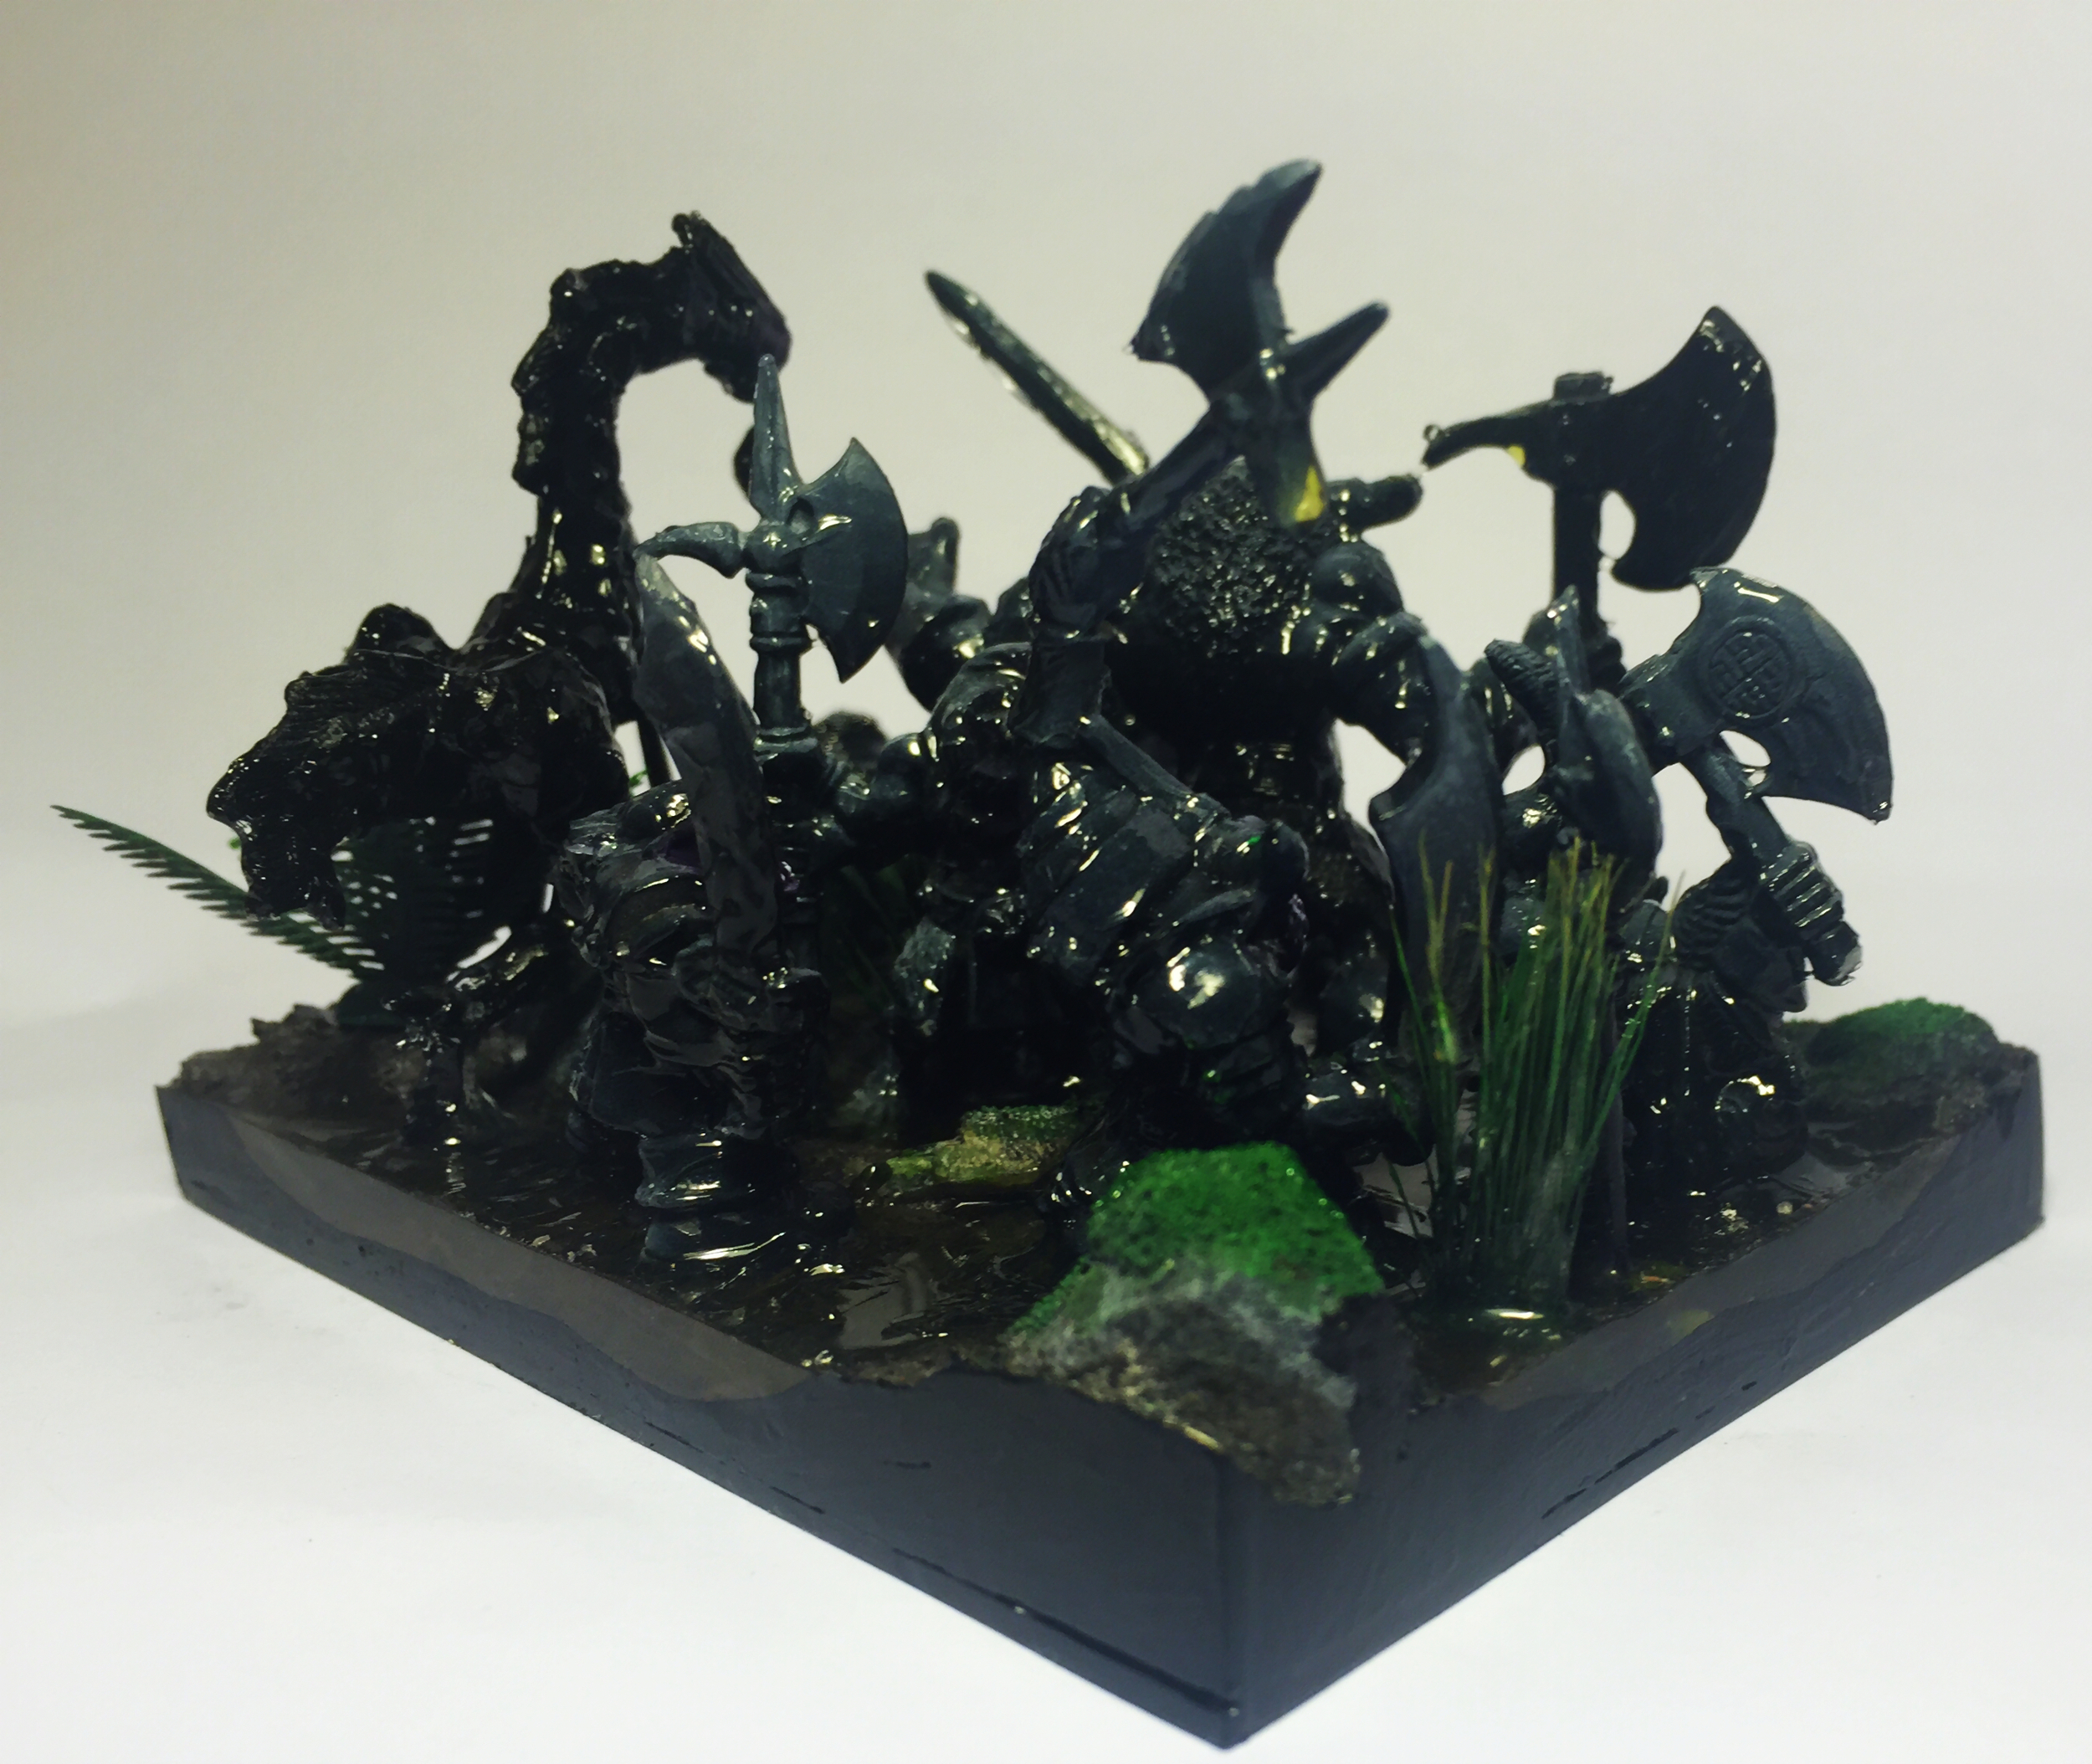
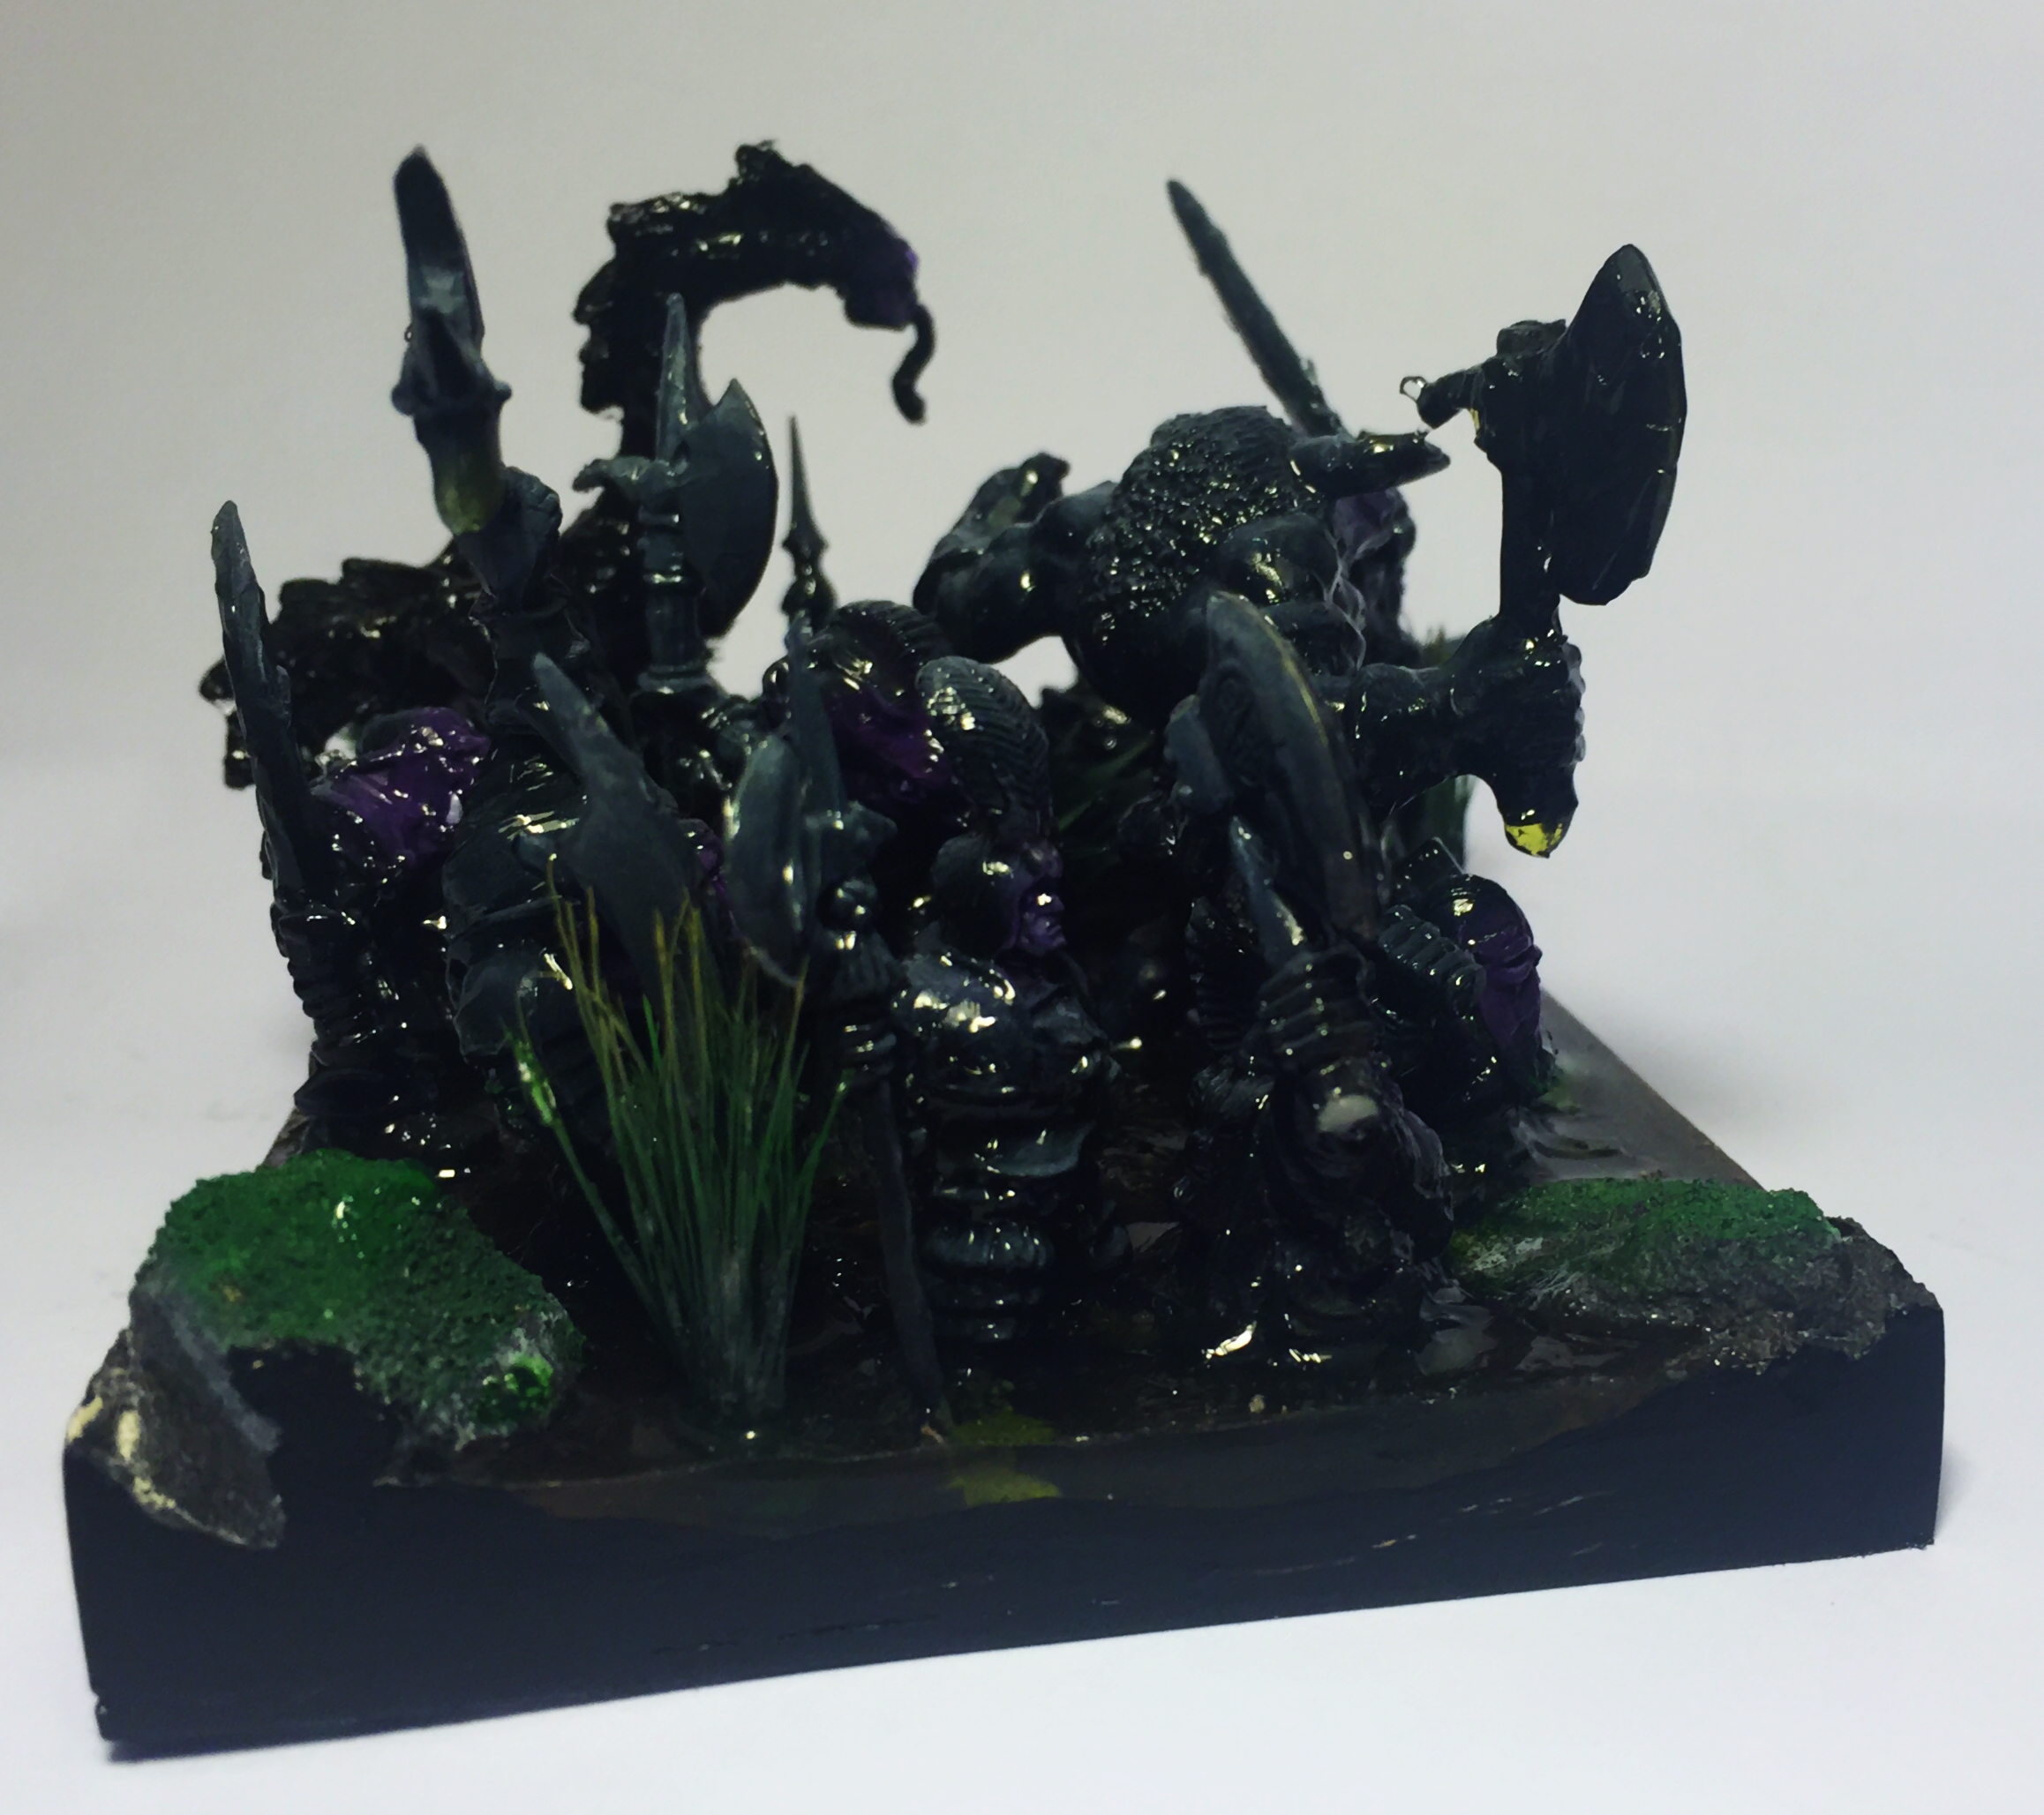
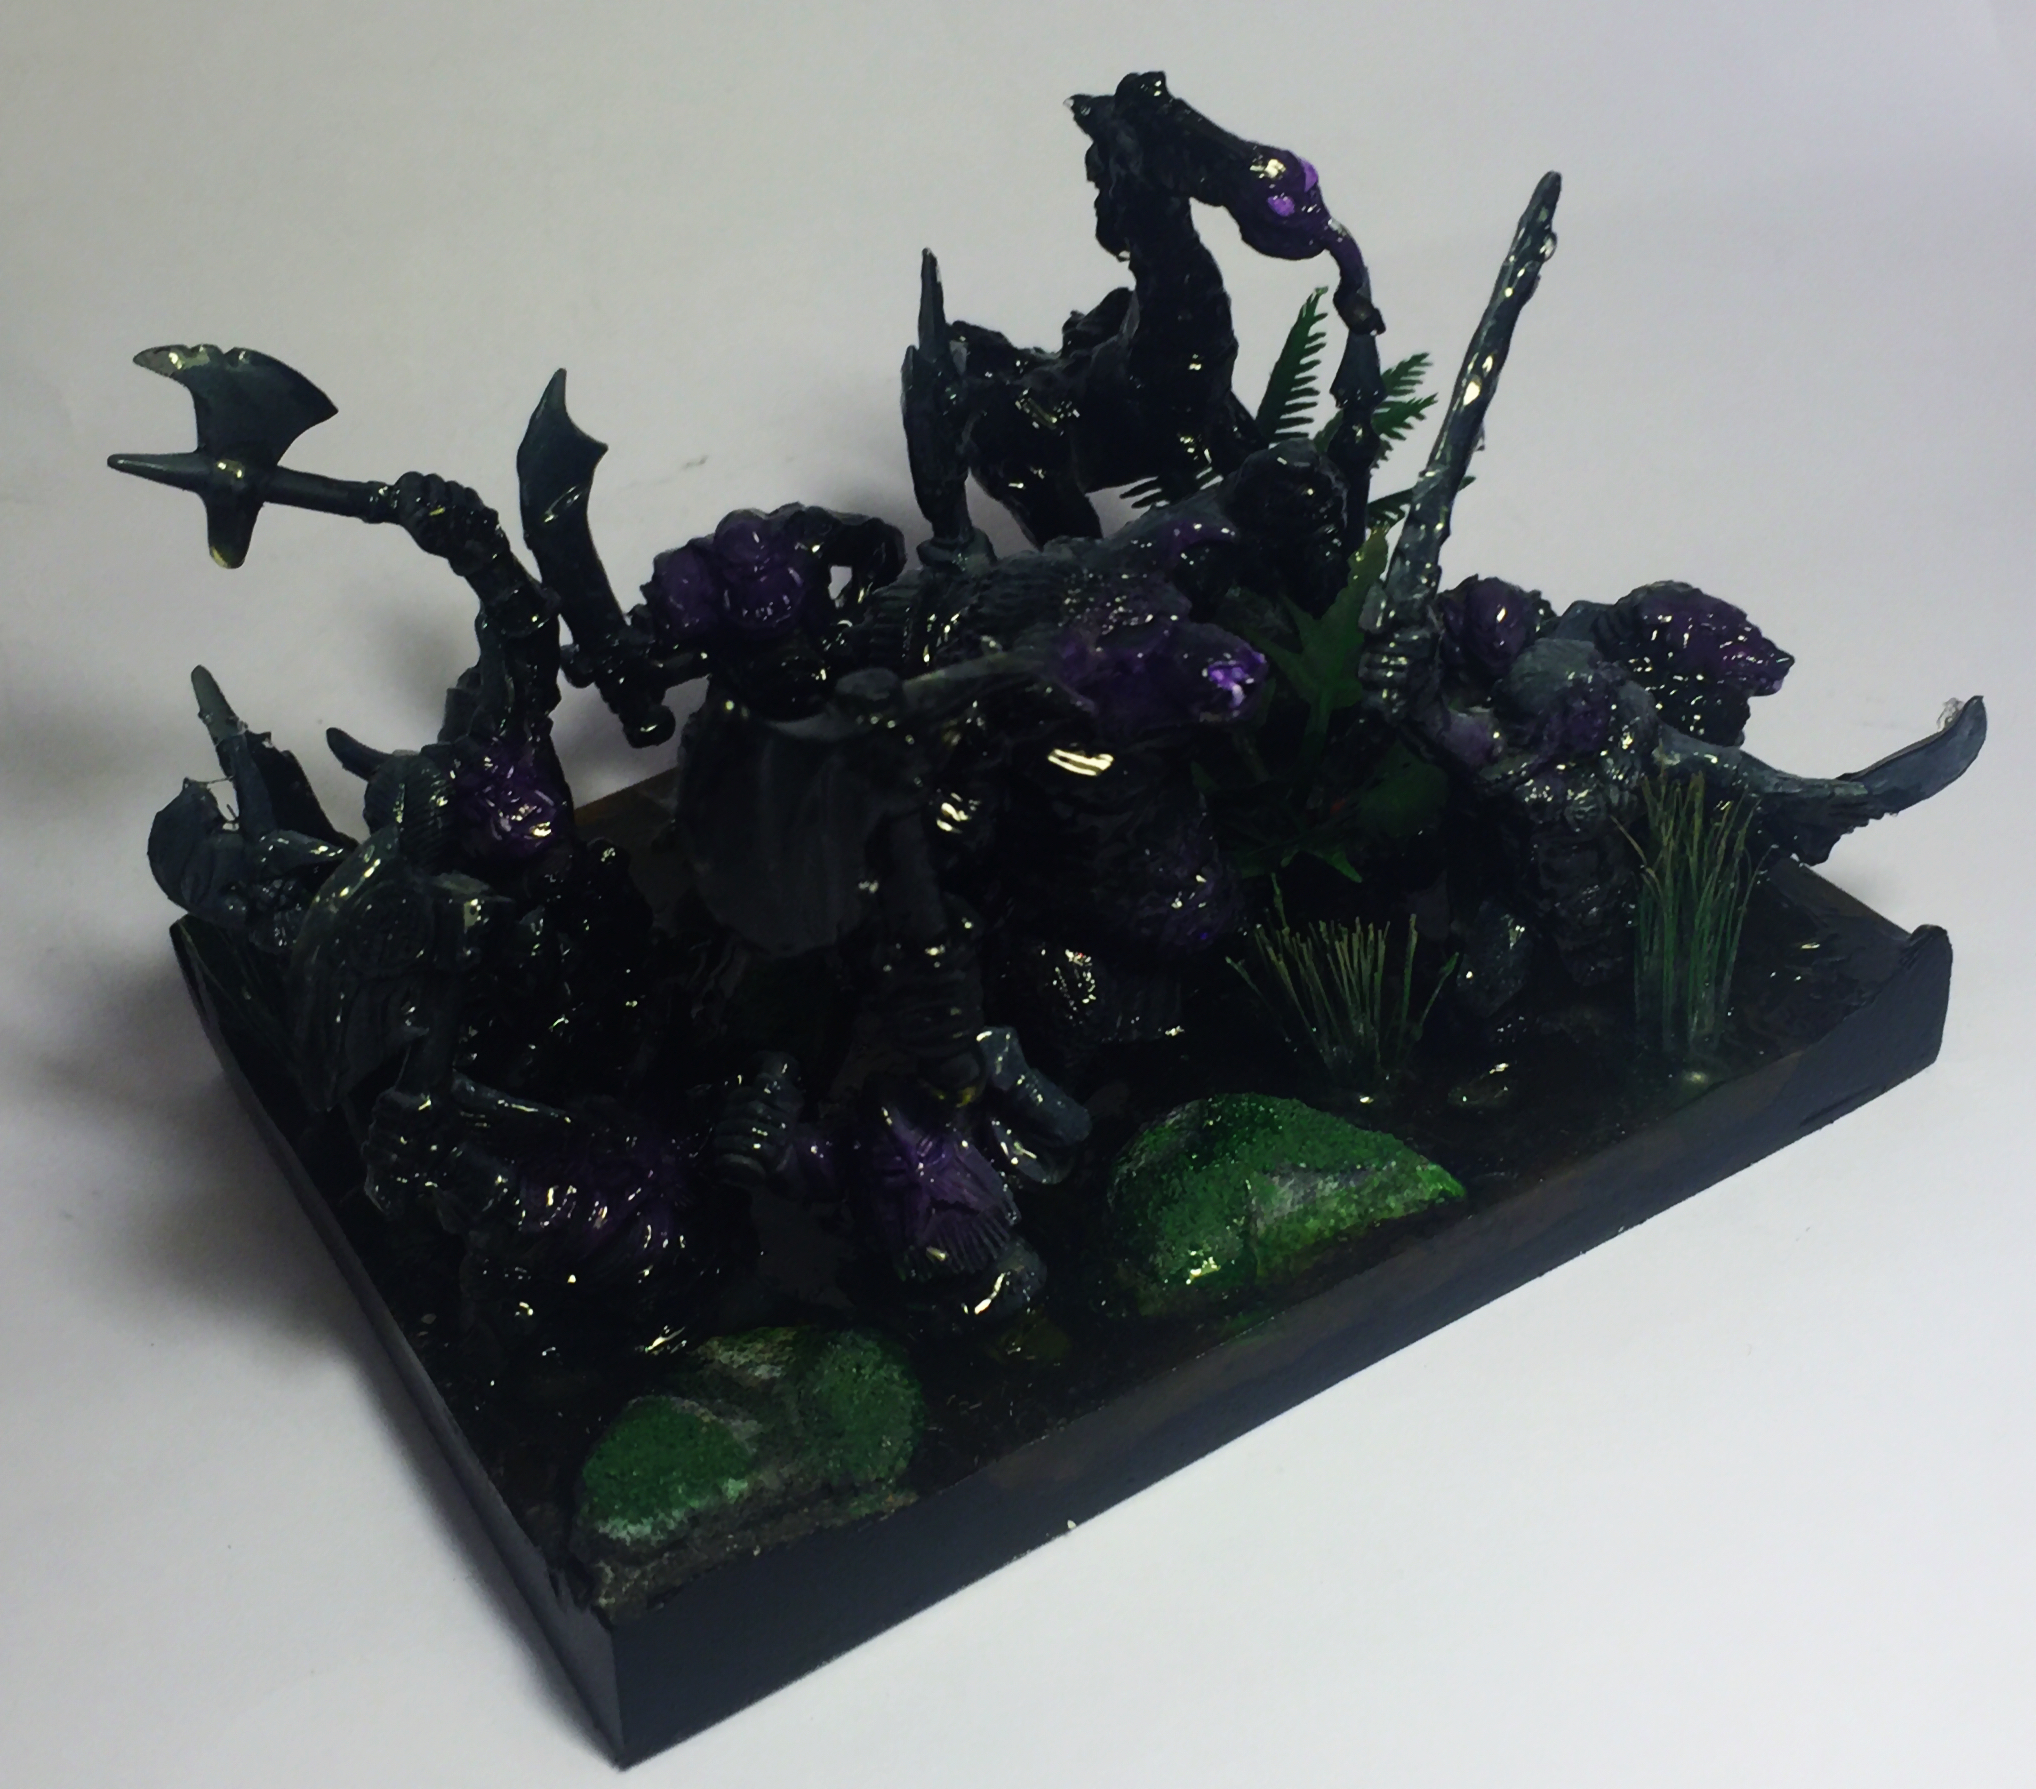
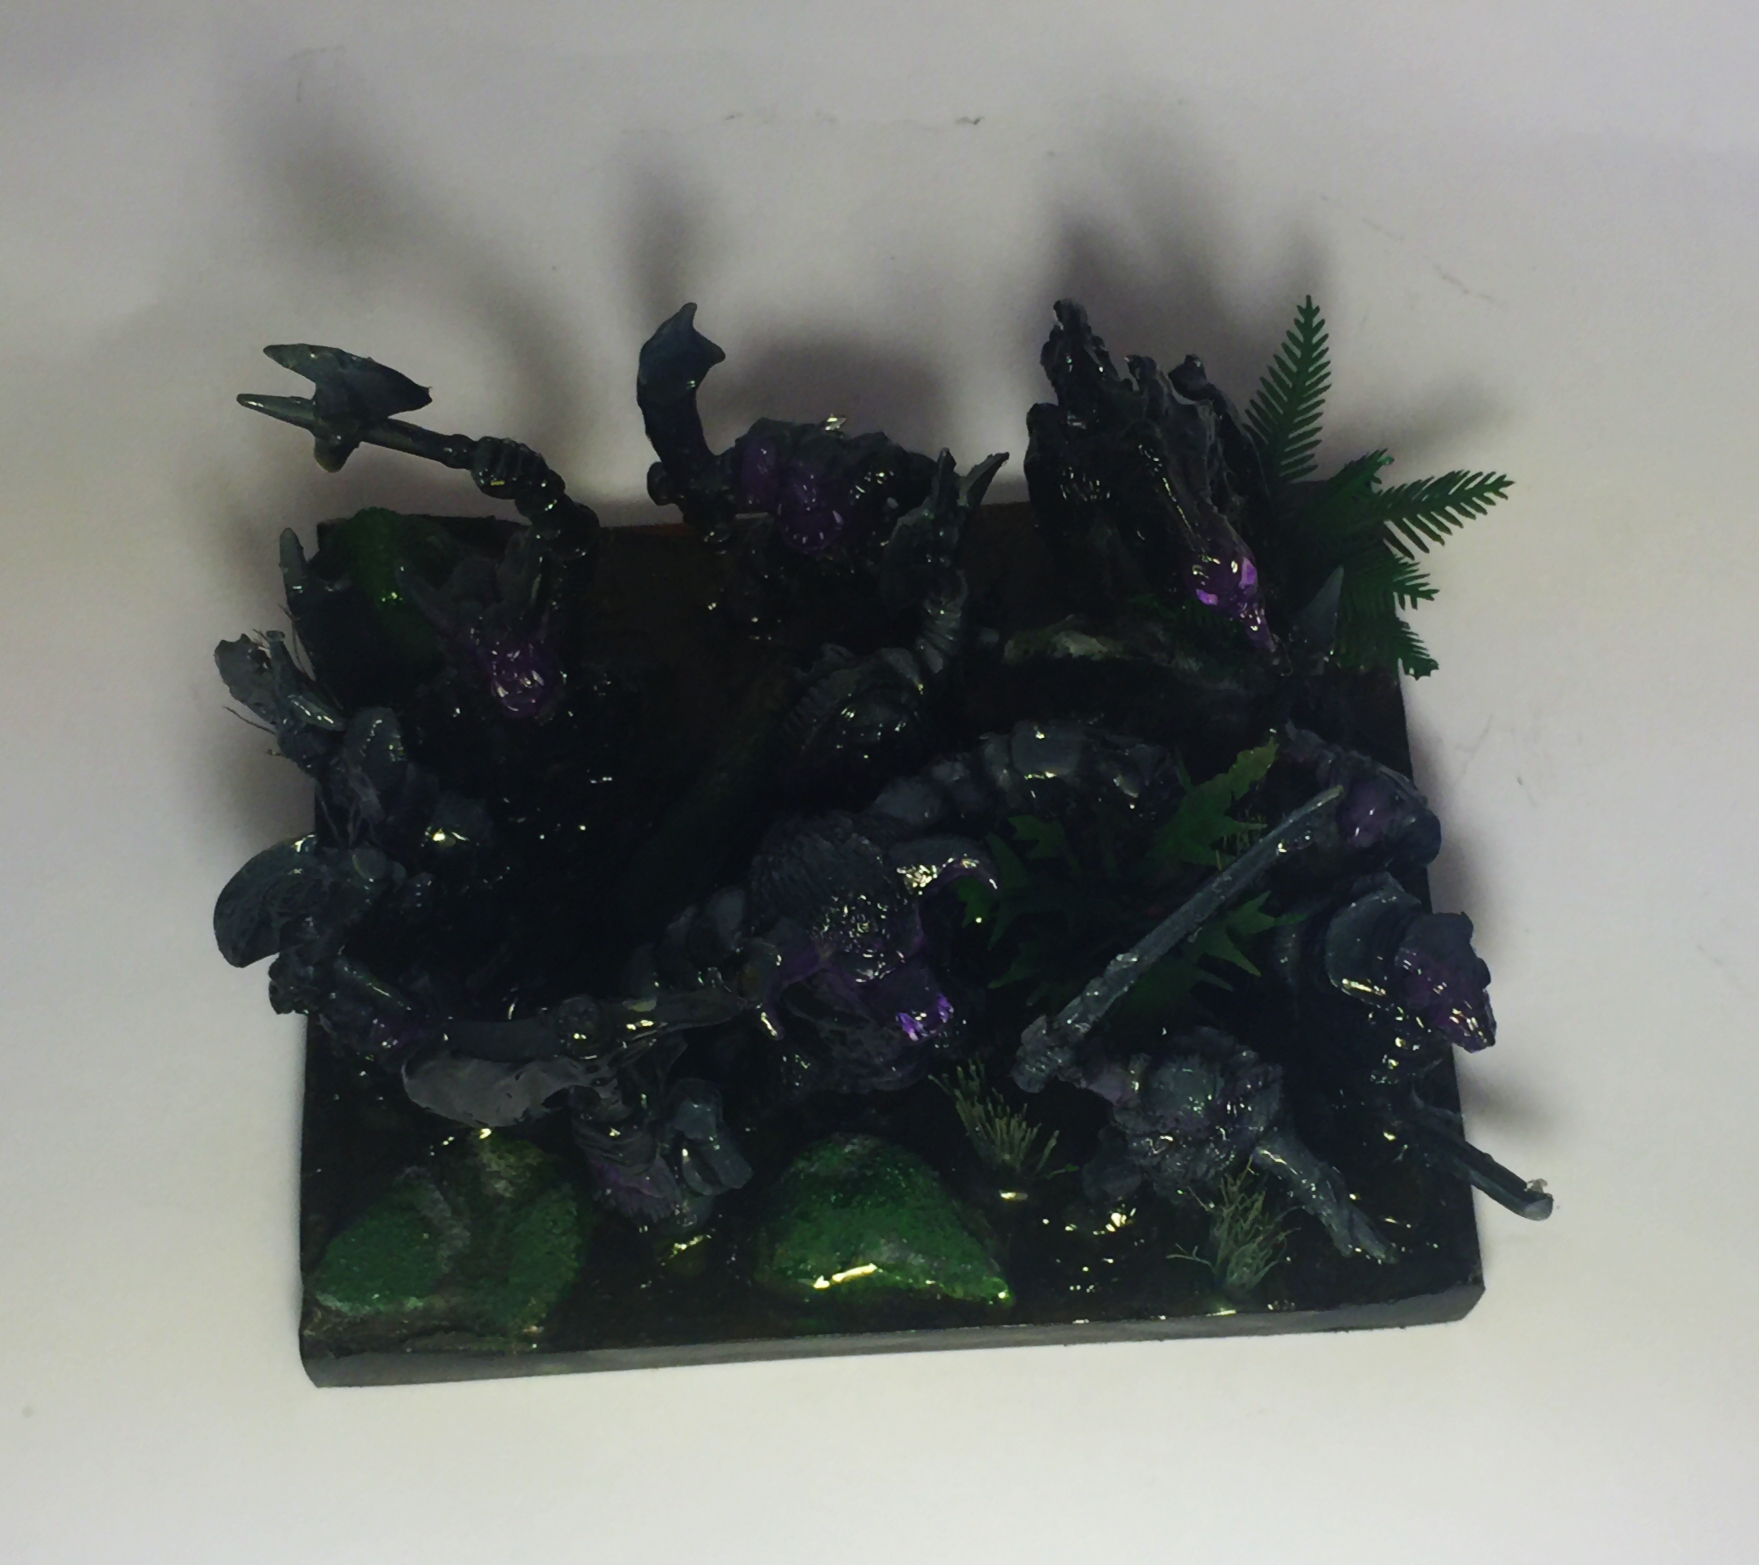
I wanted to give the impression that my Doppelgangers were gooey swamp monsters oozing out of the slimy swamp that makes up the theme of my army.  To try and achieve this I've used a lot of my old miniatures (including a bunch of Warhammer quest minis).  I painted the eyes the same way as the rest of the army, glowing purple, and embedded them int he resin swamp.  I've used Vallejo water effects to goo them up.

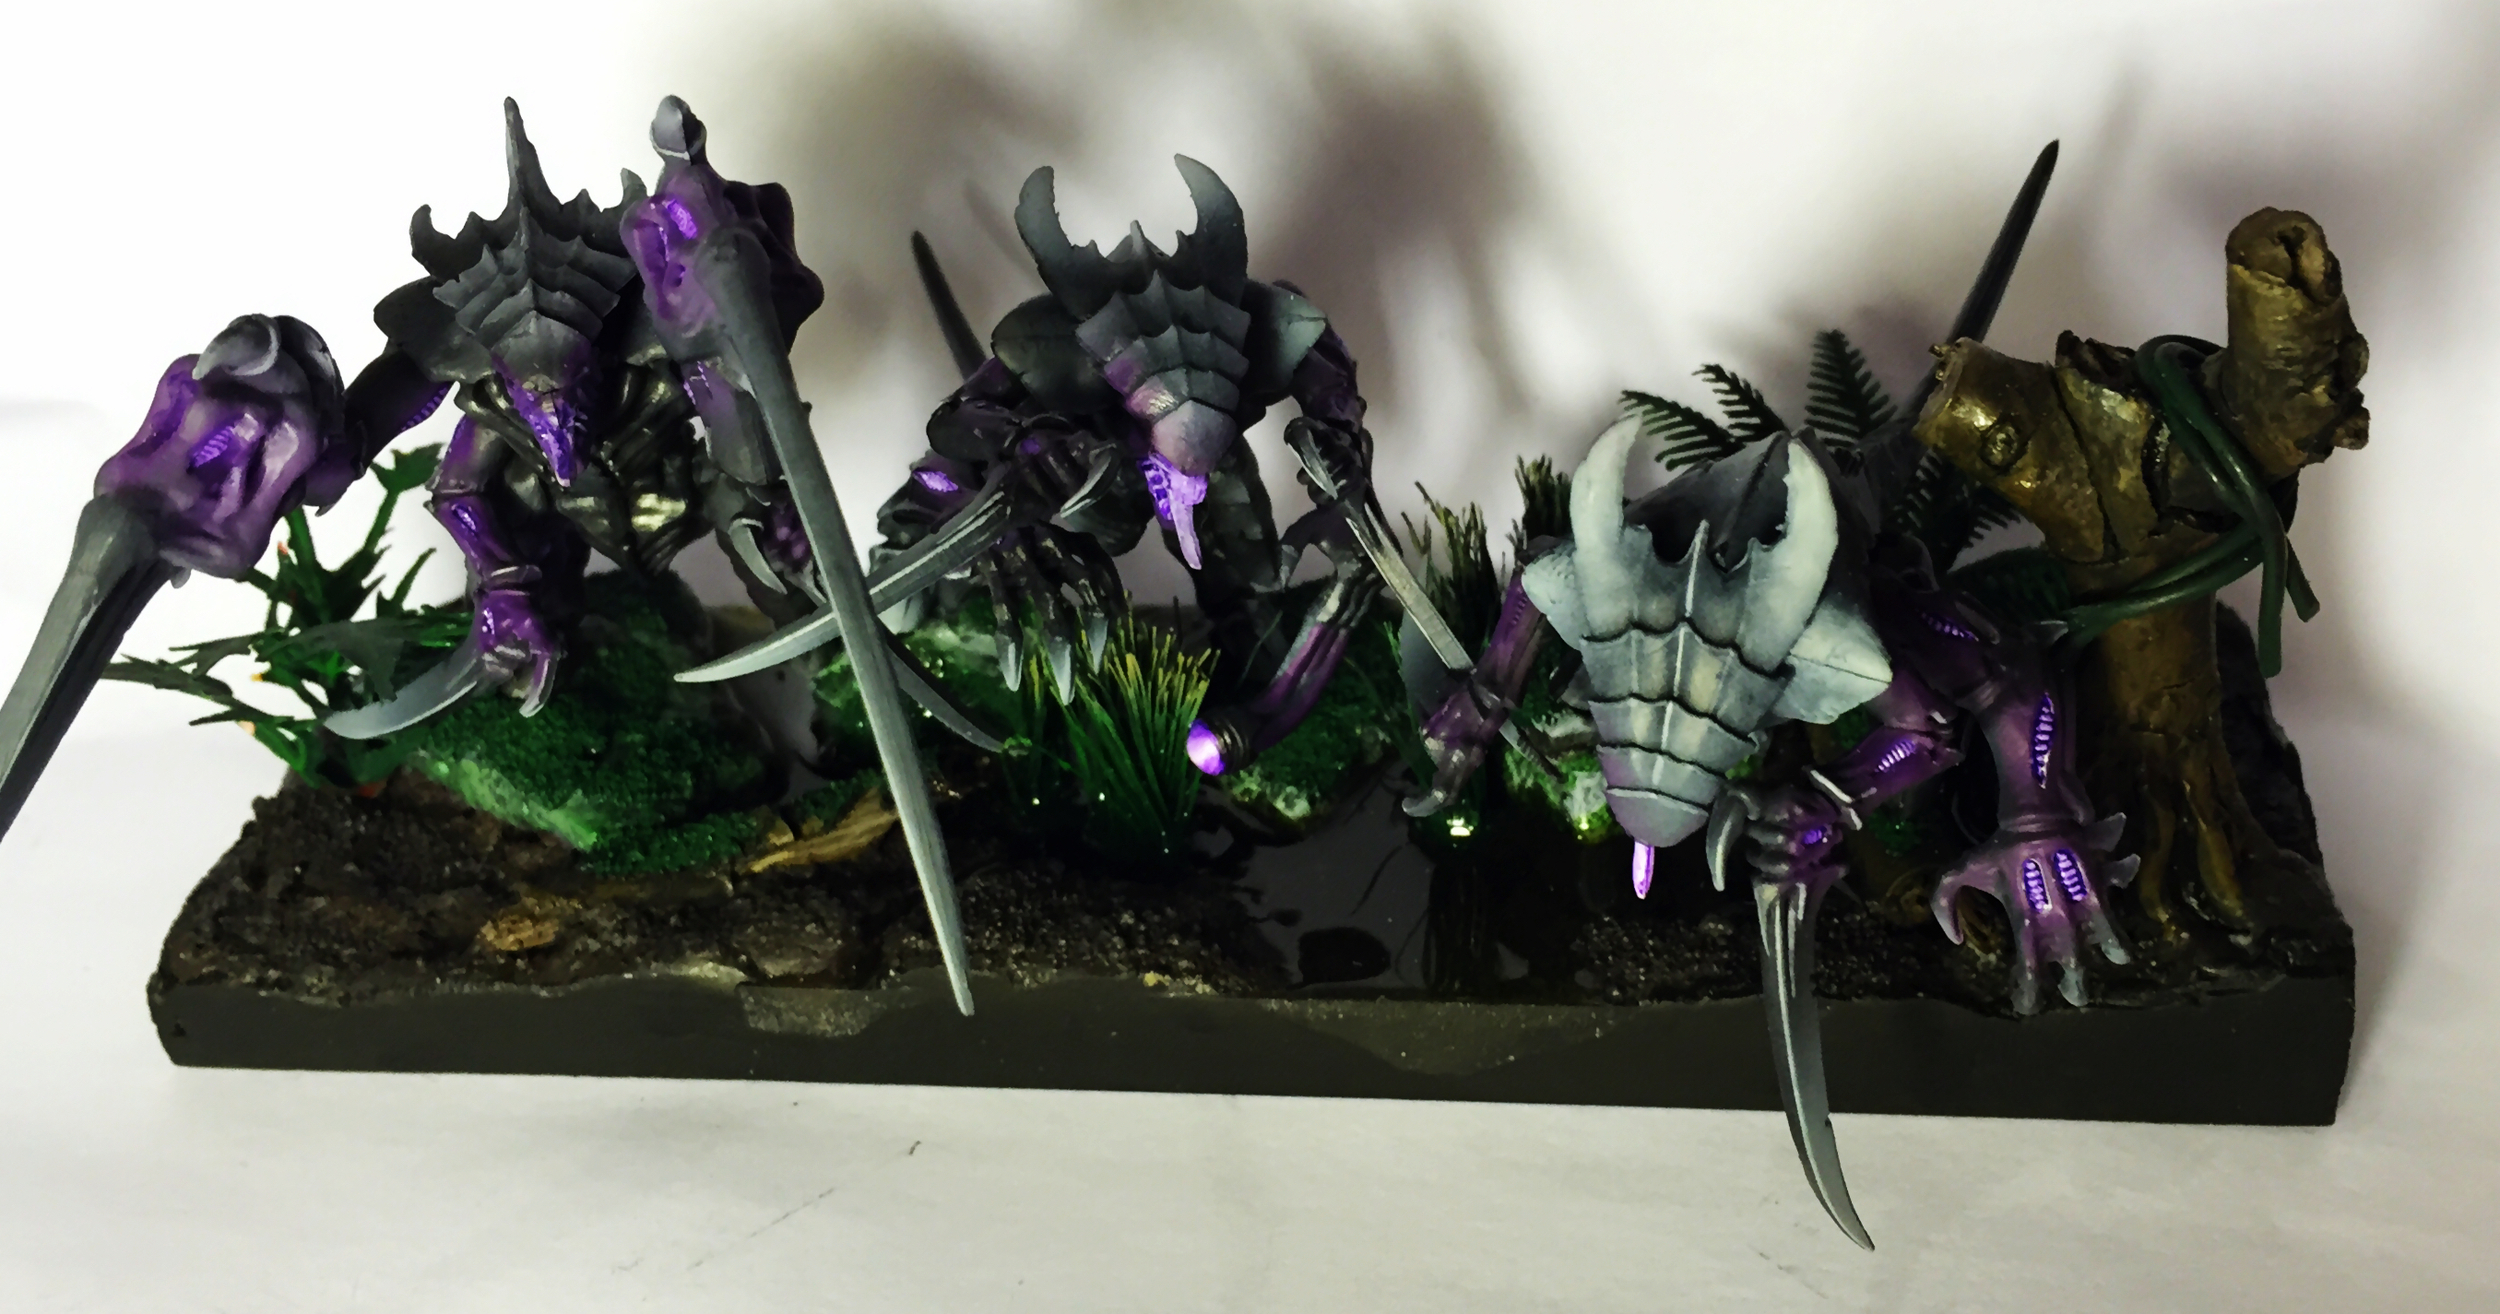
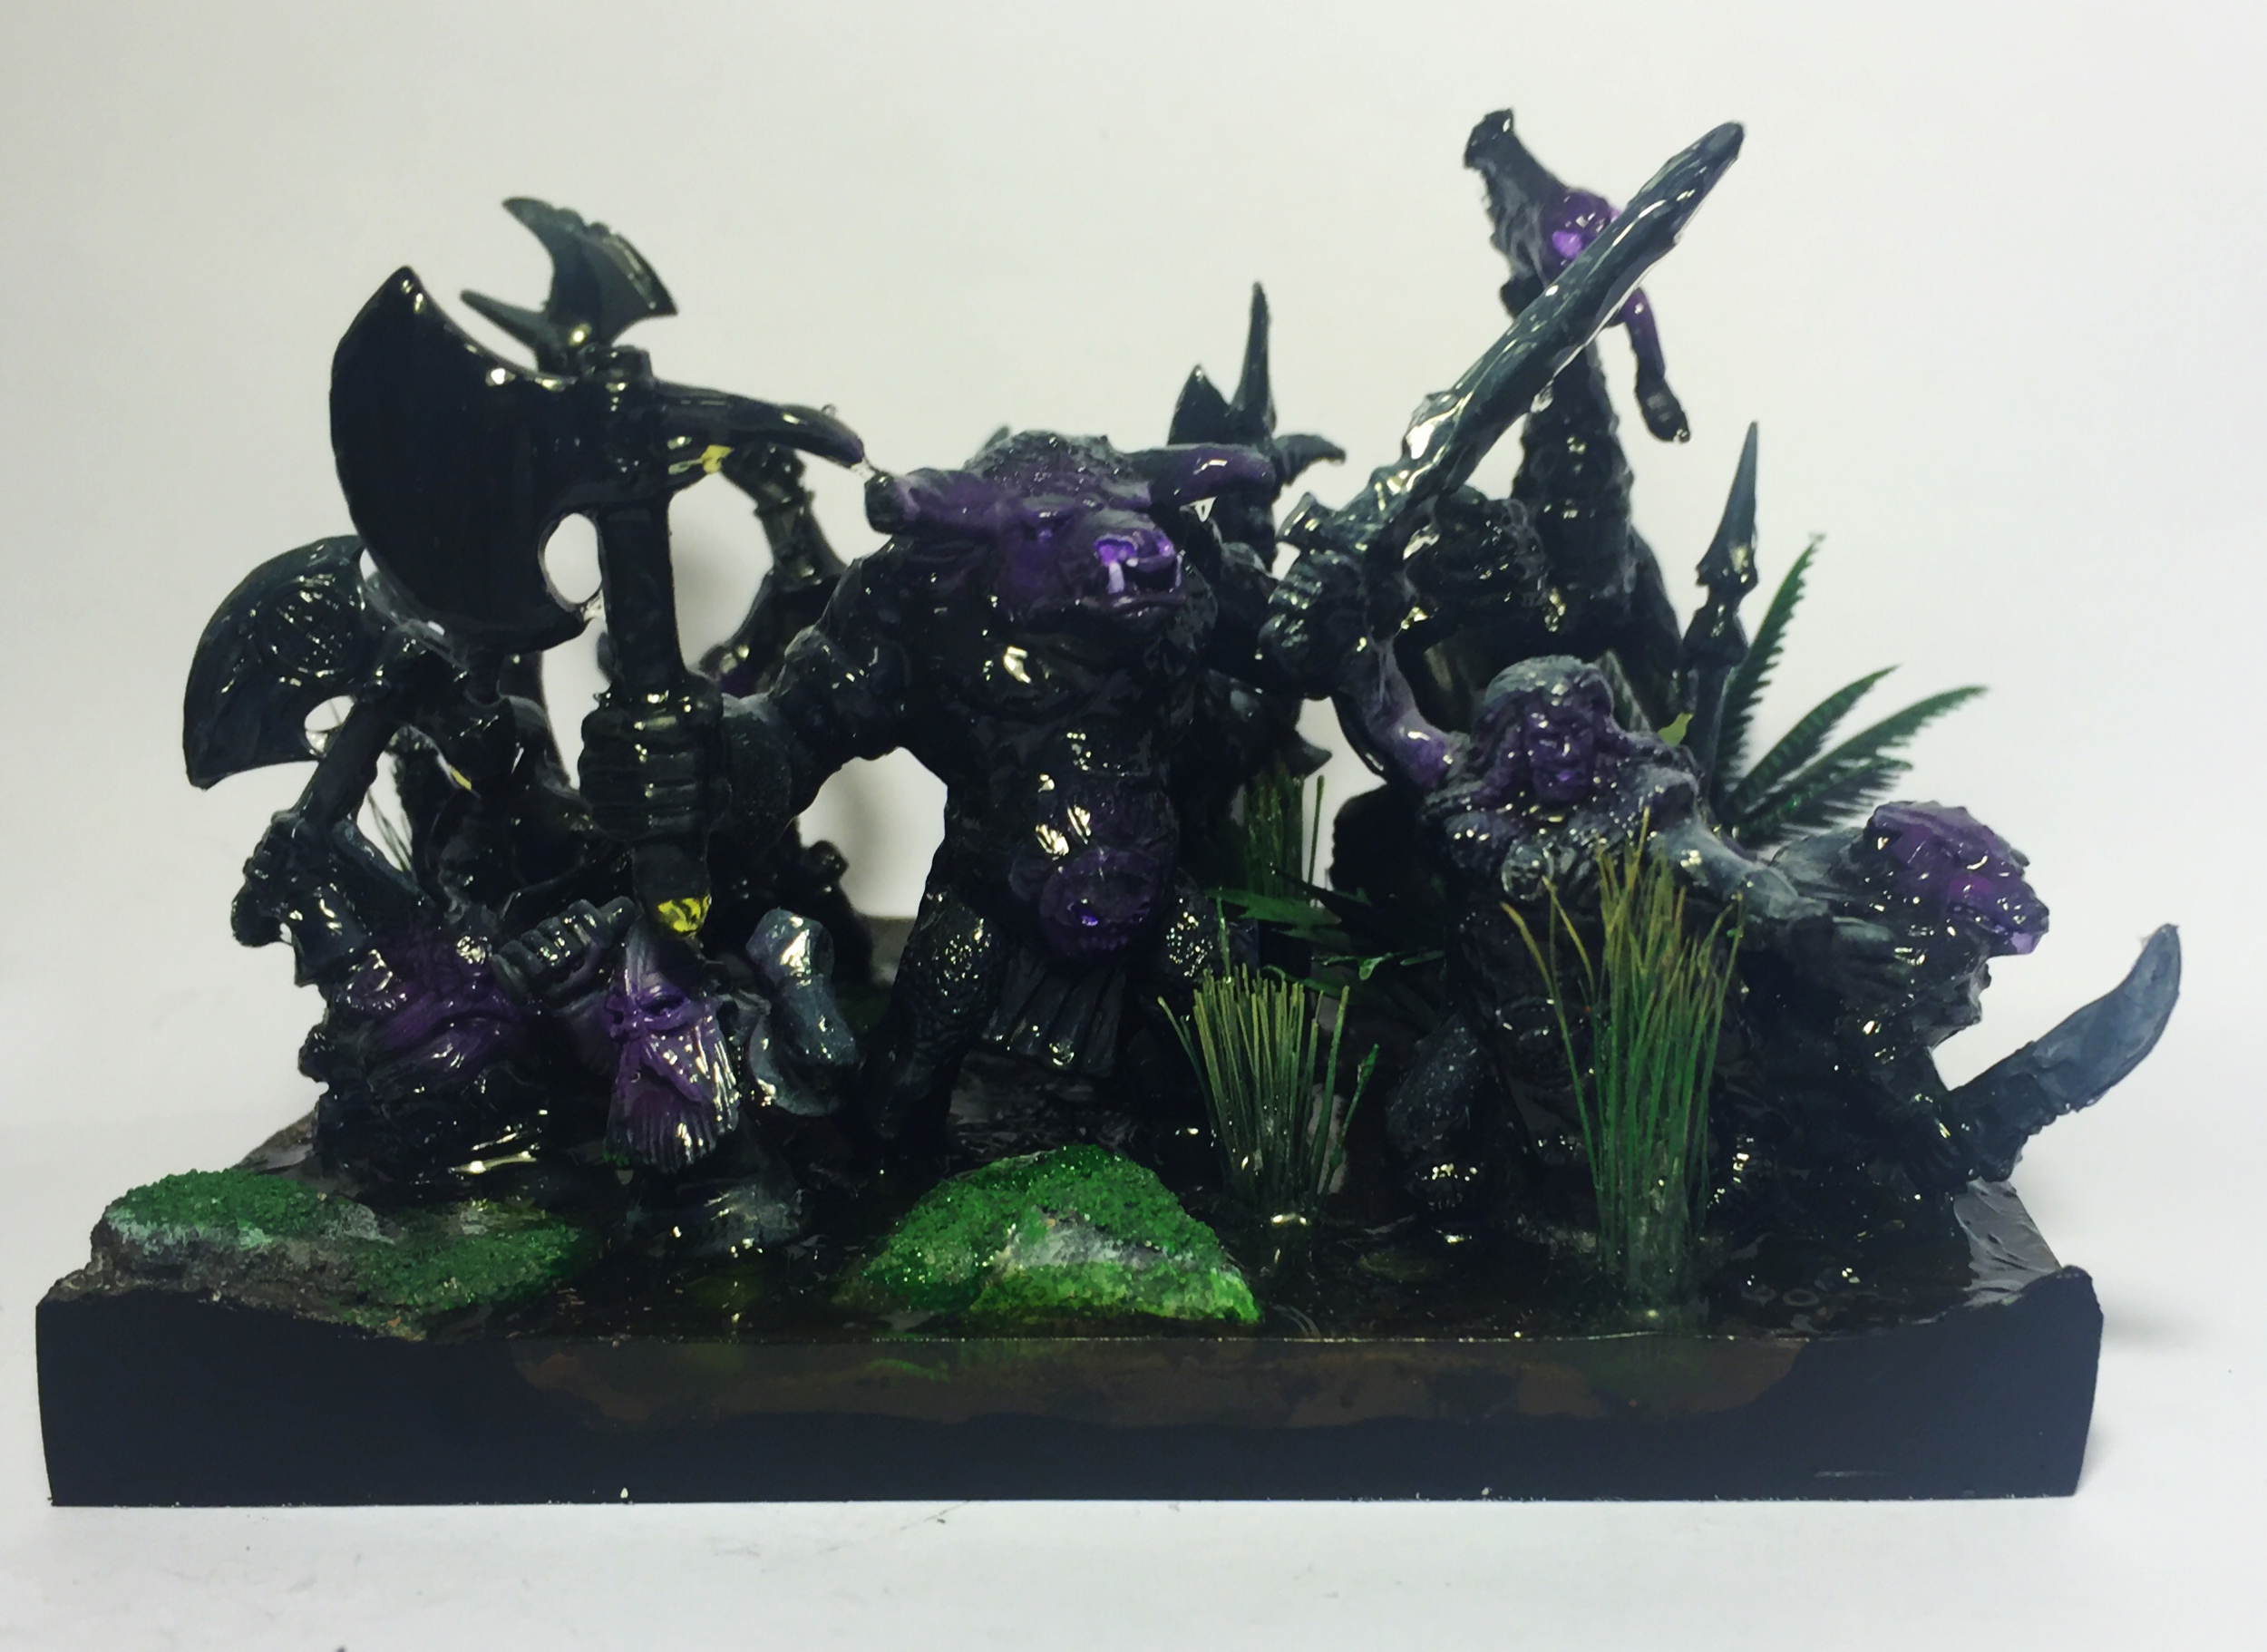
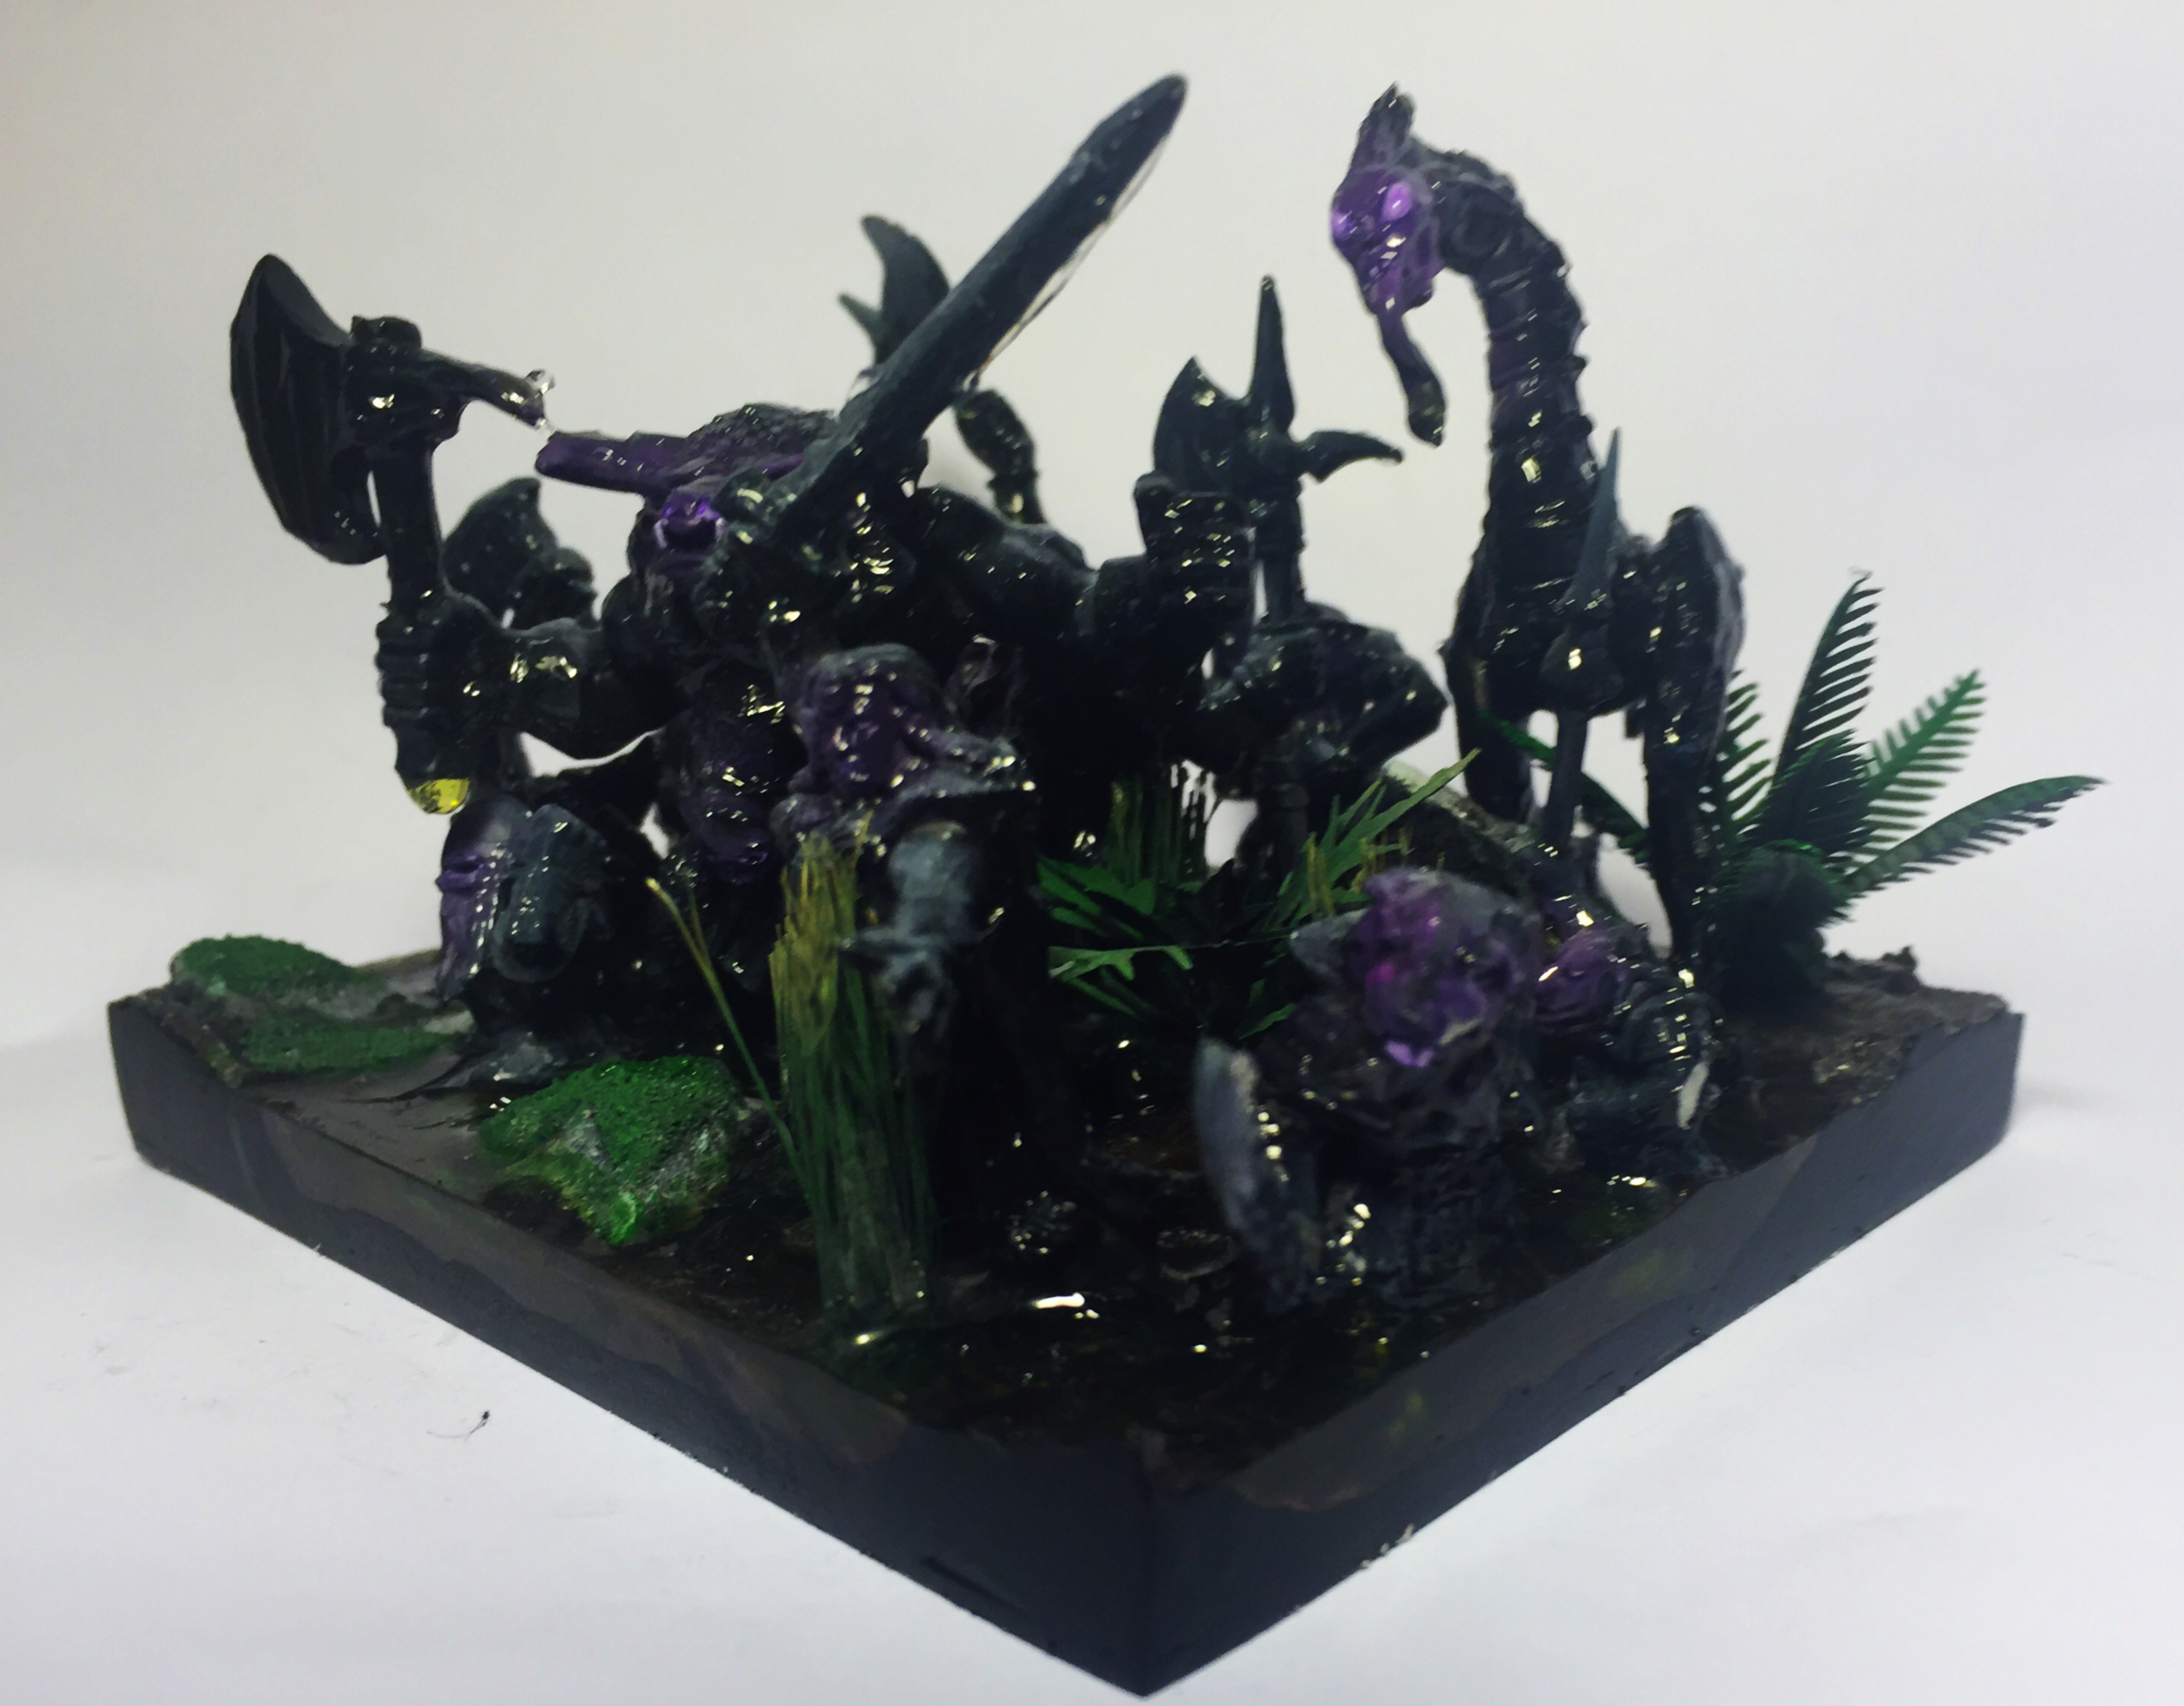
I'm fairly happy with the result, though all the shading and highlighting I did has blended into the glossy effect and the glowing eyes don't have the impact of the other models I've done.  I still feel like they do the job well and I'm happy with the result.  I have two regiments of these guys, this is the first.

Photos have come out a bit dark, I don't think I'll re-do them though.  Perhaps when I do the second unit I'll add some new photos.

Project Complete - Arachnophobia Night Stalker Needle Fangs

The next unit up in the Night Stalker army creation is the Needle Fangs.  I had a vision of this swarm as a plague of void creatures skittering through the deeper and denser parts of the swamp taking on the guise of the greatest insect fears, arachnophobia.

The models are Warhammmer Quest spiders.  I've had them for 20 years and never have they been close to a paint brush until now.  I've followed the same formula as the rest of the army.  I decided in the end not to overcrowd the base as I just didn't think it would have the same effect.

The base follows the same scheme as the rest of the army.  It's a bit deeper in resin swamp water and has no land to represent difficult terrain.  The rocks are real rocks as usual, all painted of course, and the stick is a real stick also sealed and painted.  I really like the reeds so I'll be doing more of them in the future but perhaps the base could have used a little more colour.

I now have a regiment, two troops and a monster.  All the ingredients of a small army.  My next post will have a progress group photo.  The next unit I'm working on is the Doppelgangers, and here's a small spoiler you can expect to see the return of some of the Warhammer Quest miniatures.  What's more scary than old Warhammer Quest miniatures lurching out of the swamp to come and eat your dreams?

Project Complete - Night Stalker Shadow Hulk

The first of my three Shadow Hulks for my night stalkers. This model is almost entirely airbrushed.  Black undercoat first (Vallejo) then a dark gray for a small highlight from above.  Each set of scales was then highlighted with a lighter gray using blue-tack to mask and allow the airbrush to focus on a single scale.

Purple effect was airbrushed into each of the slits and holes to create a minor OSL glow effect.  White was painted into the slits and holes then, very thinned down to get into the cracks.  Thicker white painted over that for coverage.  Purple ink and some minor highlighting where required.

Lots of mat varnish to seal each layer and a final mat varnish to seal the whole model.  I find the airbrush paints rub off easily if you don't varnish.

The base is the same as the rest of my models.  I tried to create a little waterfall and while it didn't work as intended it did make a nice stream effect.  The water surface is broken up with Vallejo water effects.  They're good, but by prepared for them to shrink a lot.

I think it's my best night stalker yet and I'm getting better with the airbrush.  Comments are definitely welcome.

Project Complete - Night Stalker Fiends Regiment

So it's been a while between posts and it's not because I haven't been busy but I've been trying to run two projects at once so neither of them have been completed in a very fast fashion.  The other project is also almost done, but in the mean time here is my second Night Stalker unit, a Regiment of Fiends.

Different from the Shadow Hounds I have used an air brush for most of this unit.  I'm pretty new to air brushing and you can see some of my mistakes but I'm very happy with the end result.

I added a new plant to my basing theme and a tree.  The reeds are from a paint brush (wall painting flat brush) and stuck together at the base with hot glue.  Then under-coated with the air brush, base-coated Vallejo Black Green and then highlighted with Vallejo Air Khaki.  I'm pretty happy with them as they are pretty easy to make and I like the effect they bring to the base.

A little bit less water on the base in this model, which I regret.  Future night stalkers will have much more water as this one just doesn't look swampy enough for my liking.  

For anyone reading this I would love to hear what you think.

New Project: Night Stalkers Fiends Regiment

Time for a new project.  Fiends are a core part of the night stalker MSU army with their great movement and strong combat skills so they're next on my table.  For this unit I'm going back again to the Tyranids and looking to use their Warrior models.

GW Tyranid picture taken from the GW site.

GW Tyranid picture taken from the GW site.

Justification

The warrior models are on hoofed feet and I figured they were appropriate for either Butchers or Fiends.  Butchers are shambling and the warriors just look to fast and agile to suit the shambling rule.  All of my shamblers are going to be on snake tails to make them easily identifiable.  The sprues come with lots of different arms and with some small mods I can setup a savage looking unit with minimal fuss.

Modelling

Obviously the guns have to go.  The sprues I have come with enough options for most of the limbs to be claws, but I'm two short.  I have spare bits I'll use for that or do something interesting with the non-gun arms as they have tentacles coming out of them that fit into the weapons.  I'm also re-positioning the legs as they look too static for a fast moving unit in their default pose.

Continuing my swamp basing scheme will be fun.  This time their going to be splashing and wading int he water a little and that's going to be much tougher in that I'll need to do some greenstuff modelling and then clear resin casting along with other water effects.

These models will be a little brighter than the hounds with some extra effects of light around their heads and hands, but they're still stealthy so expect them to still be quite dark and contrasting against the colourful swamp.  No fillers for these guys, 3 per base as they are supposed to be.

Nightstalker Shadow Hounds

Now that my swamp base is done I've been working on some shadow hounds to occupy it to define my night stalker army style.  I wanted something dark, nightmarish, black and evil but also a little colour.  Eyes aren't really enough colour for me, but the Tyranid models that GW use have lots of areas that I can set to glow with the inner purple power of these creatures.

 I used loaded brush a lot on these guys to get the blending of light gray to black to give them some depth.  The purple is simply white and then layered up to purple and a drybrush OSL.  I wanted a good effect without spending a month on each unit and I'm happy with the result.

Next step for me is the second unit of these Shadowhounds.  This unit is the lead and the second troop will be behind.  The scenic bases will match and join together with magnets when done to make a regiment.

On another note, I've added a subscribe link to my blog in case you're interested in hearing about what I'm working on.  

Creating a Swamp Basing Scheme for Kings of War

My last post was on the inspiration for the swamp basing scheme for a Kings of War Nightstalker army.  Since then I've completed my first base.  This is for a troop of cavalry and will be used for Shadow Hounds.  Those models aren't painted yet so won't be attached for a little while more, but I'm using Hormagants from the Tyranid range of GW 40K.  Water effects are easy and fun, so here's how to give it a go.

The finished product

The finished product

Step 1 - Cut your base

There are lots of places that will pre-cut you some MDF to the size you want and that's fine.  I have a large sheet of acrylic that I use and I just cut it with a jig saw and sand it down when I'm done.  It works fine and makes a good starting base, plus it's a little cheaper.

Step 2 - Mounds and Lakes

I use Fimo Modelling Clay for this step.  You can use something else if you like, Milliput for example, but just be sure that it's easy to sand once you're done.  I like clay because it's super cheap and you use quite a bit.  Mold it into place on base just as in the picture.  The low parts will fill with water.  If you have a log or a stone, make impressions in the clay before it dries.

Once the clay is all dry, snap it off and glue it down.  If you used Milliput it will bond to the base, but clay won't so use a little super glue will bond it.  Once bonded, mix some white glue with water and paint over it.  This creates a tougher surface and ensures it won't chip later.  Once again if you used Milliput this isn't necessary.

Step 3 - Sand, Rocks and Logs

Glue your rocks and logs down into the previously molded shapes you made in your clay.  I just used superglue for this part, white glue would work too just take longer to dry.

Clay and putty have too smooth a surface to look like mud or sand when painted so you'll need to add some texture.  You can use Modelling Sand (whatever brand you like) but I'm stingy so I just use cheap sand from the hardware store.  I got 10 Kg for about the same price as a small baggy of sand from a craft store.  It's fine, it's clean and it works really well.  If you want it finer (mud looks better with REALLY fine sand) like I did, just crush it in a mortar and pestle first.

Mix your sand with watered down white glue and paint it on over the mounds.  Clump it where you want to make it look wetter, messed up or mossy.

Step 4 - Who wants Moss?

Spread undiluted white glue across any surface you want to be mossy.  Don't add water because you won't get enough depth from your moss.  While the glue is still wet, you have a while white glue dries slow, pour on as much sand as you can or dip your base into the glue.  Press the sand down to spread the glue through the sand and then wait a few minutes.  The glue is pretty tacky when wet so you don't need to leave it to dry, so tap the excess sand off your base.

Stick down some extra skulls or rocks or whatever you like and you're ready to paint once it's dry.  You could add some things like mushrooms now but I find it easier to pick placement a bit later.

Step 5 - Paint.

Pick your colours, undercoat black, paint, ink, drybrush, airbrush, whatever you like.  This isn't a painting tutorial but if you're reading this and you want to know my formula just leave a comment below and I'll post it.

Step 6 - Plants

To make my plants I went to my local hobby store and bought everything that looked leafy that I could use.  I cut the leaves off and arranged them into plants.  To make the ferns I bought a few plastic palm trees from Eckersleys, cut the fronds off and stuck them together with a greenstuff base.  It's easier than you think.

Once you've put them together, undercoat black and paint them.  They're plastic so they are fragile and the paint might crack so cover them in mat varnish of your choice.

Mushrooms are easy.  Get a small peice of wire, put a small ball of greenstuff on the end and wrap it around into the stalk.  Then get a larger ball and just push it onto the end.  They look great and add some real contrast to your base.

Step 7 - Water

This is the hardest step and you can't just paint over it if you stuff it up, so take care and run a few tests first.  I did 4 test runs with different levels of ink and base paint colour to determine the colour scheme I wanted and settled on a fairly transparent green with a hint of brown.  The mix is roughly two table spoons of resin to 5 drops of ink (Vallejo) in a ratio of 4 green (Black Green specifically) to 1 brown ink.

The resin I've been using is Envirotex Lite.  It's readily available and pretty cheap.  Some forums will suggest other options, another is ICE Resin, but I've never tried them.  Envirotex Lite does a good job and is very simple to use.  Use gloves when you use it, not because it's overly harmful to your skin but because the risk of getting some on your fingers and then putting them in your eyes is high if you don't.  There are heaps of tutorials on you tube on how to use Envirotex Lite so I won't go into it here.  Google is your friend.

Once I was happy with the test results I used masking tape to mark around my diorama the height I wanted the resin to go to.  I had previously picked 6mm because masking tape comes in that height from the hobby store but you can pick any height.  

Then it's just a case of pouring your resin in.  Pour it in VERY slowly.  The best way to do this is to drill a small hole in the side of the cup holding your resin and drop it through that in a continuous stream.  It won't push into all the gaps on it's own, I used a toothpick to push it into any gaps that it's viscosity prevented it from going on to.

Step 8 - Cover and Let Cure

Cover it up so dust doesn't get in, trust me you'll regret it if it does or even worse if a bug crawls into it and get's stuck in the resin!  Once done, roughly 24 hours to be sure, pull the tape off and sand the edges flat with the finest sandpaper you can.  Use a gloss varnish to clear up the edge and here's the result.

Thanks for reading, I hope you get something out of this post, please leave a comment below or share this post.

Basing the Night Stalkers

In my previous post I talked about the inspiration behind the Night Stalker army I want to build.  In this post I'm looking into the basing of the army.  The creatures themselves will be mostly black with some OSL, so the bases really need to make the army.  The bases need to create a nice contrast with the evil black creatures stalking through them.  I've decided that I want a deep green swamp basing with plenty of water effects, colourful growth and deep green growth.  Fallen logs and moss will play a big part.

Here's my inspiration research.

Swamp bases work well when there's stark contrast between the elements.  I need to combine this with the stark contrast with the night stalkers treading through them.  I recently picked up a two part water effects resin kit and the next step is to get competent with that.

I've also never created mossy surfaces.  I really like the second picture with the mossy rocks and logs.  I've sourced a few places that sell stumps but I'm planning on using real sticks along with some greenstuff to model the fallen logs.

I'm still looking for a good place to get small plants like ferns and reeds from, but I'll try the color scheme and water effects first and make sure I can do it first.

Night Stalkers - My First KoW Project

Now that I've completed my first Kings of War tournament I've decided that I'm going to blog a little more about getting into the hobby.  My particular inspiration is coming from the new Night Stalker list.

What I love about this list is that there are no models for it.  Not only that but the list doesn't really have a counterpart in any other game.  The team that created it has drawn inspiration from Babylon 5 (one of my favorite TV series ever), the Tyranid army (the only 40K army I ever played) and from the looks of the lists from several classic horror films.

I've done a bit of research to help me find the right inspiration for this army.  Here's a gallery that shows what I'm thinking this army should look like.

Black is a colour that can really blend into the background, so lighting is going to be important.  Basing will also let me have very dark models without making the whole thing feel unpainted.

I'd like to try a few techniques that I haven't worked on before with this army.  The first is going to be for the base, and that's water effects.   This army is going to be based around lush green swampland filled with water, fallen logs, critters, plants and moss.  Probably not a lot of grass, but reeds and weeds a plenty.  A dark and bold green will be the primary colour for the bases and I plan to produce one of these before even assembling a single model for the army.