Work in Progress

On The Bench - 5th July

I've recently been made aware of a painting competition over at Good Games at Top Ryde, and being a sucker for these things I've shelved my current work to give something a go for it.  I've started to paint one of my Giants of Albion, yep sticking with the retro figures.  I love this model and have always wanted to paint it.  The pictures here are mostly for the face.  I'm playing with new colours for faces at the moment, reds and purples on top of skin tones to give him a really gaunt and unhealthy feeling.

FullSizeRender.jpg

I've also been working on my eye process, dotting the pupils and colouring the iris to give him  more colour and make the eye a little more catching.  I'm quite happy with the result on this guy.

FullSizeRender.jpg

Finally, looks like I've lost the hands for this model so I'm trying my hand at sculpting a replacement.  It's only half way there, layering up small bits of green stuff at a time to get something that resembles a hand.  It's really hard to do and very new for me but so far I'm happy with my first effort.

IMG_1258.JPG

And that's what's on the bench.

On the Bench - 16th of March

Now that the Wolf Knights are all complete it's time to start something new.  I was going to do a single model, something high quality, but I'm on a bit of a high from creating a unit so I decided to do another one.  Keeping in the Dogs of War theme I decided to break out the Alcatani Fellowship.  Had these guys for ages and I will probably rename and theme them once the painting is further through. 

FullSizeRender.jpg


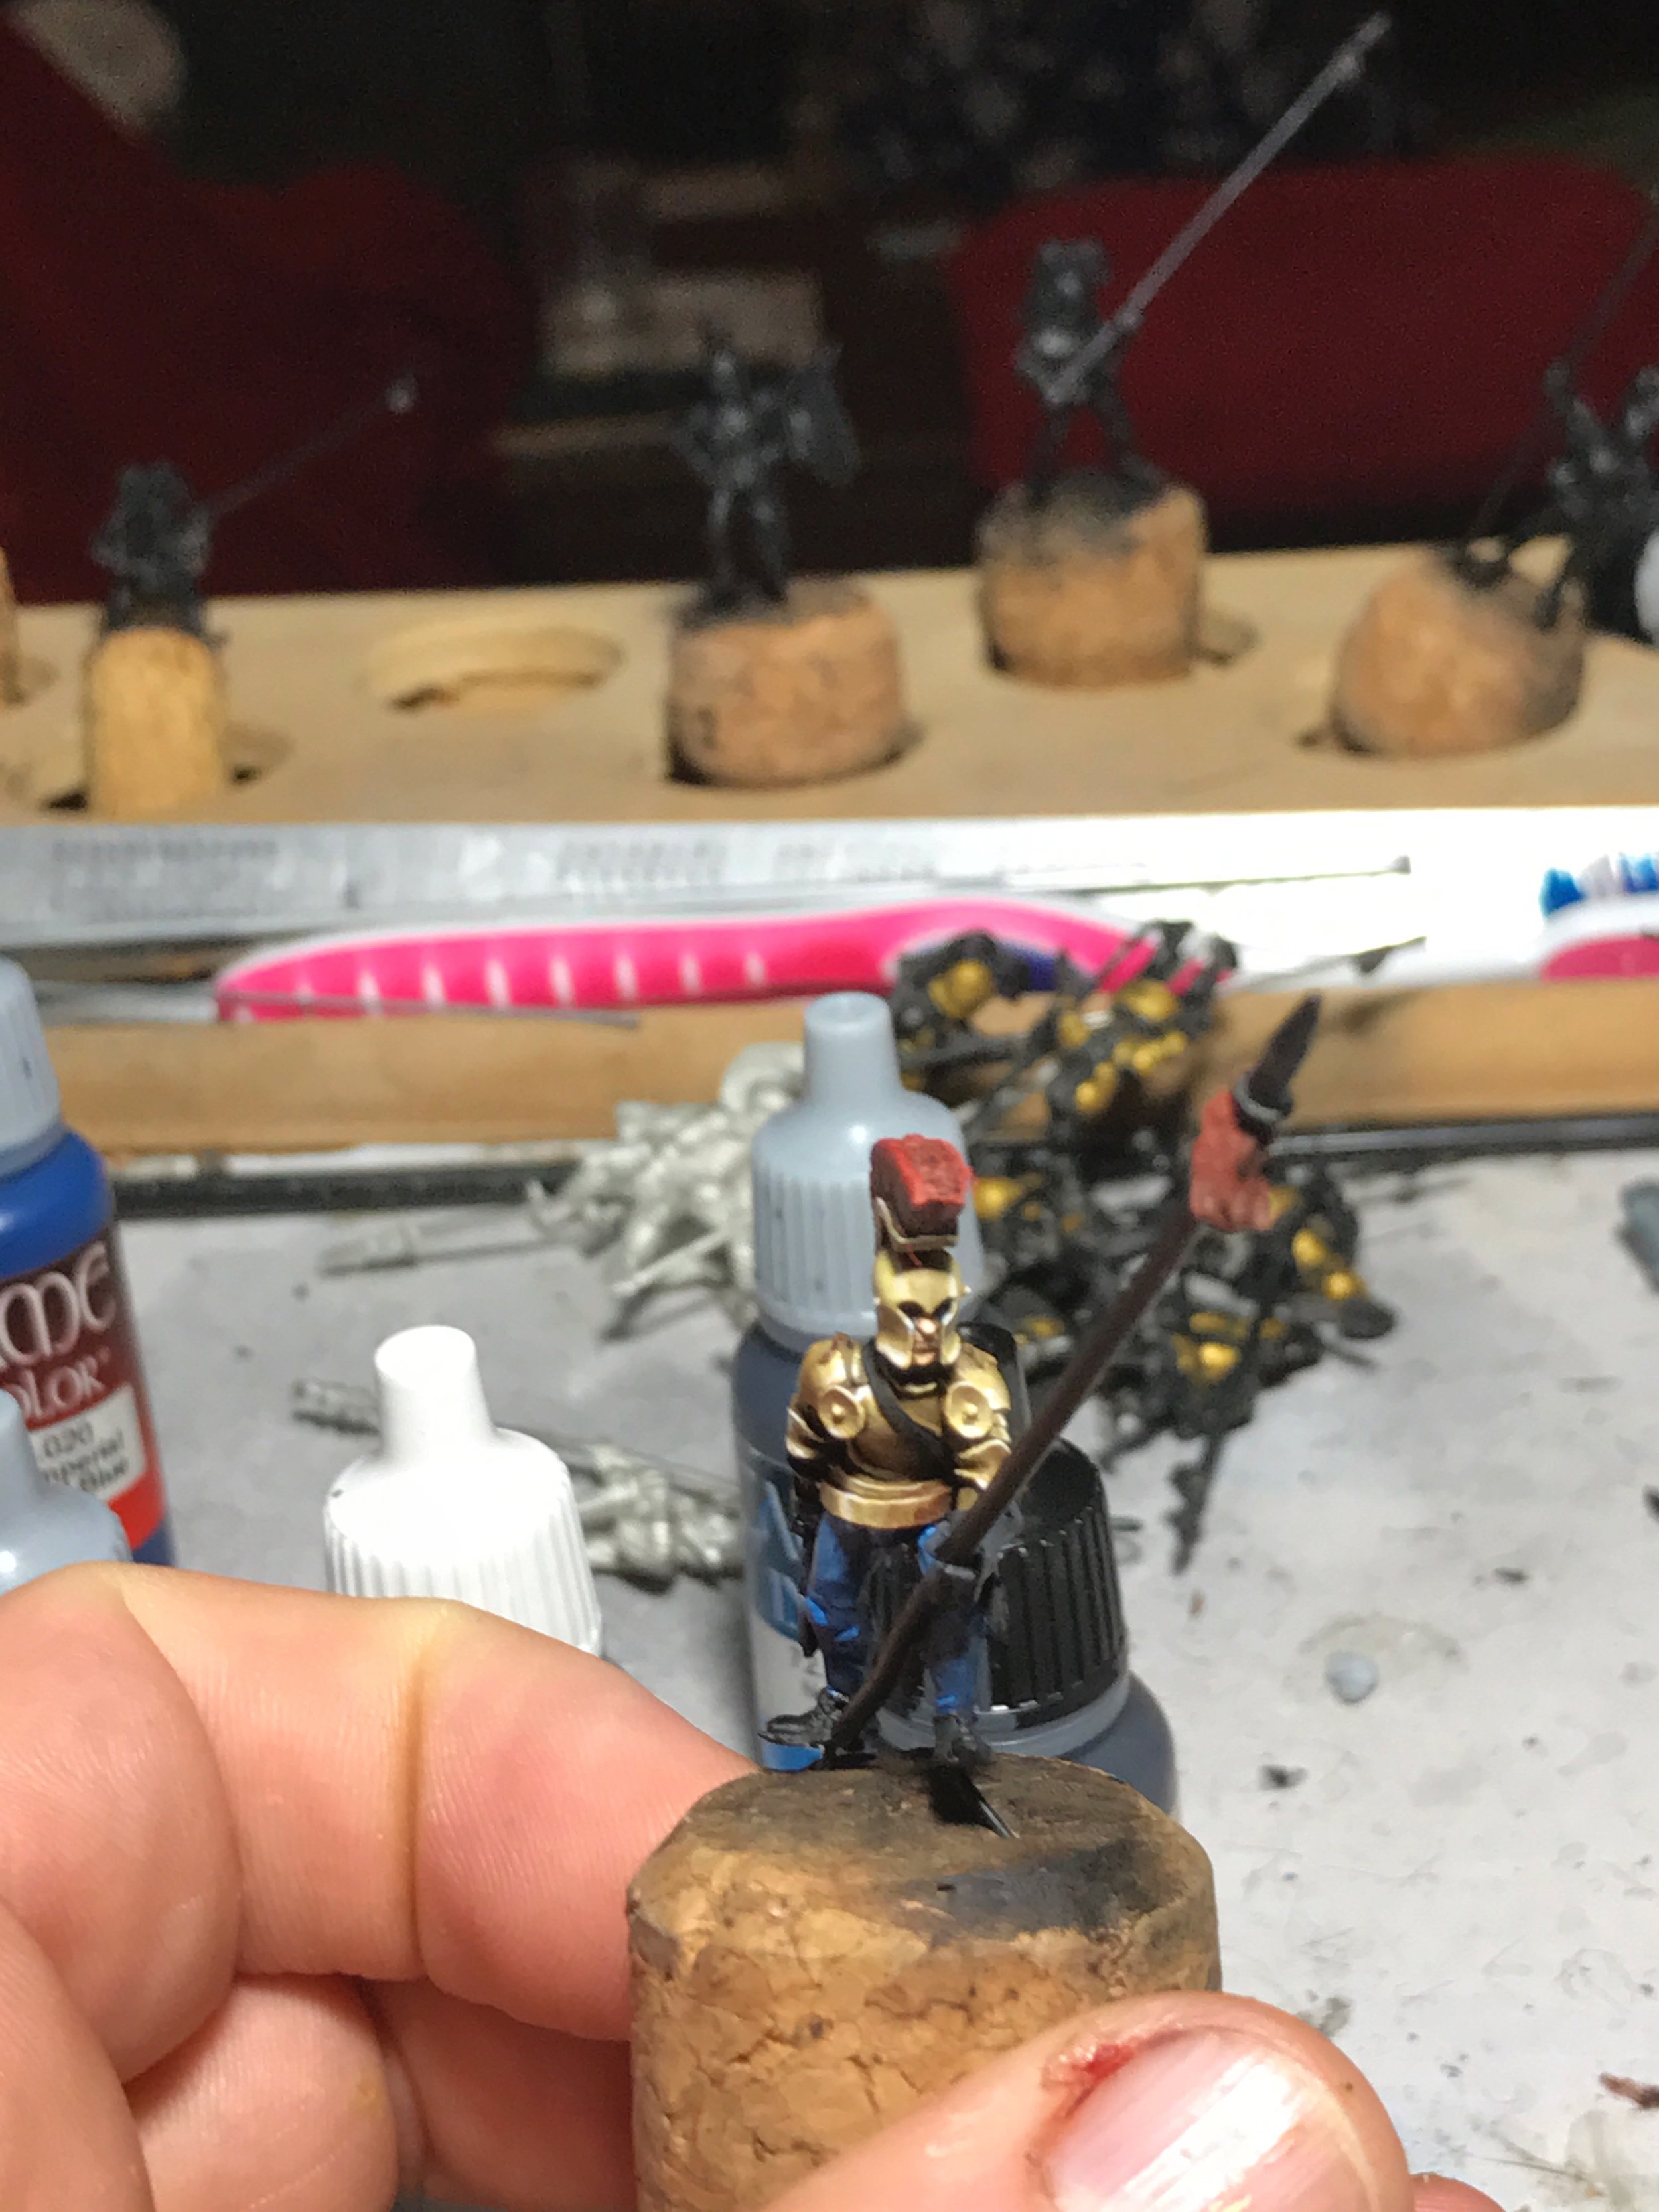
Keeping with the non metallic metal theme I was going for a polished brass kind of look for these guys.  Vallejo English Uniform for the base, Armour Brown for the shadows, Iraqi Sand for the highlight and white for the tips. Sounds like a lot but with loaded brush it is a quick 4 step process.  I don't know if I'm all that happy with the blue pants though and I'll probably change that. 

IMG_0735.JPG

Pretty happy with the helmet and plume.  There are two types of plumes, which is a shame because I like the Mohawk style one pictured here. 

IMG_0736.JPG

Going to do about 20 or so for this regiment, count them as dogs of war for KoW and EoS spear men for 9th.   A second regiment will let me make a horde in the future, but one at a time.

Thats what's on the bench today. 

On The Bench - 1st March

Slow hobby progress for the last few weeks as I've been on a little holiday.  Had a great time but little painting done.  I have done a little now I'm back, and started on the base for my wolf knights

FullSizeRender.jpg

The flowers are easy, bur damn there are a lot of them!!

FullSizeRender.jpg

Same basing technique as the halflings, but not in a skirmish style.  Regiment of knights for Kings of war or 10 knights for The 9th Age.  Lots of flowers to finish up and then the grass to add. 

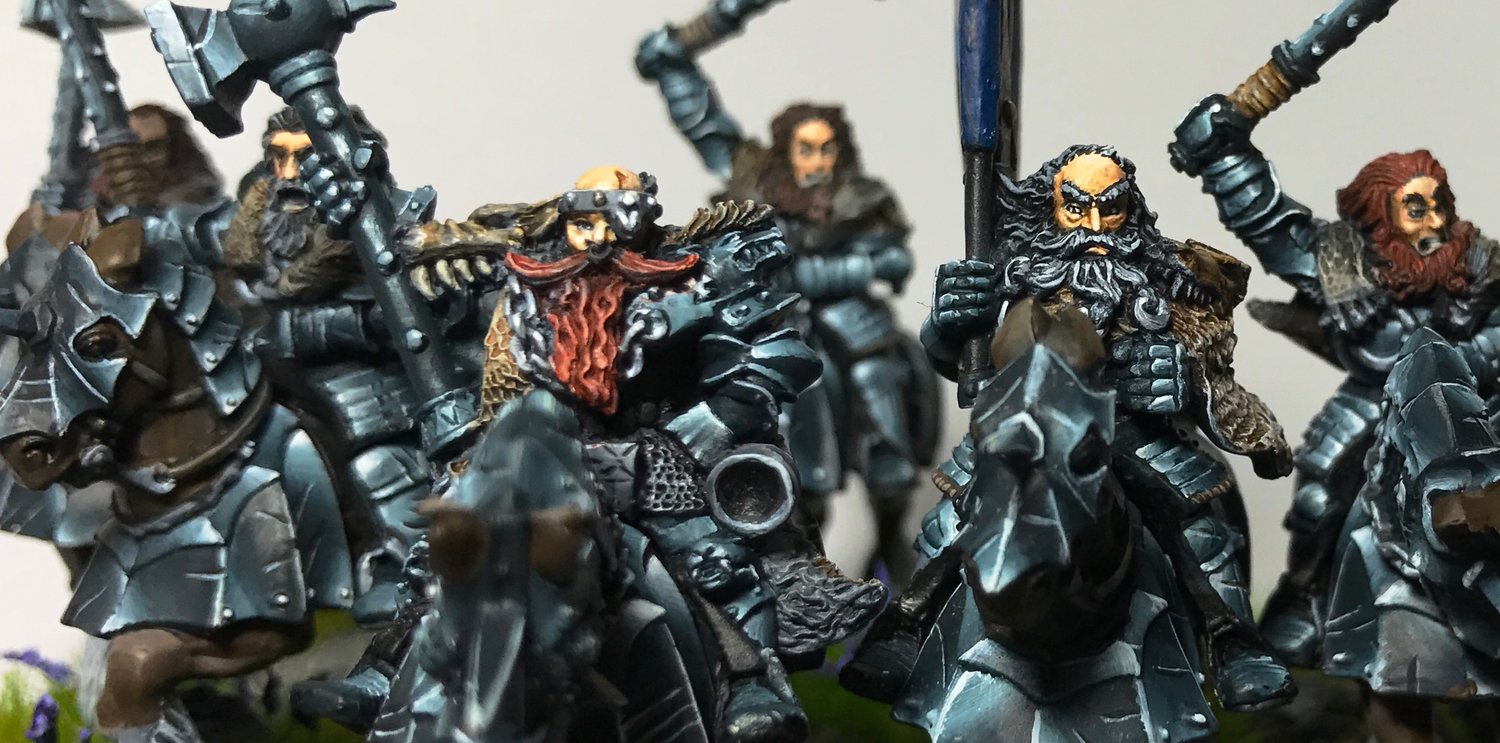
Four of the knights are done, barring a little weathering and cleaning up that I'll do at the end.   All done in non metallic metal mostly with a quick loaded brush.

FullSizeRender.jpg

Not a great photo but you get the idea.  Started working on the unit captain too, love the old model and quite fun to paint

FullSizeRender.jpg

Still quite a bit to go, hopefully he'll look wicked when I'm done. 

So that's what's on the bench today.

Static Grass Applicator - First Steps

So this post will be a little messy because I'm really just fooling around.  Static grass is designed to react to a static field in a similar way to the reaction your hair has when you rub a balloon on it.  I have tried many times to apply grass without a static field and it just looks like matted rubbish, not a nice grassy field.   

You can buy products that do this for you, but as always I want to understand how it works so I am going to try and make my own.

The Apple is a key component! 

The Apple is a key component! 

Here are the parts I have.   

  • Two small steel plates
  • 9 volt battery
  • Bunch or wires and clips
  • Negative ION generator
  • Apple core (every project needs sustenance) 

The only important part here is the negative ION generator.  It basically creates a static field between the generator cable and ground.  Hook up the positive and negative terminals to the battery and clip the generator cable to one steel plate and the ground to the other.  Blue tack your base smothered with PVA glue to the ground plate and lay static grass over the generator plate.  

Turn it all on!  Grass everywhere!  It does work though.   

First attempt side view

First attempt side view

Second attempt top view

Second attempt top view

The grass flies all over the place and some of it sticks to the glue.  My problem with the first attempt is that it seems to go on thin.  It's good, but it could be better. 

Next step is to take away my hands, as they are grounded they mess up the field, and try to use gravity.

Non Metallic Metal - Practice Practice Practice


Non metallic metal, or NMM,  is a daunting endeavor.  Almost every video you see will look painstakingly difficult and time consuming.  The outcome looks fantastic and best of all you don't have to work with metallic paint.  I hate working with metal paints because the clump, they are hard to get even and in bright light they they are so reflective it's hard to see how you are painting.  They also get into your water and infect your other paints of you don't change your water.  

My Dogs of War / Kingdoms of Men / Empire of Sonnishtal are largely heavily armored humans and I want to paint a whole army with NMM, so with that in mind I needed a faster technique.  I stumbled across the loaded brush technique and here I am.  

Completed first attempt  

Completed first attempt  

​You can find heaps of detail on how to perform the loaded brush technique of wet blending on Painting Buddha, a wonderful site that you should really support if you find them helpful.  They make amazing videos. 

So the trick with this technique is practice practice practice.  Learning how wet to make the brush, how much highlight to put on the tip depending on the size of the material and how bright you want the highlight and the right thickness of each of the paints.  When you do it right the results are amazing and right now I get it right 1 in 2 or 3 (or 4) attempts. 

image.jpg

So to practice I'm painting a unit of Knights.  The pictures on Here are the WIP, and almost the whole model is done with the loaded brush.  They are far from my best work, but it is quick, maybe half an hour for the metal on each horse, and I'm getting faster.  Please (pretty please?) ignore the shoddy work on the extra bits like gloves and faces, like I said these are practice models for the NMM look and otherwise paited up to "battlefield" quality.

Final horse, obviously not complete but the armour is

Final horse, obviously not complete but the armour is